USING YOUR RANGE
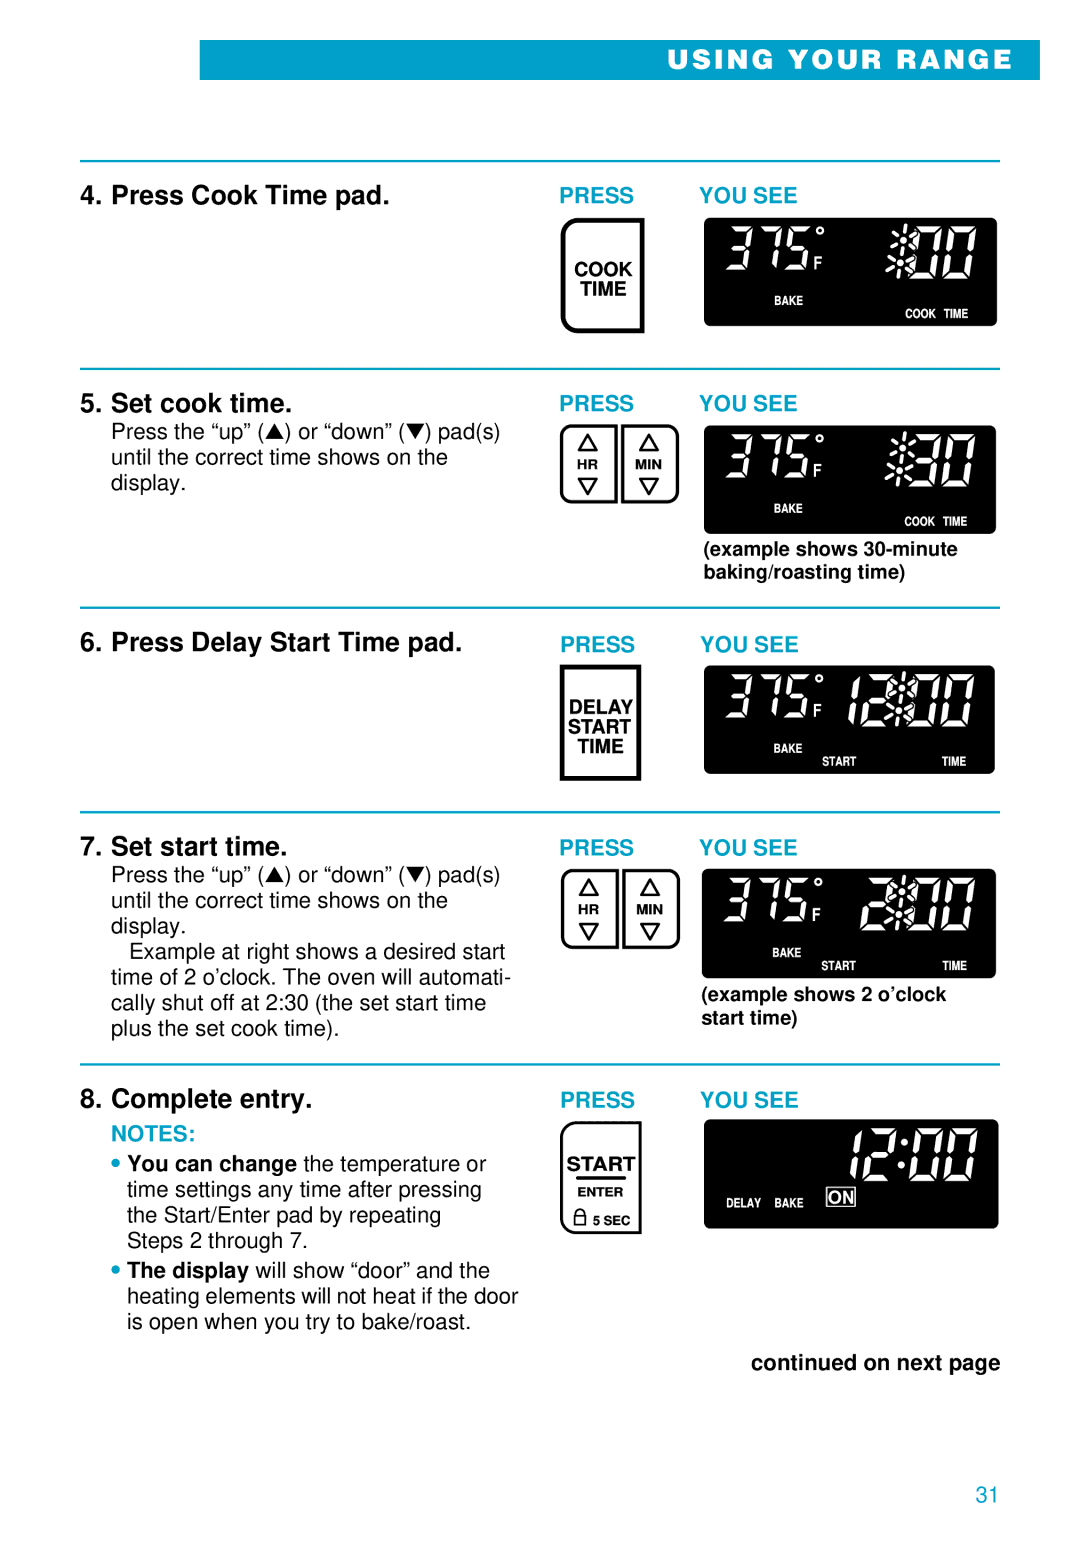
4. Press Cook Time pad. | PRESS | YOU SEE |
| COOK | F |
| TIME | BAKE |
|
|
COOK TIME
5. Set cook time.
Press the “up” (s) or “down” (t) pad(s) until the correct time shows on the display.
PRESS |
| YOU SEE |
HR | MIN | F |
|
| |
|
| BAKE |
COOK TIME
(example shows
6. Press Delay Start Time pad. | PRESS | YOU SEE |
DELAY START TIME
![]()
![]() F
F
BAKE
STARTTIME
7. Set start time.
Press the “up” (s) or “down” (t) pad(s) until the correct time shows on the display.
Example at right shows a desired start time of 2 o’clock. The oven will automati- cally shut off at 2:30 (the set start time plus the set cook time).
PRESS | YOU SEE |
HR MIN | F |
| BAKE |
STARTTIME
(example shows 2 o’clock start time)
8. Complete entry.
NOTES:
•You can change the temperature or time settings any time after pressing the Start/Enter pad by repeating Steps 2 through 7.
•The display will show “door” and the heating elements will not heat if the door is open when you try to bake/roast.
PRESS | YOU SEE | ||
START |
| ||
| ENTER |
| DELAY BAKE ON |
|
|
| |
| 5 SEC |
| |
continued on next page
31
