USING YOUR RANGE
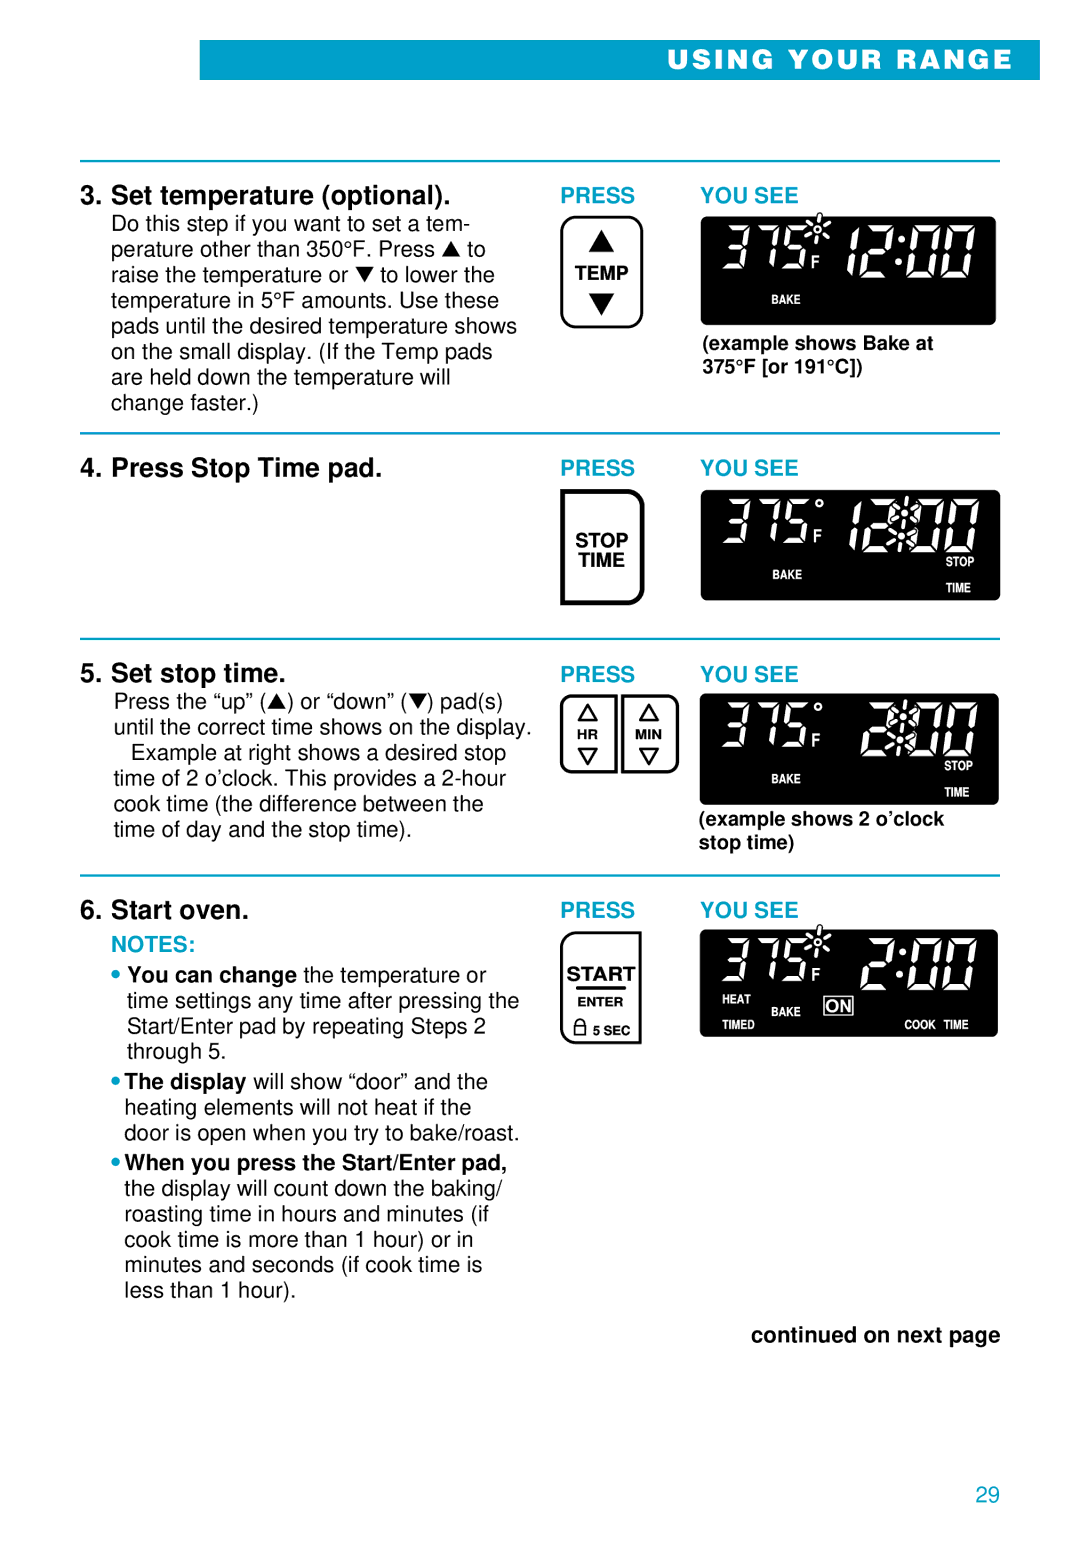
3. Set temperature (optional).
PRESS | YOU SEE |
Do this step if you want to set a tem- perature other than 350°F. Press ▲ to raise the temperature or ▼ to lower the
TEMP
F
temperature in 5°F amounts. Use these pads until the desired temperature shows on the small display. (If the Temp pads are held down the temperature will change faster.)
BAKE
(example shows Bake at 375°F [or 191°C])
4. Press Stop Time pad.
PRESS | YOU SEE |
STOP | F |
TIME | STOP |
| BAKE |
| TIME |
5. Set stop time.
Press the “up” (▲) or “down” (▼) pad(s) until the correct time shows on the display.
Example at right shows a desired stop time of 2 o’clock. This provides a
PRESS | YOU SEE |
HR MIN | F |
| |
| STOP |
| BAKE |
| TIME |
(example shows 2 o’clock stop time)
6. Start oven.
NOTES:
•You can change the temperature or time settings any time after pressing the Start/Enter pad by repeating Steps 2 through 5.
•The display will show “door” and the heating elements will not heat if the door is open when you try to bake/roast.
•When you press the Start/Enter pad, the display will count down the baking/ roasting time in hours and minutes (if cook time is more than 1 hour) or in minutes and seconds (if cook time is less than 1 hour).
PRESS | YOU SEE |
|
START |
| F |
ENTER | HEAT | ON |
| BAKE | |
5 SEC | TIMED | COOK TIME |
|
|
continued on next page
29