Phaser 860 specifications
The Xerox Phaser 860 is a high-performance color laser printer that combines advanced features and innovative technology to meet the demands of businesses and workgroups. Launched as part of Xerox’s renowned Phaser series, the Phaser 860 is designed to deliver exceptional print quality and efficiency, making it a valuable asset for any office environment.One of the standout features of the Xerox Phaser 860 is its print resolution, capable of producing sharp images with a resolution of up to 1200 x 1200 dpi. This high-quality output ensures that text, graphics, and images appear vibrant and clear, making it an ideal choice for producing marketing materials, presentations, and professional documents. Additionally, the printer supports a wide range of media sizes and types, including envelopes, labels, and heavier stock, providing versatility for various printing needs.
Speed is another significant characteristic of the Phaser 860. It can print up to 30 pages per minute in color and monochrome, streamlining workflow and increasing productivity in busy office environments. The printer's first-page-out time is impressively fast, minimizing downtime and allowing users to focus on their work while waiting for documents to print.
The Phaser 860 employs advanced printing technologies such as Solid Ink, which not only produces high-quality prints but also addresses environmental concerns. The Solid Ink system uses solid sticks of ink instead of traditional toner cartridges, resulting in less waste and easier handling. This eco-friendly approach leads to reduced packaging waste and a smaller carbon footprint, making the printer suitable for environmentally conscious organizations.
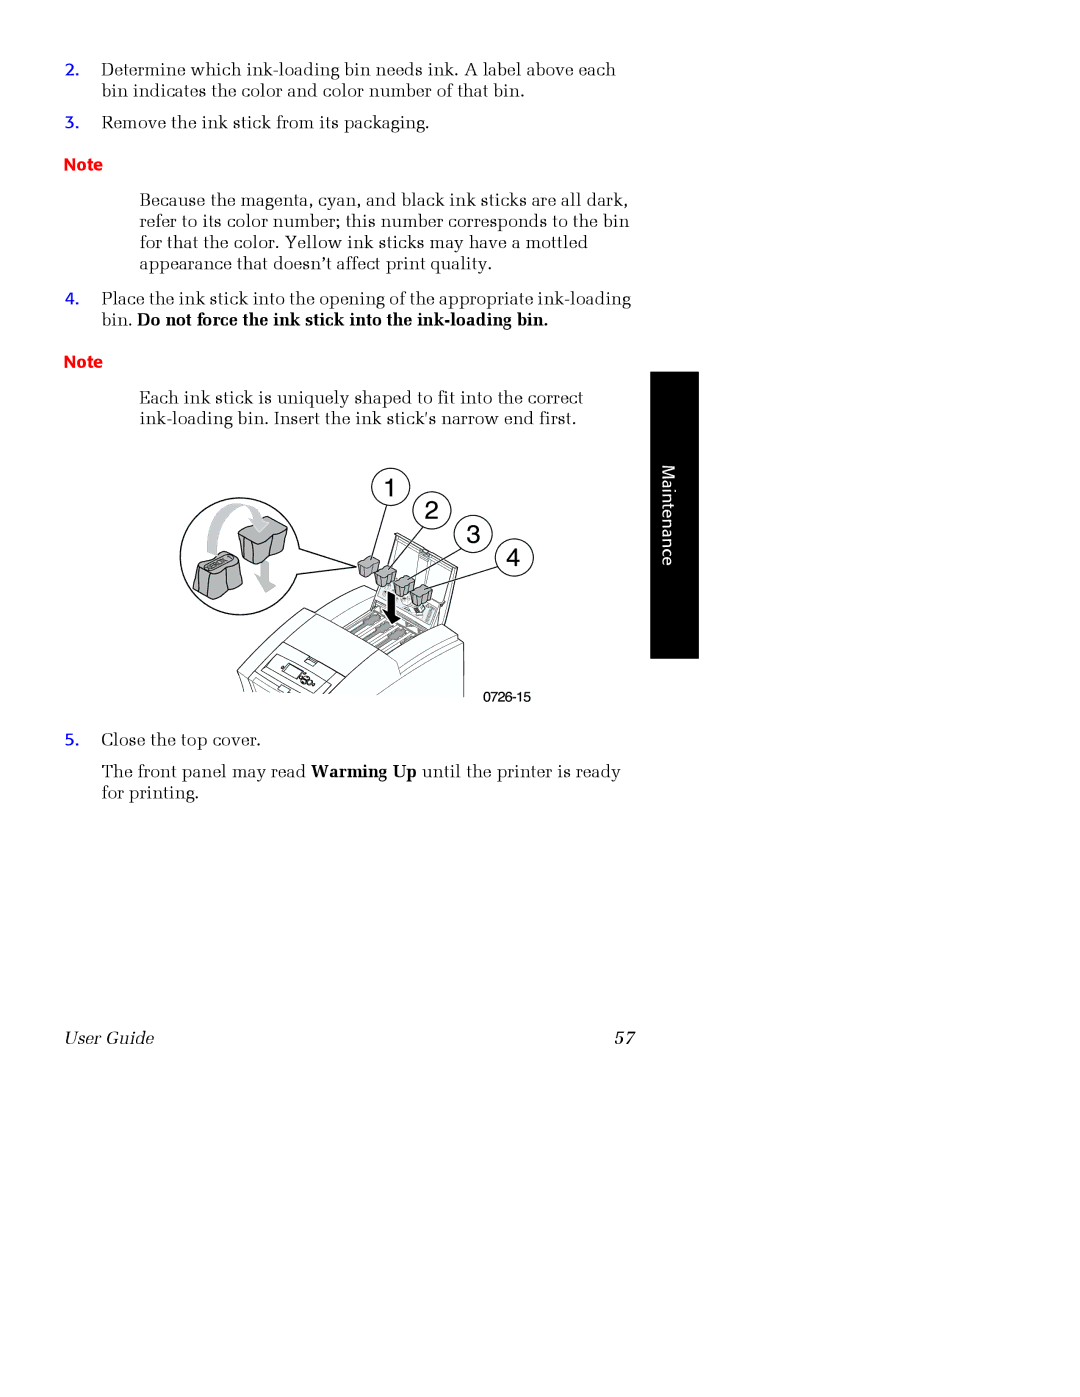
Networking capabilities are robust, with options for wired and wireless connectivity. This allows for seamless integration into a variety of office setups, enabling multiple users to print from their desktops, laptops, or mobile devices. The inclusion of PostScript and PCL drivers enhances compatibility with different operating systems and applications, further simplifying the printing process.
Another notable characteristic of the Xerox Phaser 860 is its user-friendly interface, featuring an intuitive control panel and an LCD display that makes it easy to navigate settings and monitor print jobs. The printer also supports remote management via a web interface, allowing IT administrators to check on printer status, manage supplies, and perform maintenance from any location.
Overall, the Xerox Phaser 860 is a powerful and efficient color laser printer that meets the diverse needs of modern businesses. With its high-quality output, fast printing speeds, eco-friendly technologies, and user-friendly features, the Phaser 860 is designed to enhance productivity and support a wide range of printing tasks in any office setting.