
XK25C, XK35C specifications
Xerox has long been synonymous with innovation in the realm of printing and document management solutions. Among its impressive line of products, the XK35C and XK25C models stand out for their advanced features and technologies tailored to meet the demands of modern offices.The Xerox XK35C is a color multifunction printer specifically engineered for high-volume workgroups. It boasts a robust printing speed of up to 35 pages per minute, enabling businesses to complete large print jobs efficiently. Its impressive resolution of 1200 x 2400 dpi ensures that every document produced is clear, vibrant, and professional in appearance. The XK35C supports various media types and sizes, making it versatile for everything from standard letter-sized documents to custom-sized labels and envelopes.
One significant feature of the XK35C is its automatic duplex printing capability, which allows users to print on both sides of a page automatically, conserving paper and reducing environmental impact. The printer also comes with advanced scanning options, including color scanning at speeds of up to 100 images per minute, and the ability to create searchable PDFs, enhancing document management efficiency.
The XK25C, while slightly less powerful, excels in providing high-quality printing and copying for small to medium-sized workgroups. With a printing speed of up to 25 pages per minute and the same impressive resolution as the XK35C, the XK25C is perfect for businesses that require reliable, high-quality output without the need for maximum volume capabilities.
Both models leverage Xerox’s state-of-the-art ConnectKey technology, which integrates cloud-based services and mobile printing capabilities, allowing users to print documents directly from their smartphones or tablets. The user-friendly interface simplifies navigation through various functions, making it easy for any employee to operate the machine.
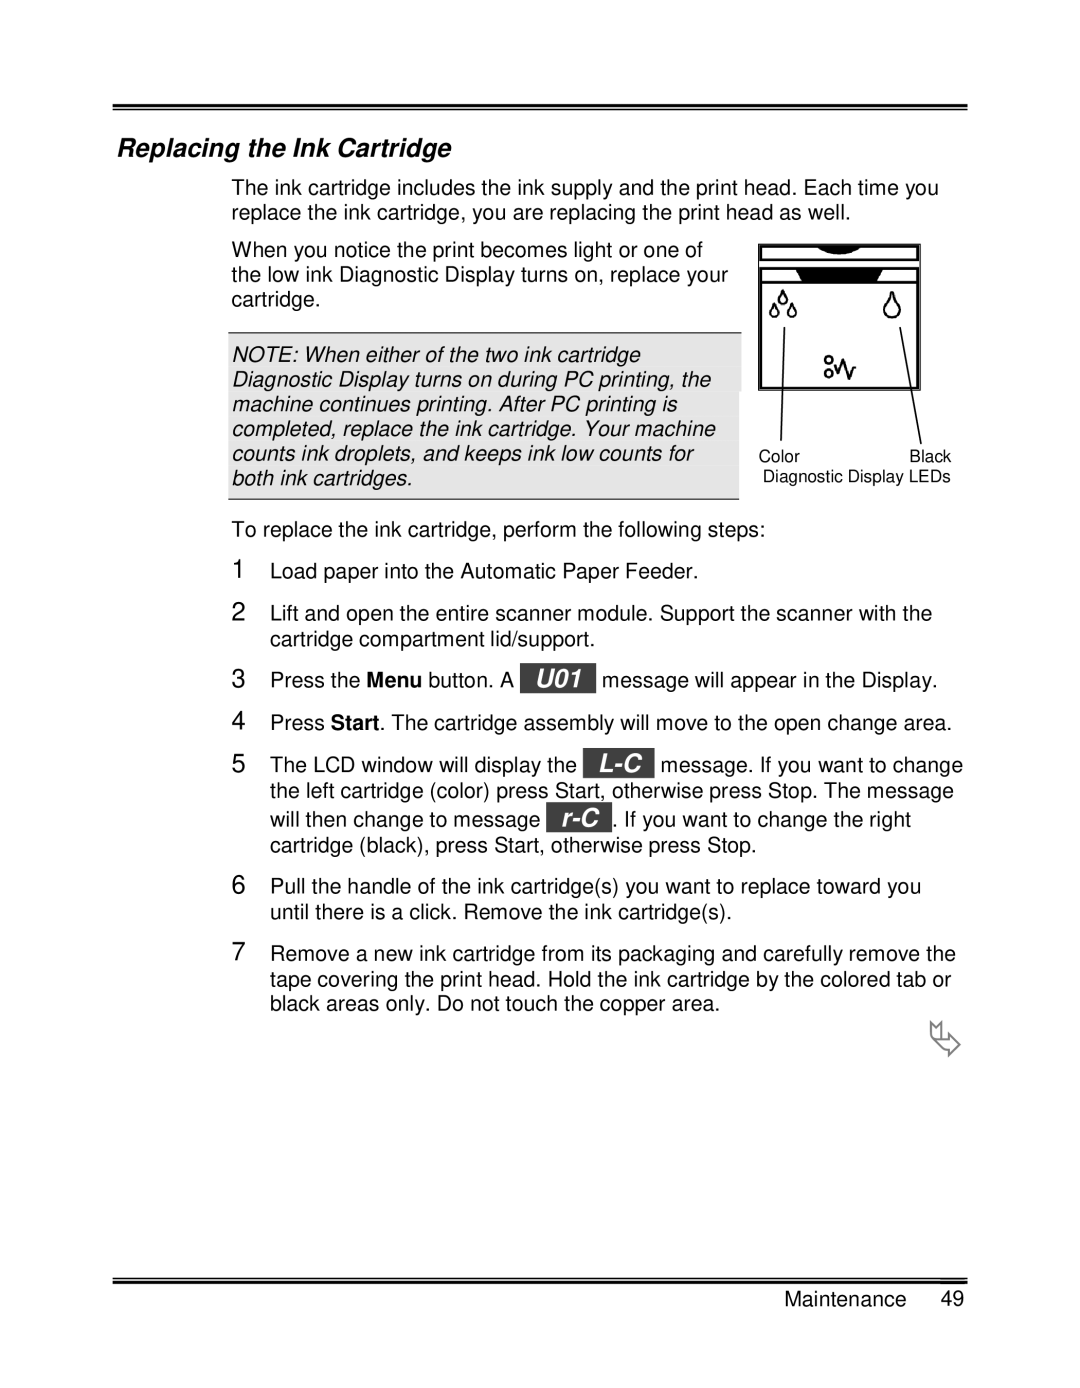
Additionally, both the XK35C and XK25C feature robust security protocols that protect sensitive information across all devices. With options for secure print release and encryption, businesses can ensure that their data remains confidential.
In summary, the Xerox XK35C and XK25C multifunction printers exemplify cutting-edge engineering and commitment to quality. Ideal for businesses looking to enhance productivity without compromising on output quality, these models embody the perfect balance of functionality, security, and efficiency, making them invaluable assets in today’s digital workspace.