Getting Started
Adjusting the Media Sensor
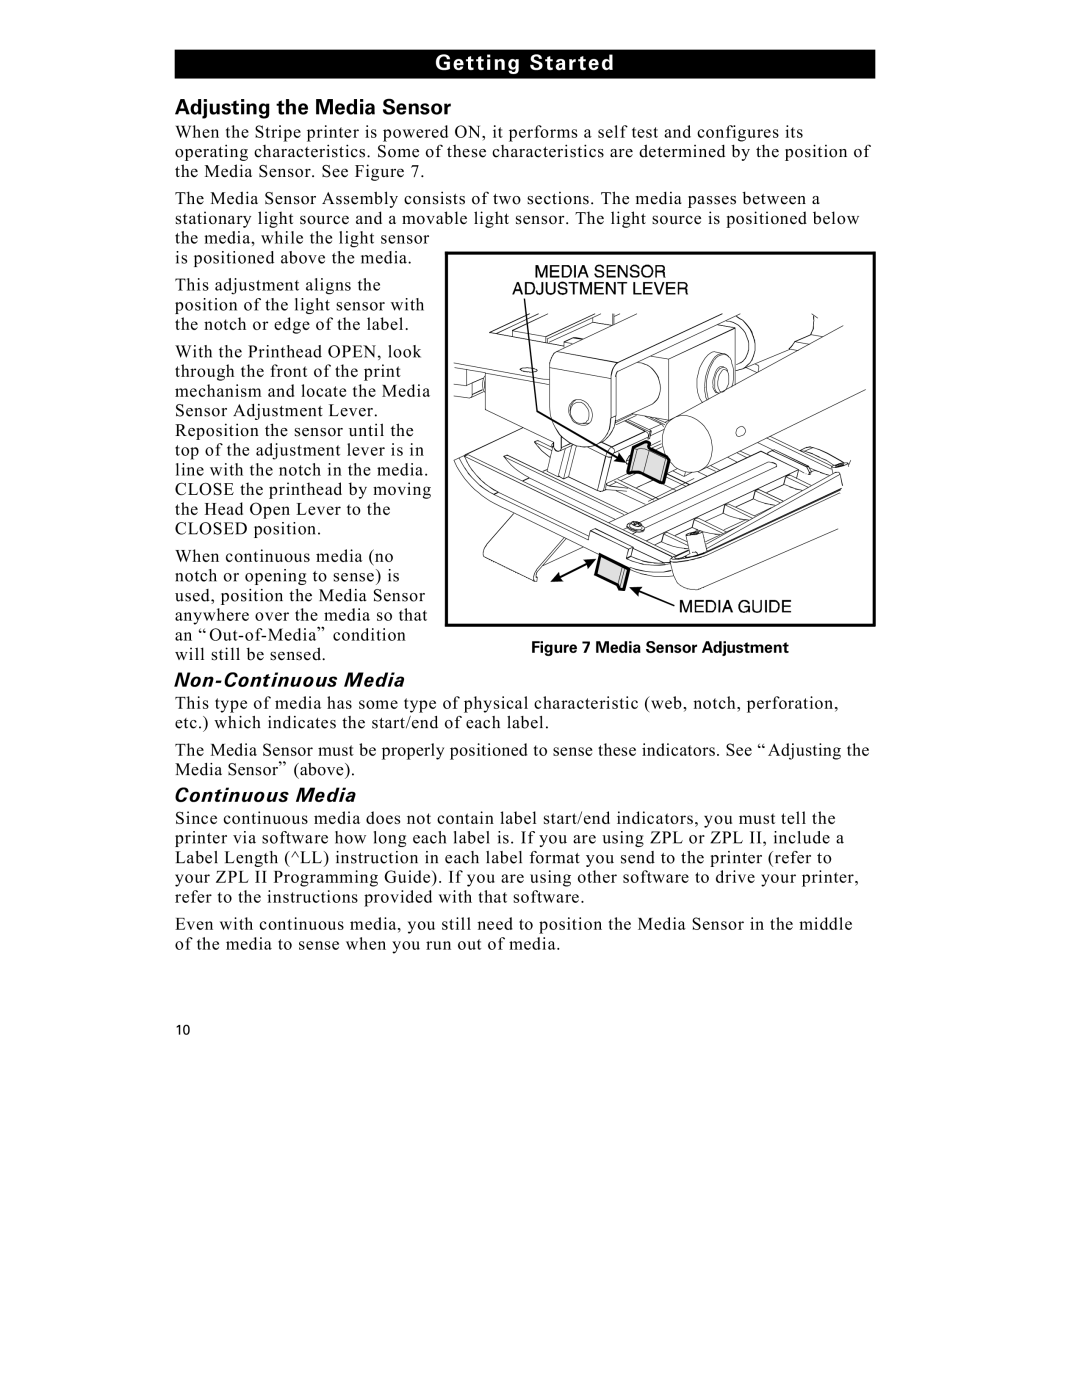
When the Stripe printer is powered ON, it performs a self test and configures its operating characteristics. Some of these characteristics are determined by the position of the Media Sensor. See Figure 7.
The Media Sensor Assembly consists of two sections. The media passes between a stationary light source and a movable light sensor. The light source is positioned below the media, while the light sensor
is positioned above the media.
This adjustment aligns the position of the light sensor with the notch or edge of the label.
With the Printhead OPEN, look through the front of the print mechanism and locate the Media Sensor Adjustment Lever. Reposition the sensor until the top of the adjustment lever is in line with the notch in the media. CLOSE the printhead by moving the Head Open Lever to the CLOSED position.
When continuous media (no notch or opening to sense) is used, position the Media Sensor anywhere over the media so that an “
will still be sensed. | Figure 7 Media Sensor Adjustment |
|
Non-Continuous Media
This type of media has some type of physical characteristic (web, notch, perforation, etc.) which indicates the start/end of each label.
The Media Sensor must be properly positioned to sense these indicators. See “ Adjusting the Media Sensor” (above).
Continuous Media
Since continuous media does not contain label start/end indicators, you must tell the printer via software how long each label is. If you are using ZPL or ZPL II, include a Label Length (^LL) instruction in each label format you send to the printer (refer to your ZPL II Programming Guide). If you are using other software to drive your printer, refer to the instructions provided with that software.
Even with continuous media, you still need to position the Media Sensor in the middle of the media to sense when you run out of media.
10