Routine Care and Adjustment
I.Remove the Cutter Module from the printer.
1.Turn the printer’s AC power OFF.
2.Raise the printer’s Media Access Door and lower the printer’s Front Door. See Figure 17.
3.Remove the Label Catch Tray by lifting it up and away from the front of the Cutter Module.
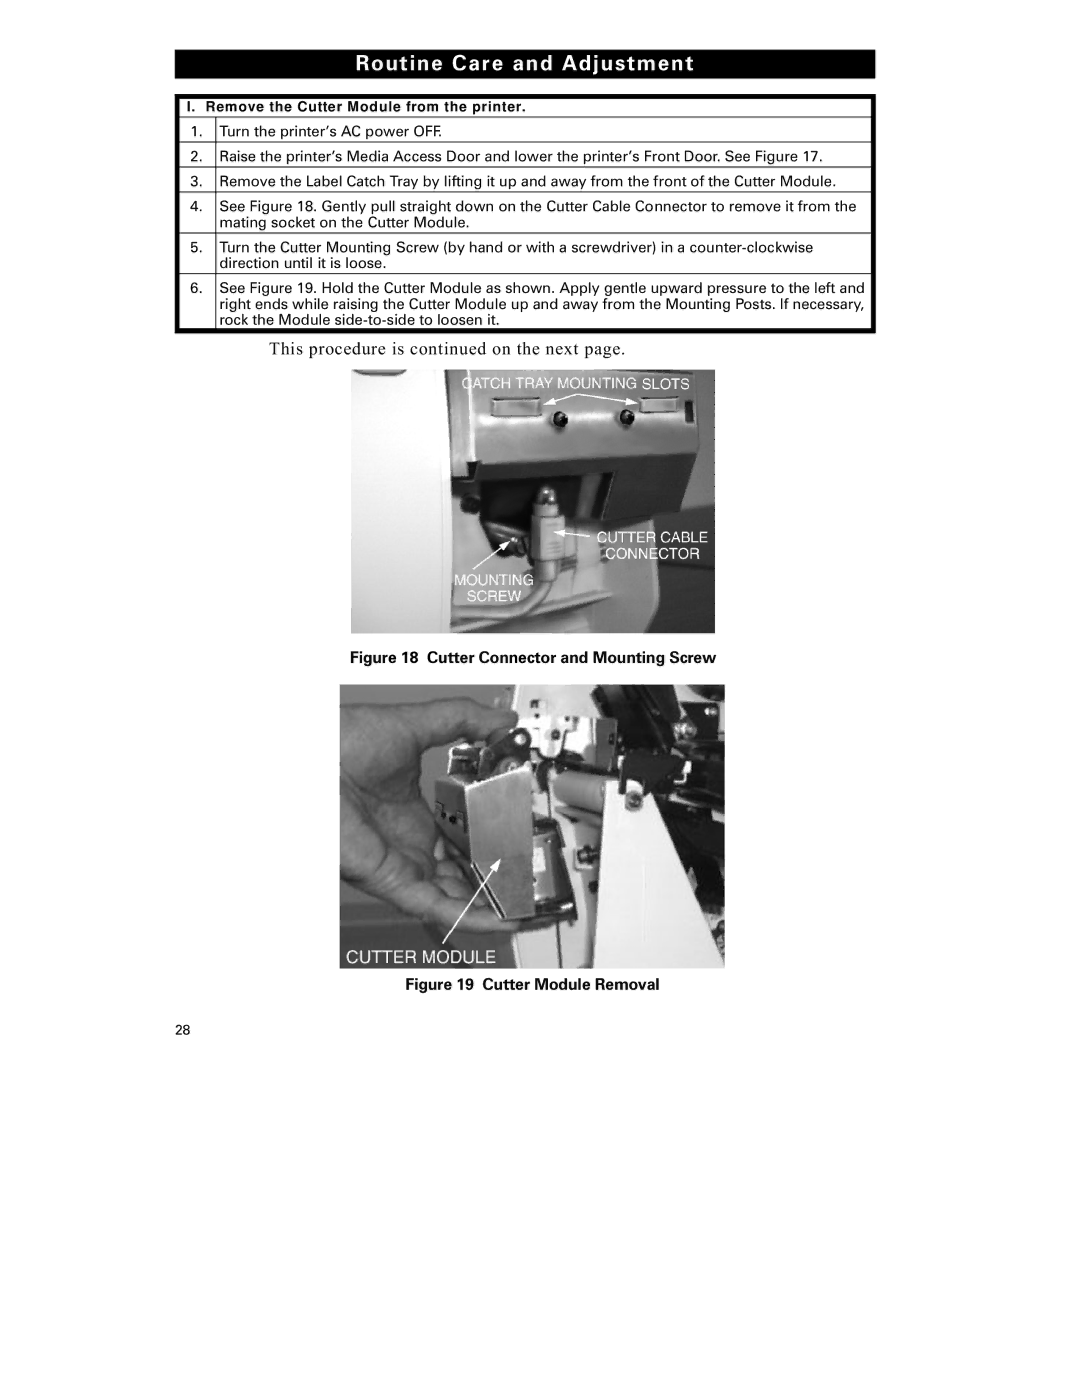
4.See Figure 18. Gently pull straight down on the Cutter Cable Connector to remove it from the mating socket on the Cutter Module.
5.Turn the Cutter Mounting Screw (by hand or with a screwdriver) in a
6.See Figure 19. Hold the Cutter Module as shown. Apply gentle upward pressure to the left and right ends while raising the Cutter Module up and away from the Mounting Posts. If necessary, rock the Module
This procedure is continued on the next page.
Figure 18 Cutter Connector and Mounting Screw
Figure 19 Cutter Module Removal
28
