Appendix |
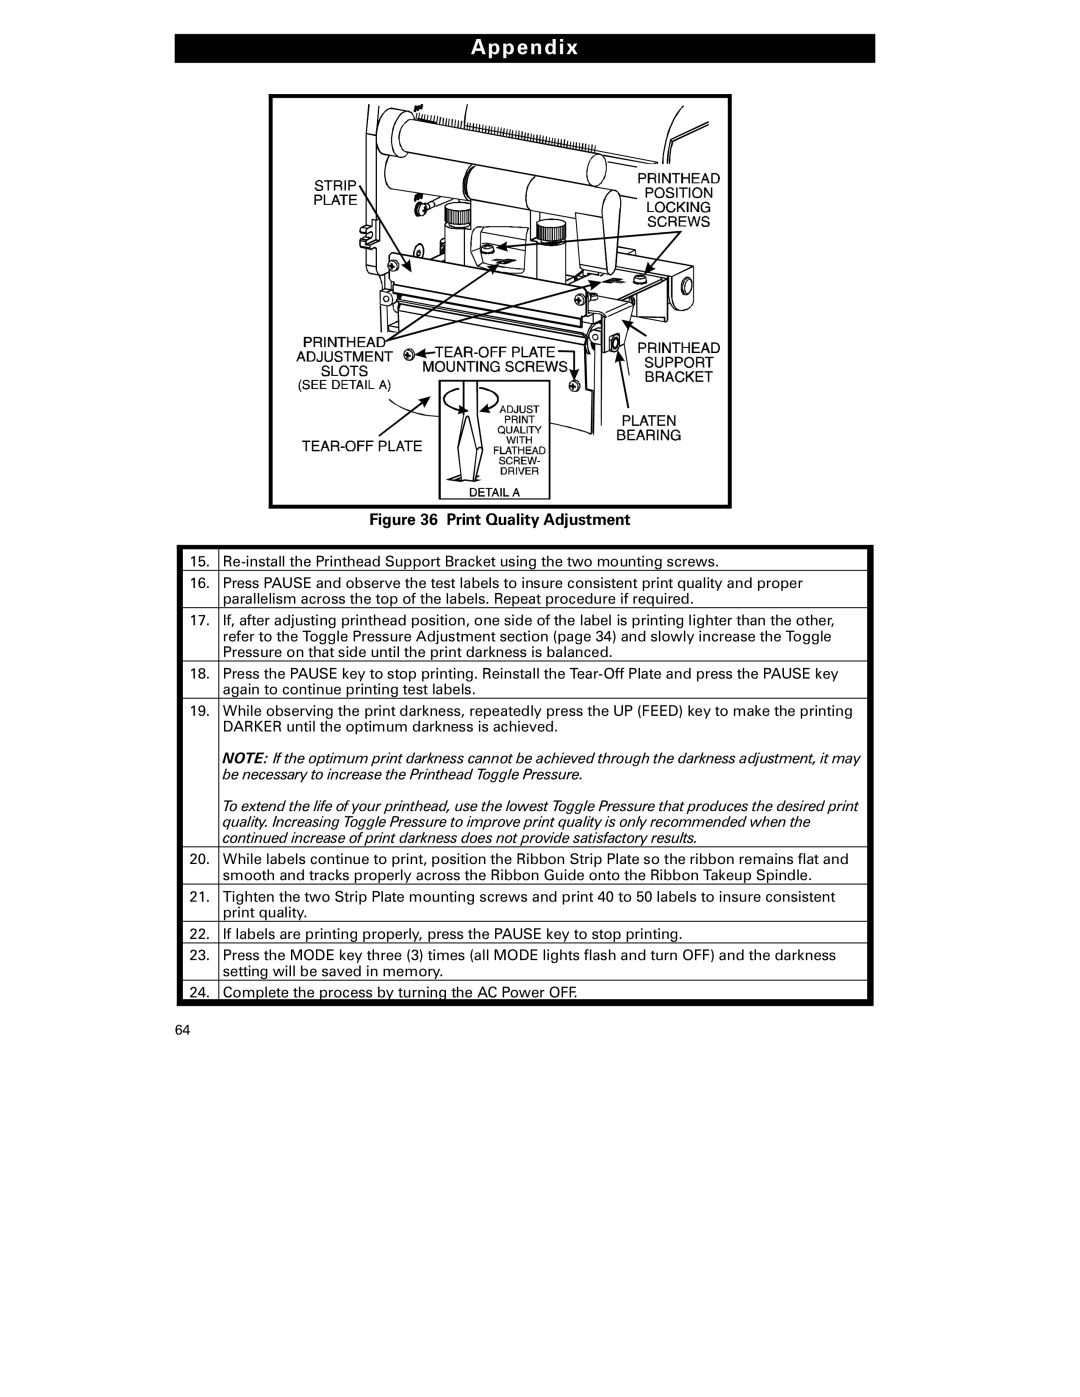
Figure 36 Print Quality Adjustment
15.
16.Press PAUSE and observe the test labels to insure consistent print quality and proper parallelism across the top of the labels. Repeat procedure if required.
17.If, after adjusting printhead position, one side of the label is printing lighter than the other, refer to the Toggle Pressure Adjustment section (page 34) and slowly increase the Toggle Pressure on that side until the print darkness is balanced.
18.Press the PAUSE key to stop printing. Reinstall the
19.While observing the print darkness, repeatedly press the UP (FEED) key to make the printing DARKER until the optimum darkness is achieved.
NOTE: If the optimum print darkness cannot be achieved through the darkness adjustment, it may be necessary to increase the Printhead Toggle Pressure.
To extend the life of your printhead, use the lowest Toggle Pressure that produces the desired print quality. Increasing Toggle Pressure to improve print quality is only recommended when the continued increase of print darkness does not provide satisfactory results.
20.While labels continue to print, position the Ribbon Strip Plate so the ribbon remains flat and smooth and tracks properly across the Ribbon Guide onto the Ribbon Takeup Spindle.
21.Tighten the two Strip Plate mounting screws and print 40 to 50 labels to insure consistent print quality.
22.If labels are printing properly, press the PAUSE key to stop printing.
23.Press the MODE key three (3) times (all MODE lights flash and turn OFF) and the darkness setting will be saved in memory.
24.Complete the process by turning the AC Power OFF.
64