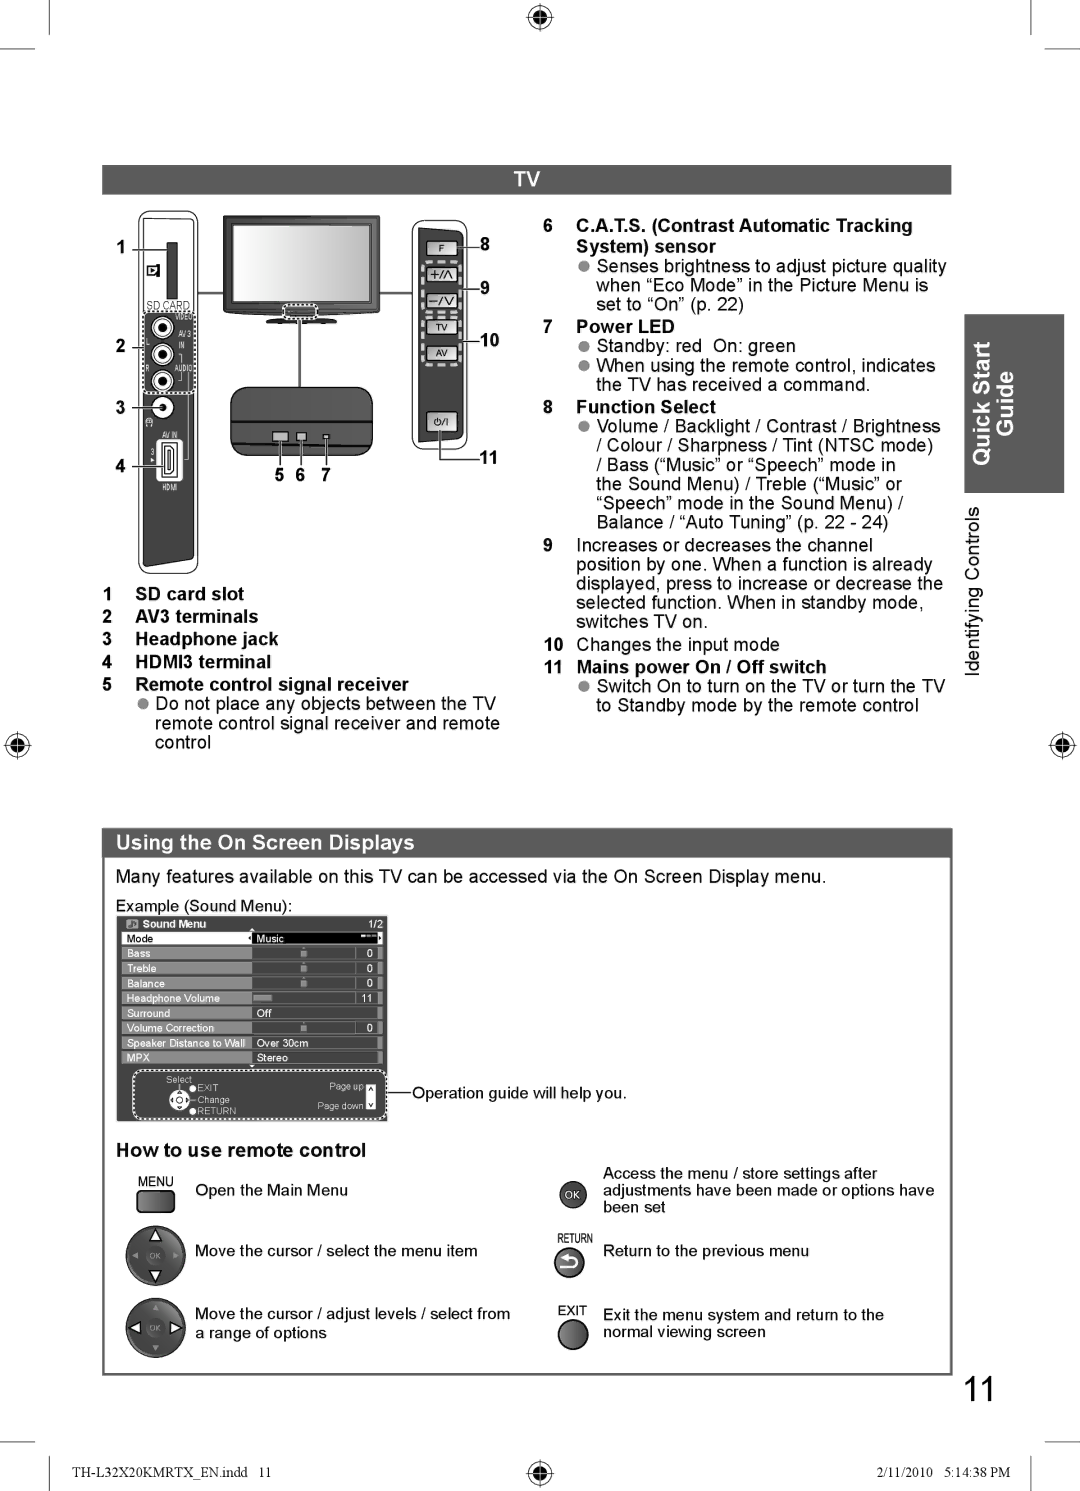
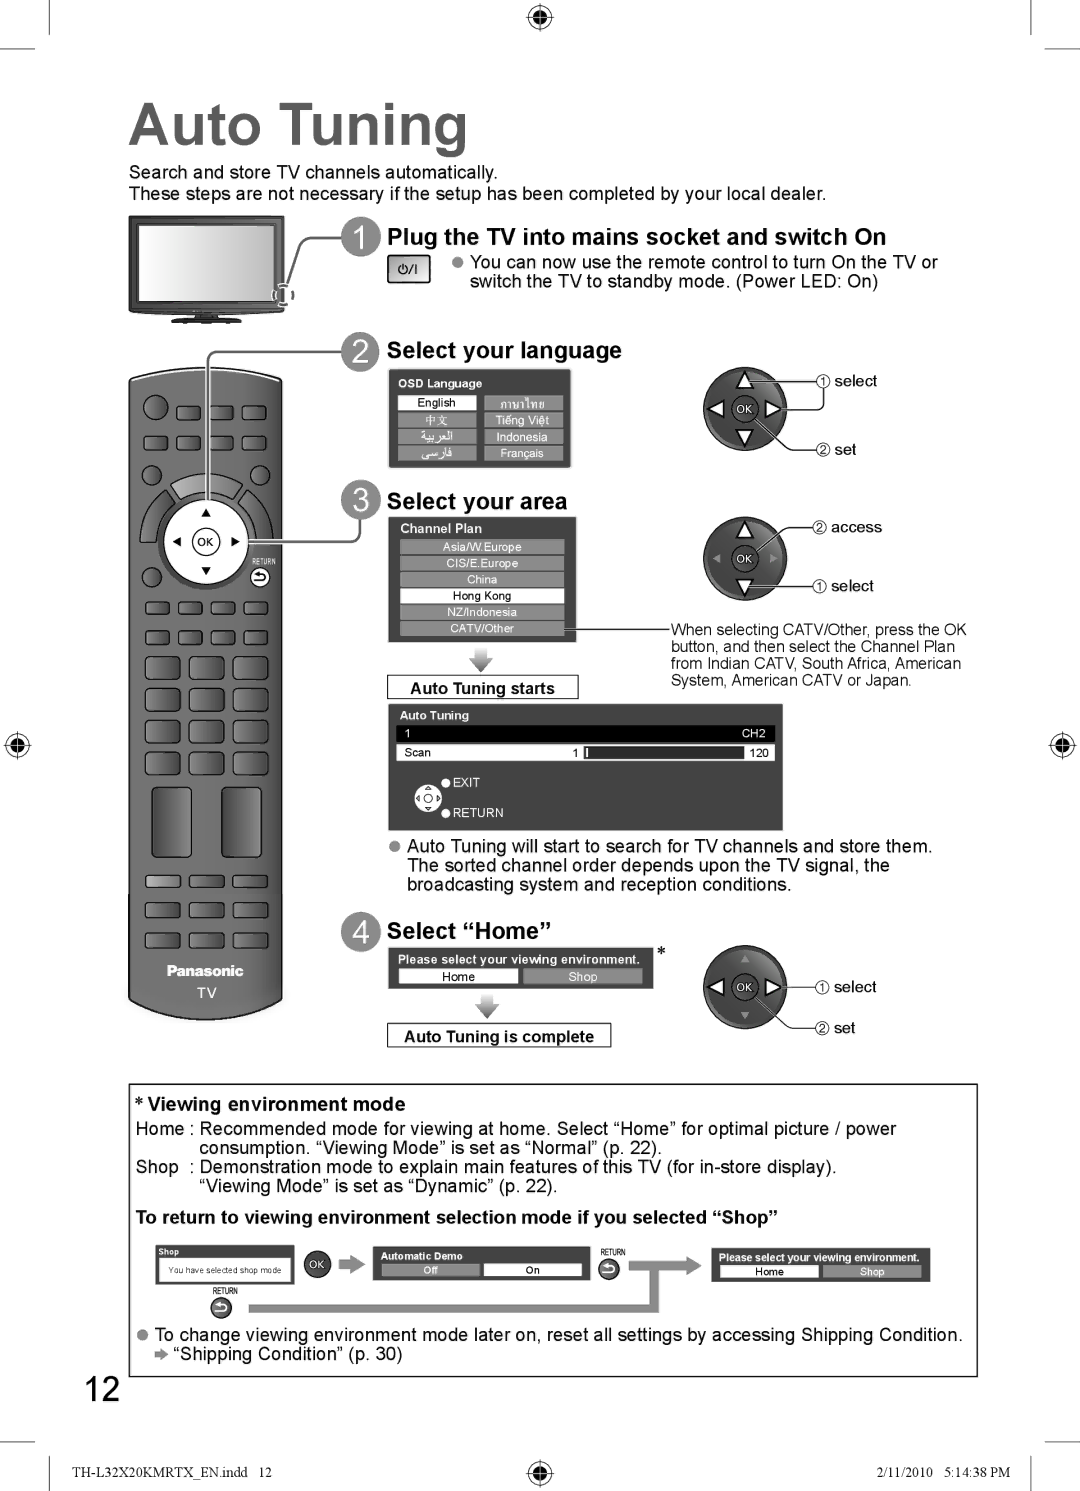
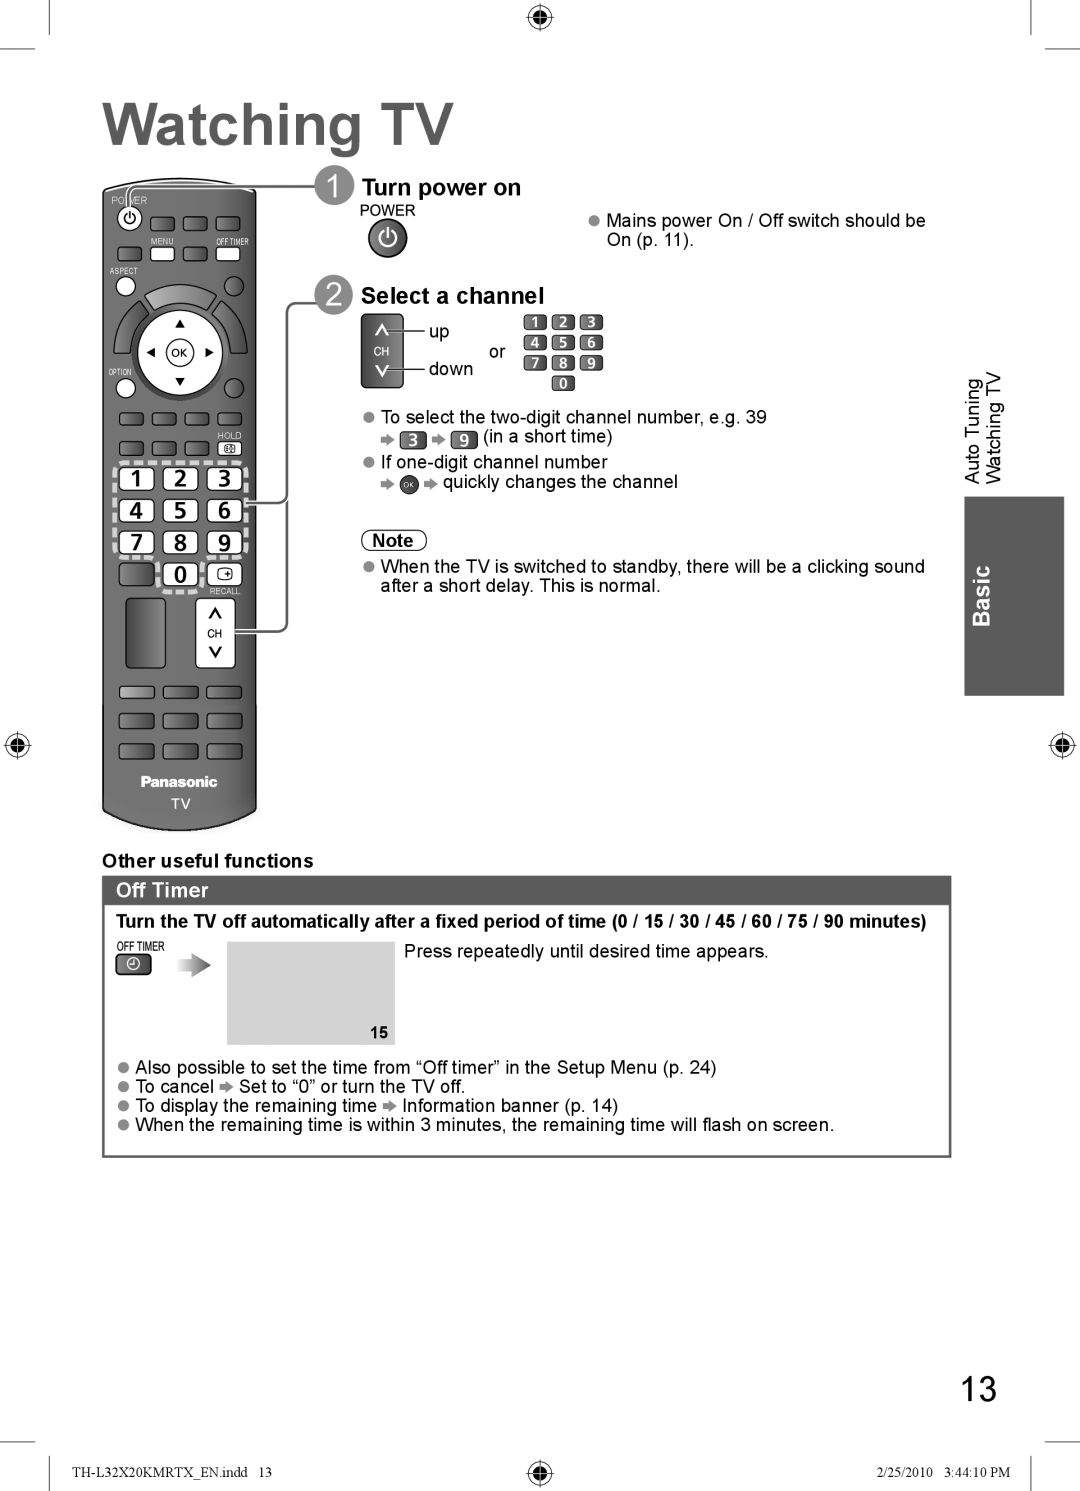
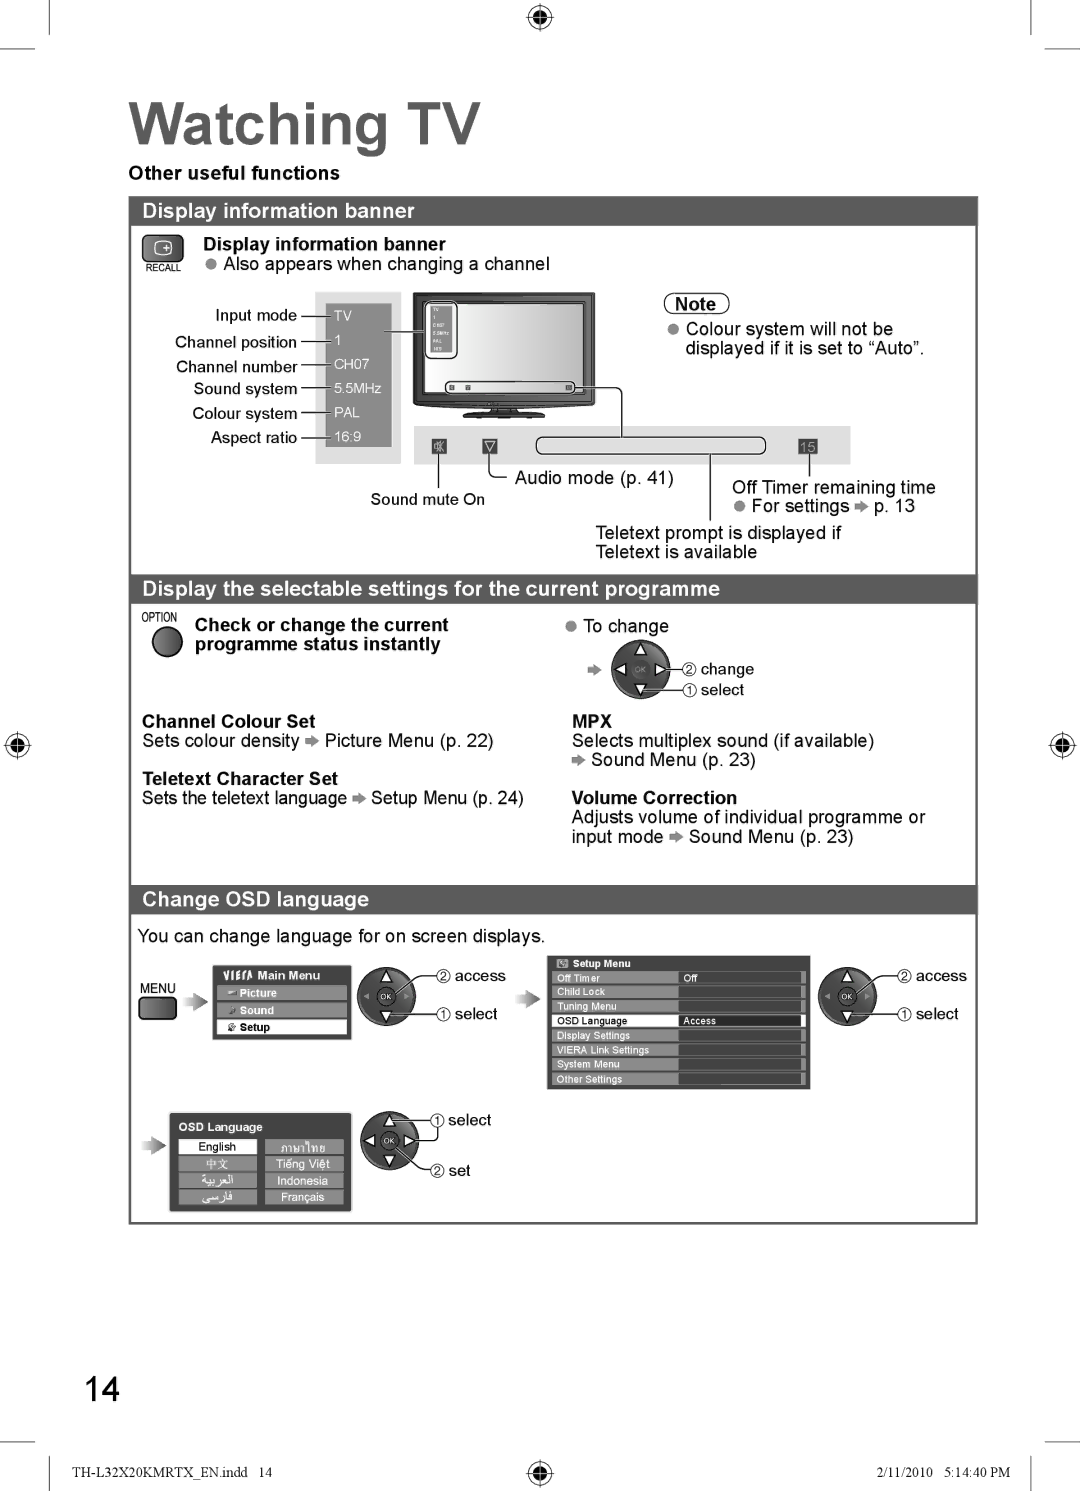
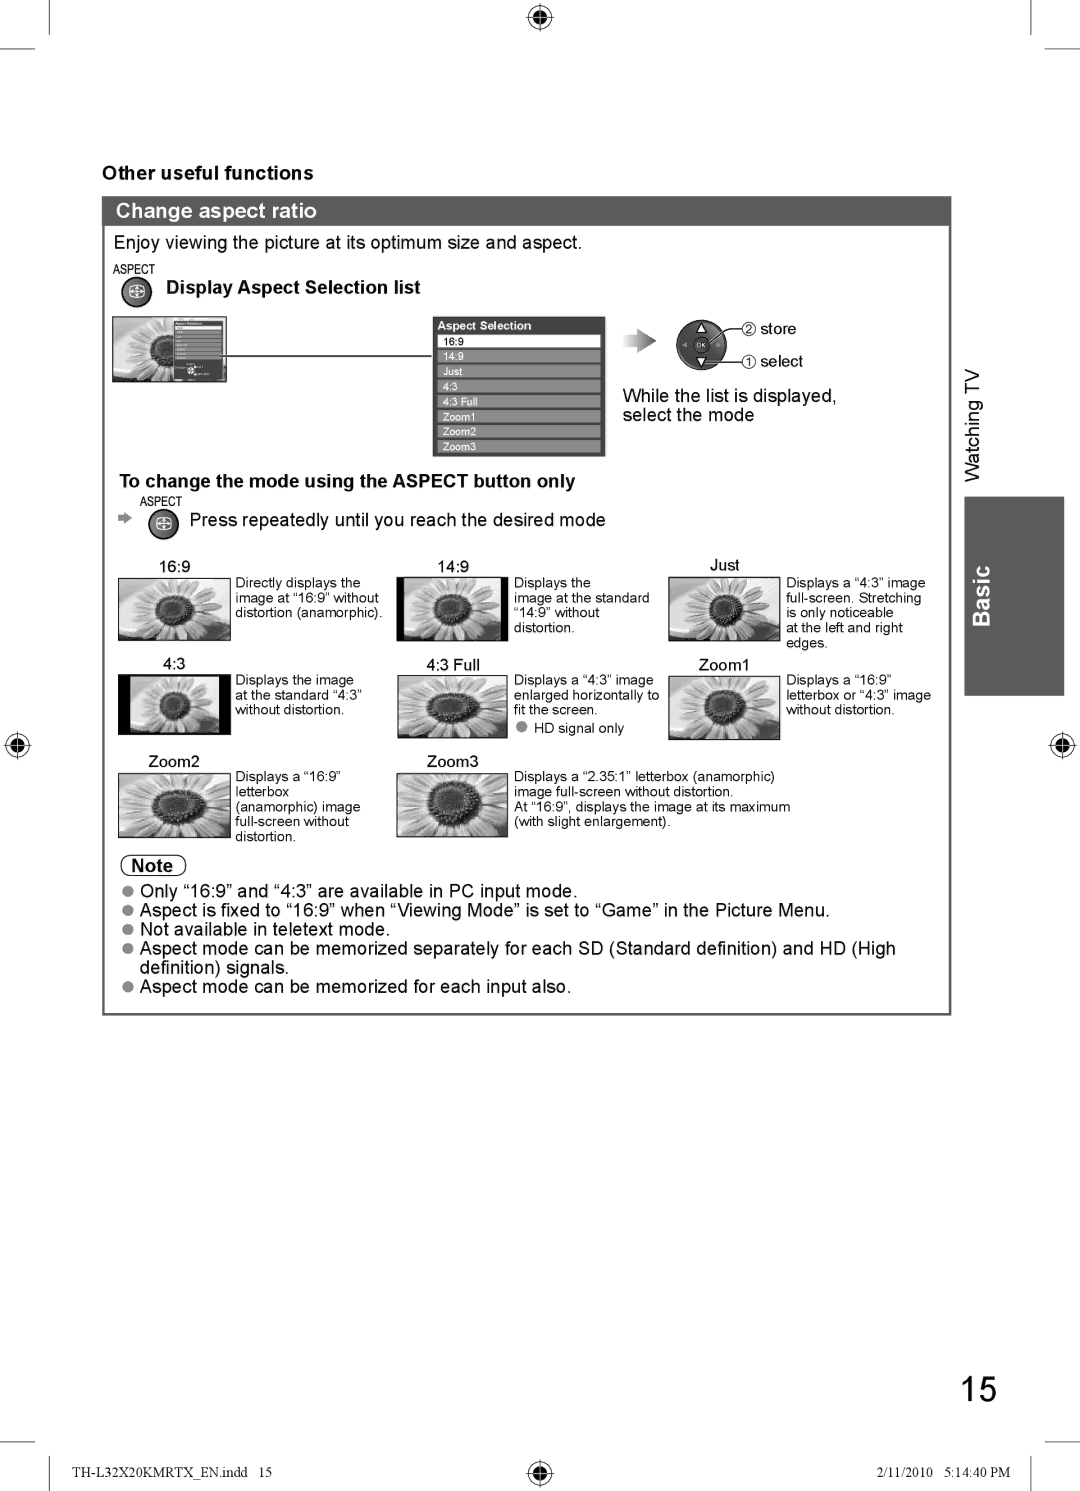
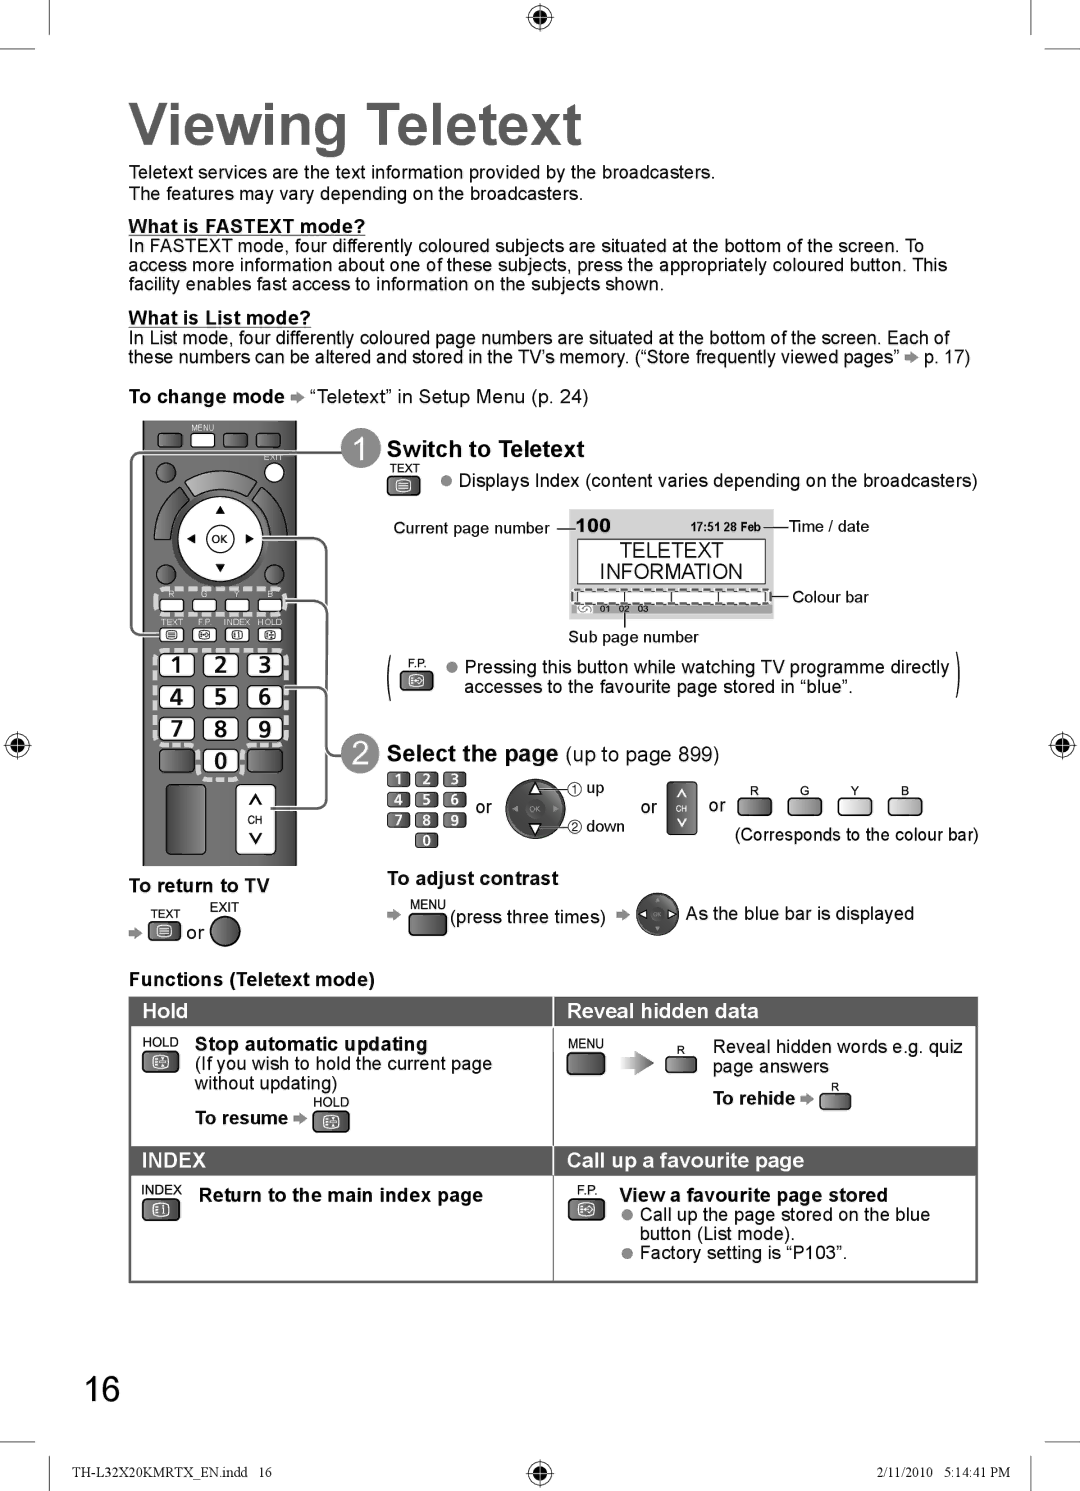
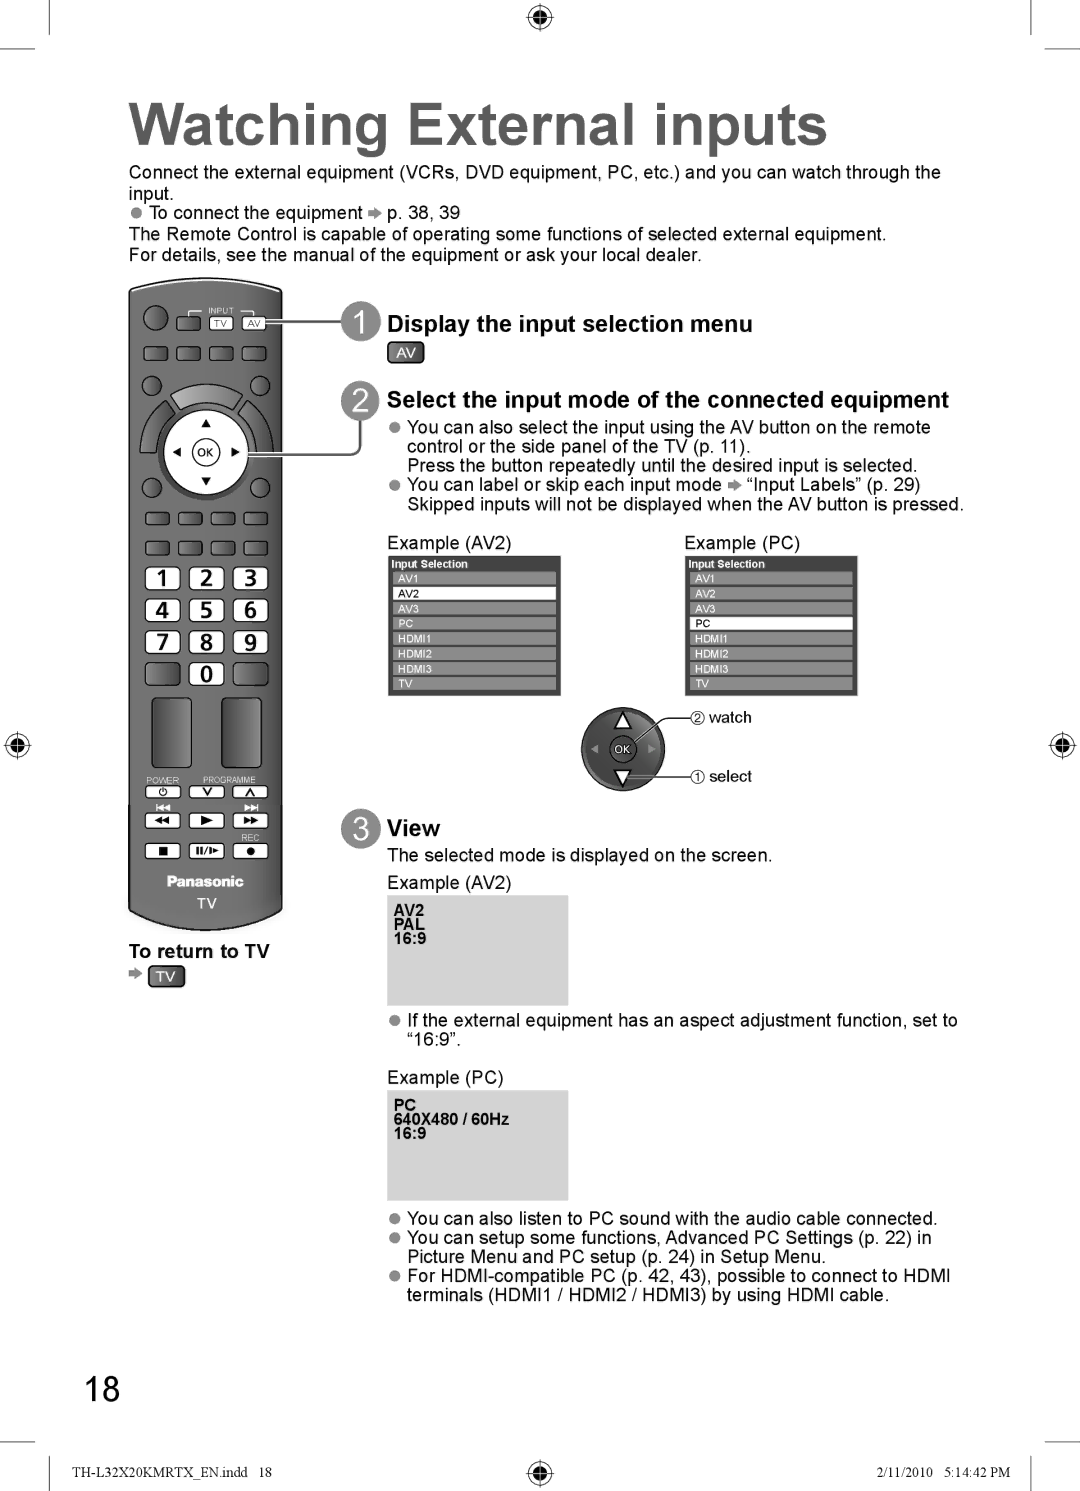
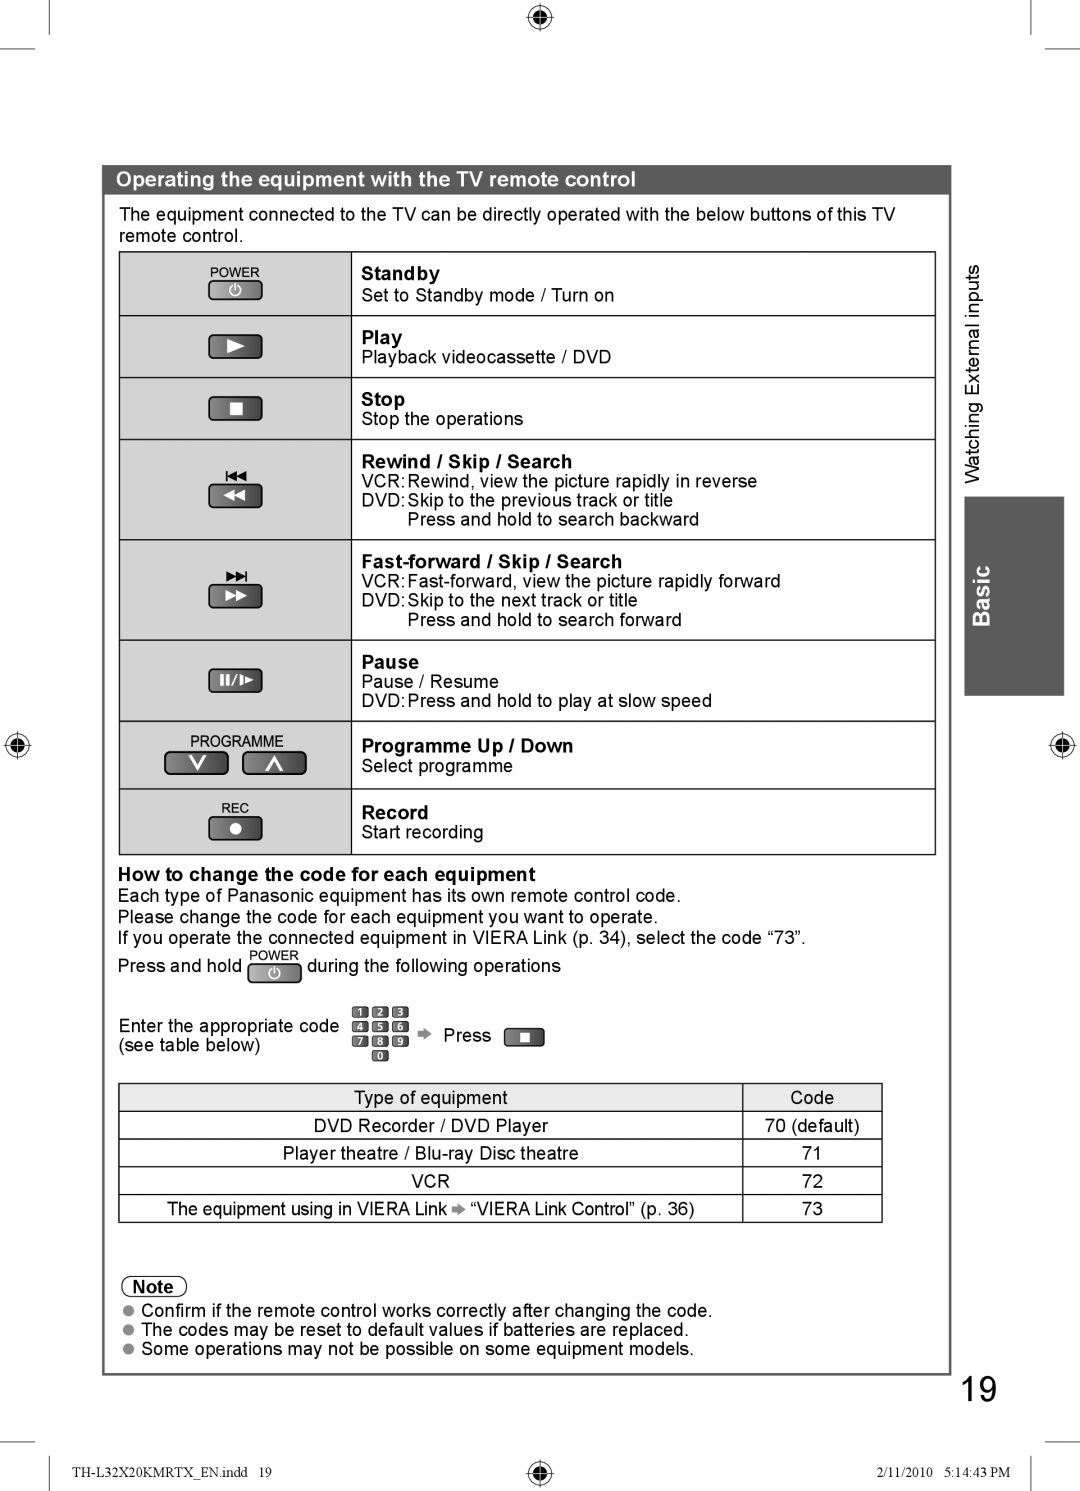
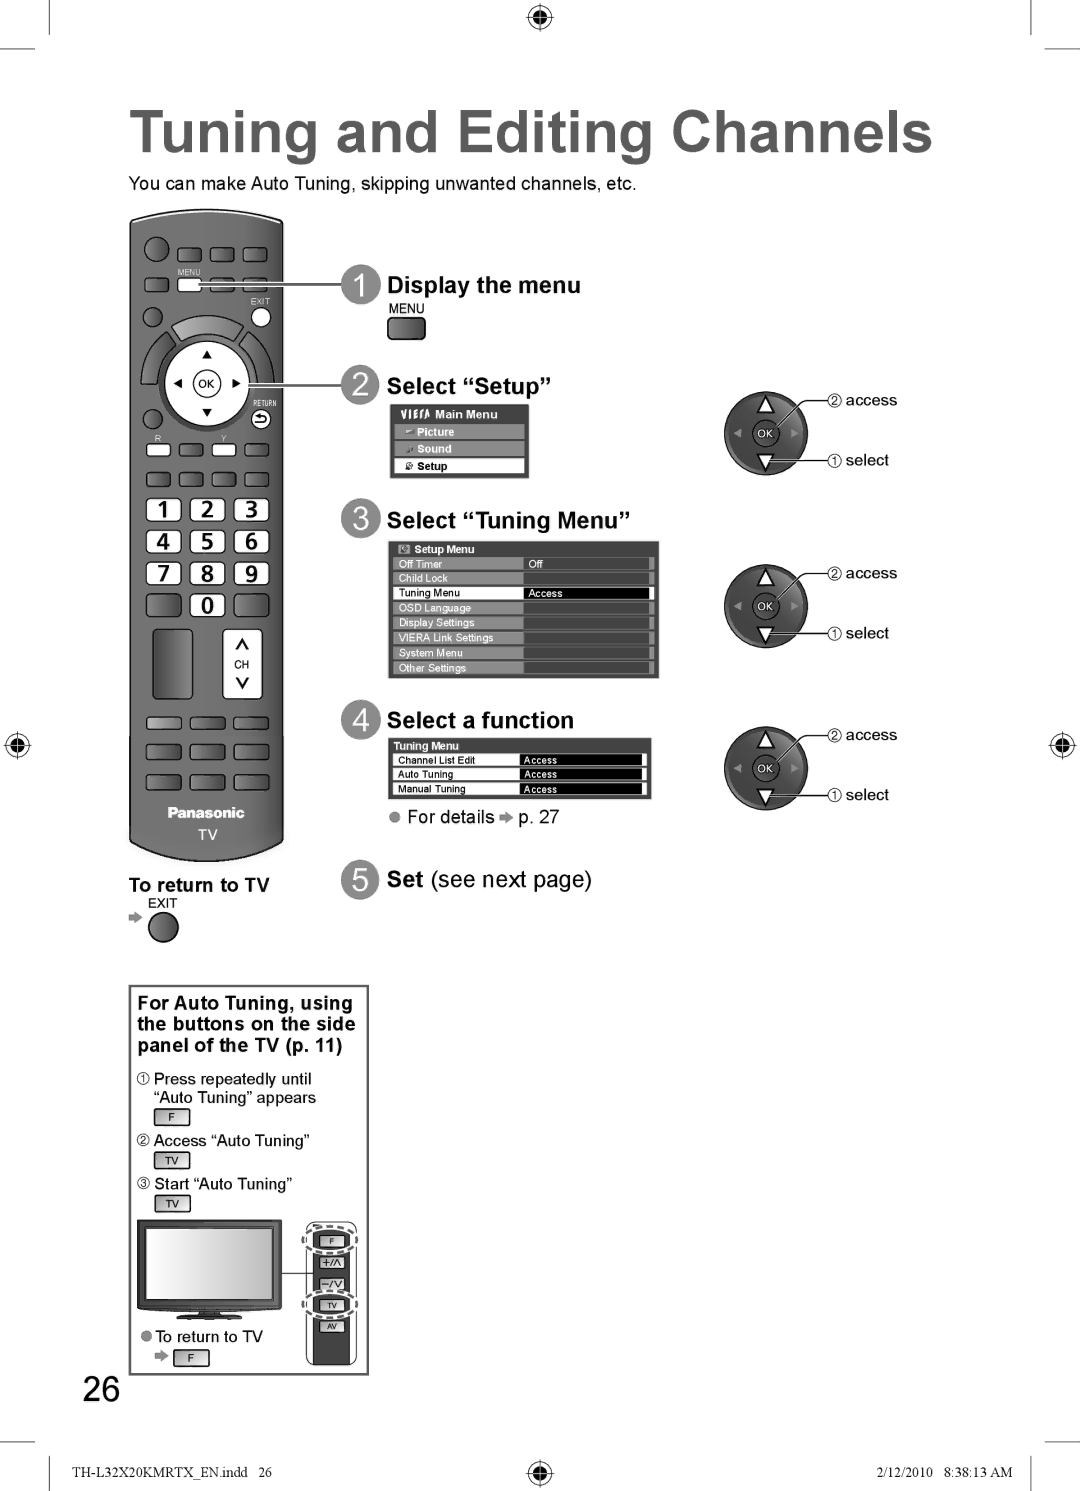
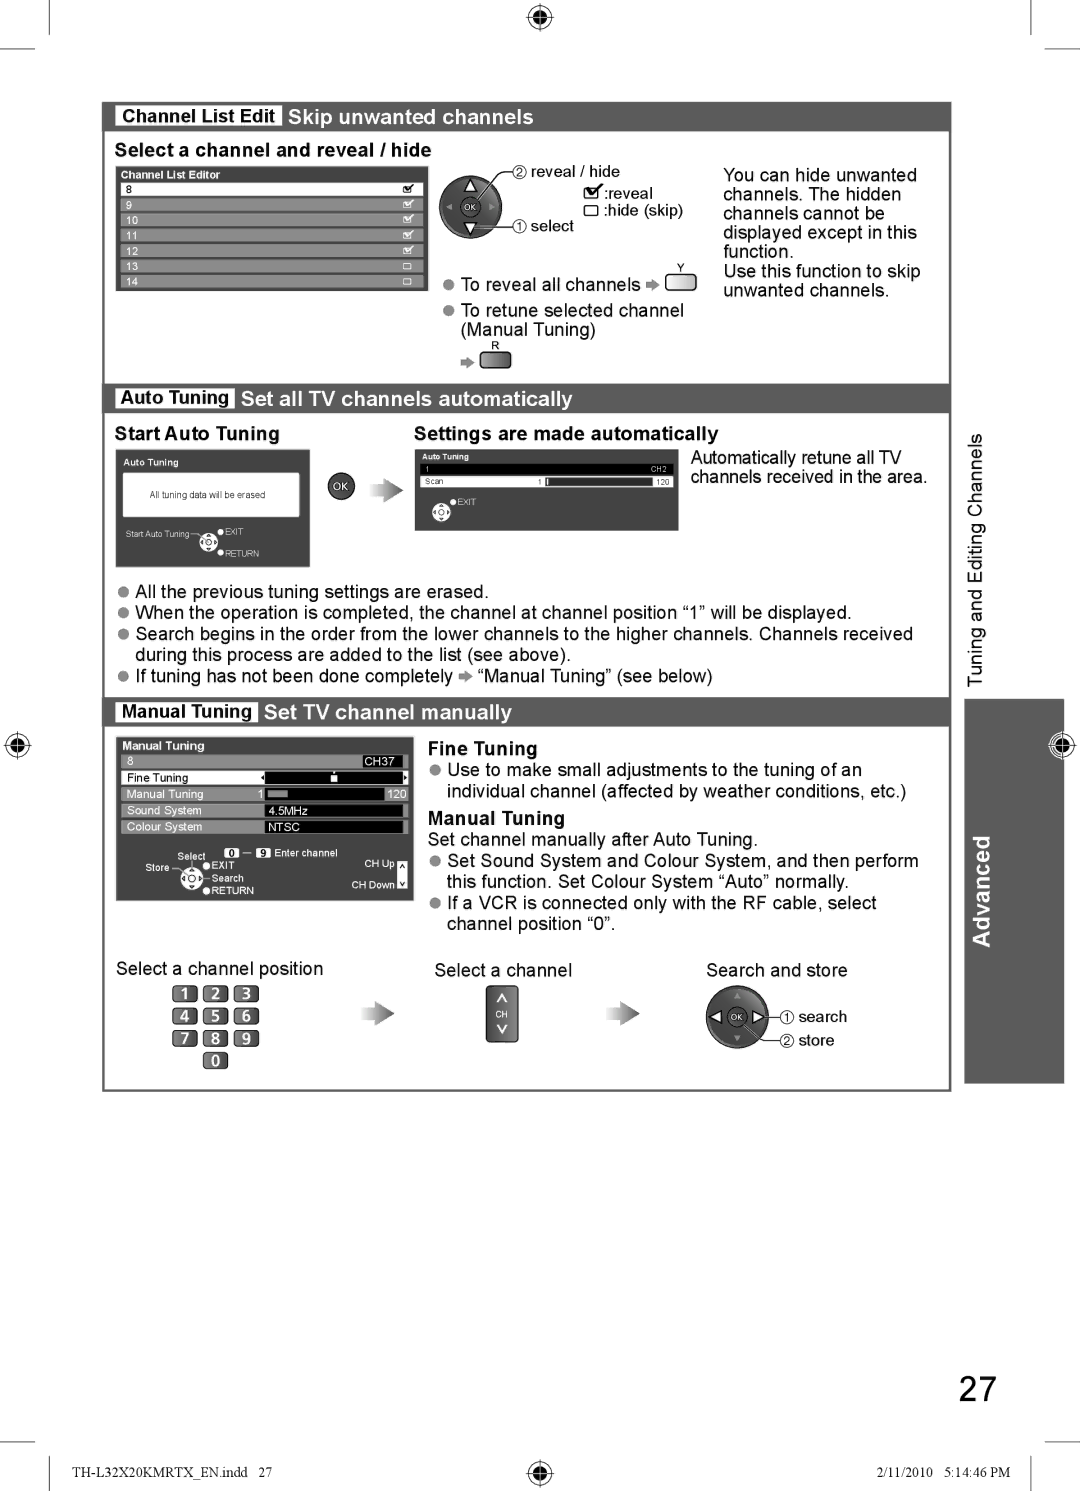
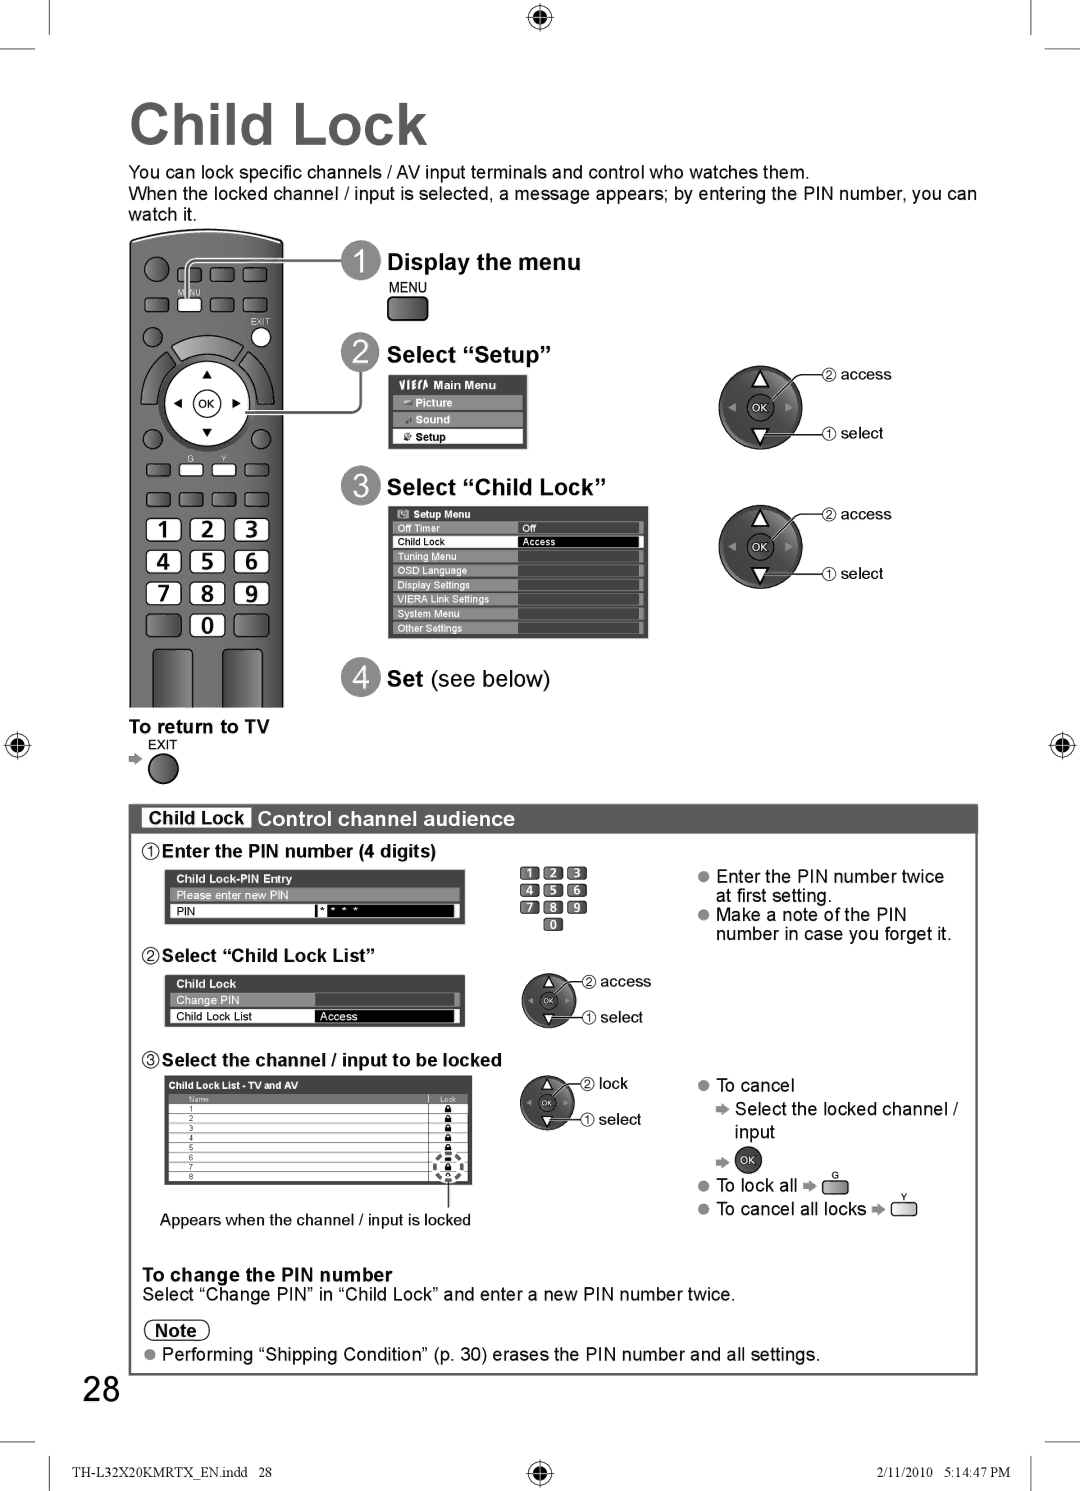
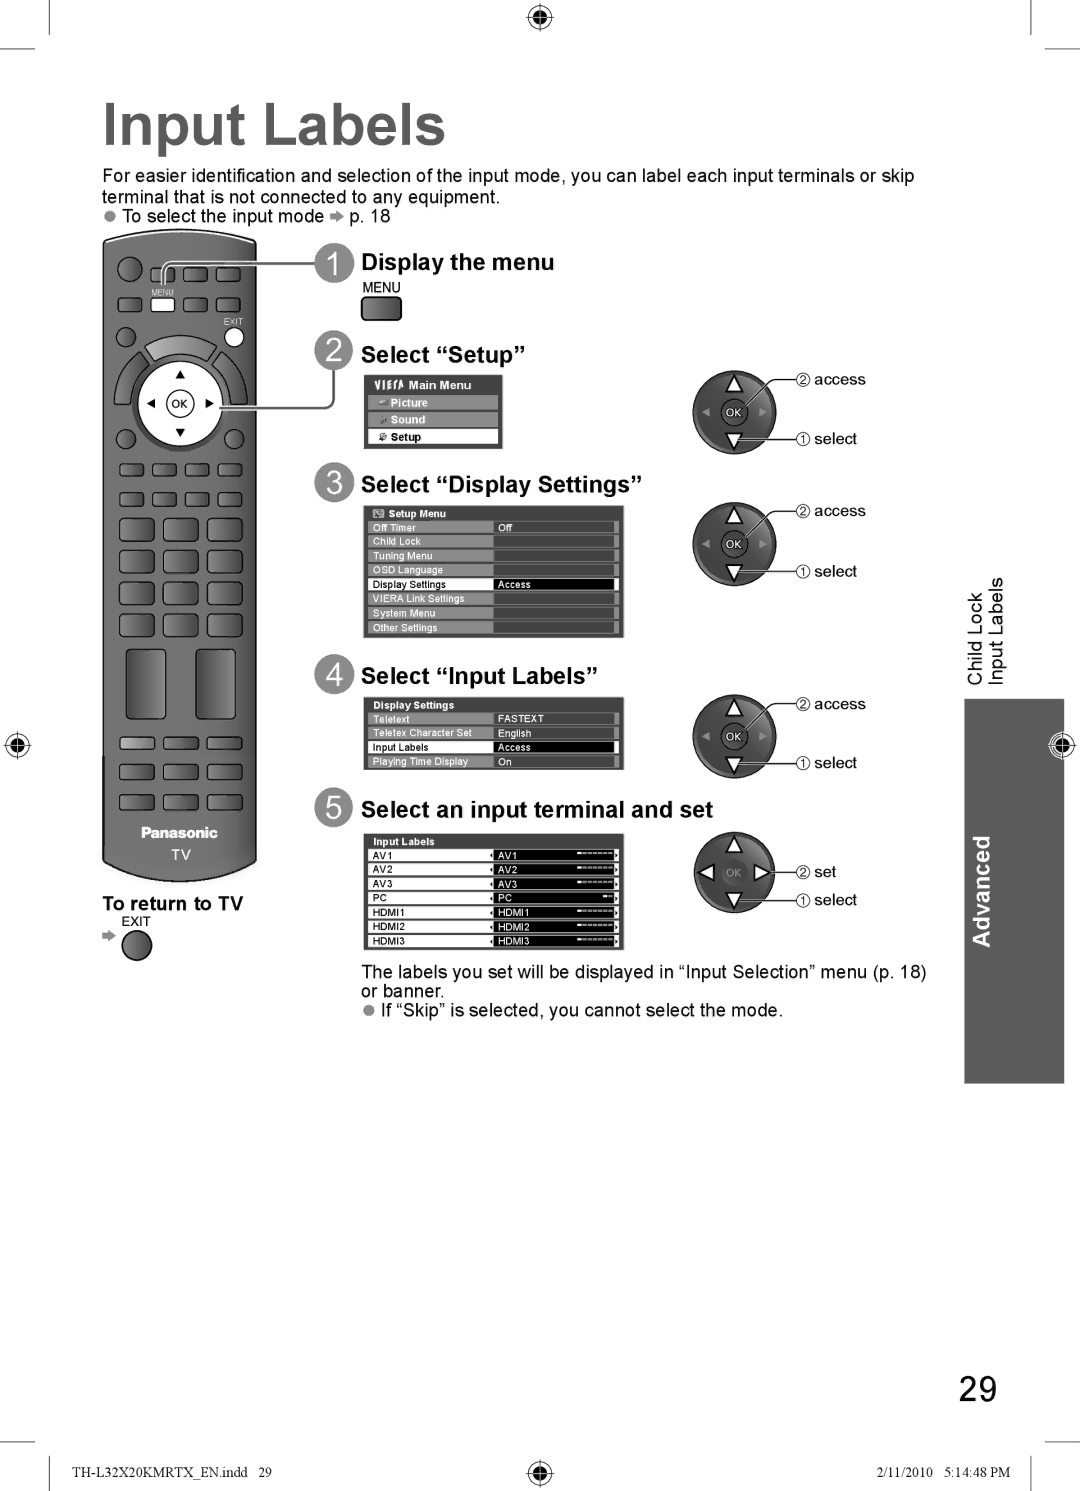
Panasonic TH-L32X20X, TH-L32X20M, TH-L32X20R, TH-L32X20T manual Optional accessories, Rear of the TV

Page 7

Optional accessories

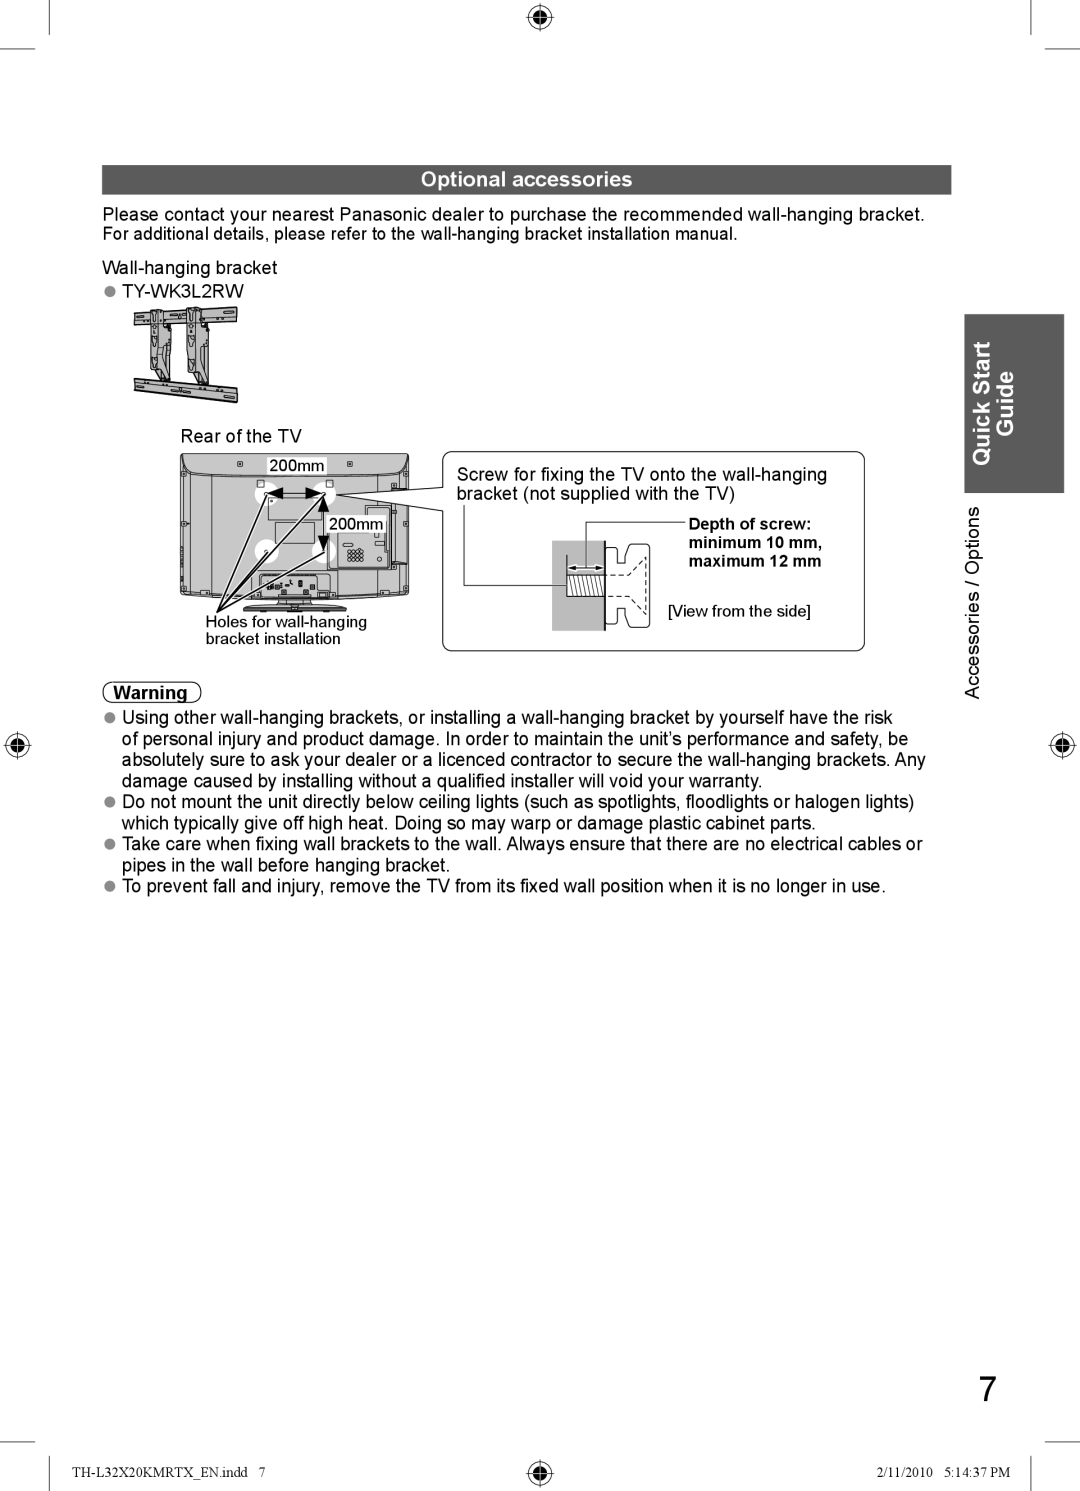
Please contact your nearest Panasonic dealer to purchase the recommended wall-hanging bracket. For additional details, please refer to the wall-hanging bracket installation manual.

Wall-hanging bracket

TY-WK3L2RW

Rear of the TV

200mm

200mm

Holes for wall-hanging bracket installation

Screw for fixing the TV onto the wall-hanging bracket (not supplied with the TV)

Depth of screw: minimum 10 mm,

maximum 12 mm [View from the side]

Guide

Accessories / Options Quick Start

Warning

Using other wall-hanging brackets, or installing a wall-hanging bracket by yourself have the risk of personal injury and product damage. In order to maintain the unit’s performance and safety, be absolutely sure to ask your dealer or a licenced contractor to secure the wall-hanging brackets. Any damage caused by installing without a qualified installer will void your warranty.

Do not mount the unit directly below ceiling lights (such as spotlights, floodlights or halogen lights) which typically give off high heat. Doing so may warp or damage plastic cabinet parts.

Take care when fixing wall brackets to the wall. Always ensure that there are no electrical cables or pipes in the wall before hanging bracket.

To prevent fall and injury, remove the TV from its fixed wall position when it is no longer in use.

7

TH-L32X20KMRTX_EN.indd 7

2/11/2010 5:14:37 PM
Image 7
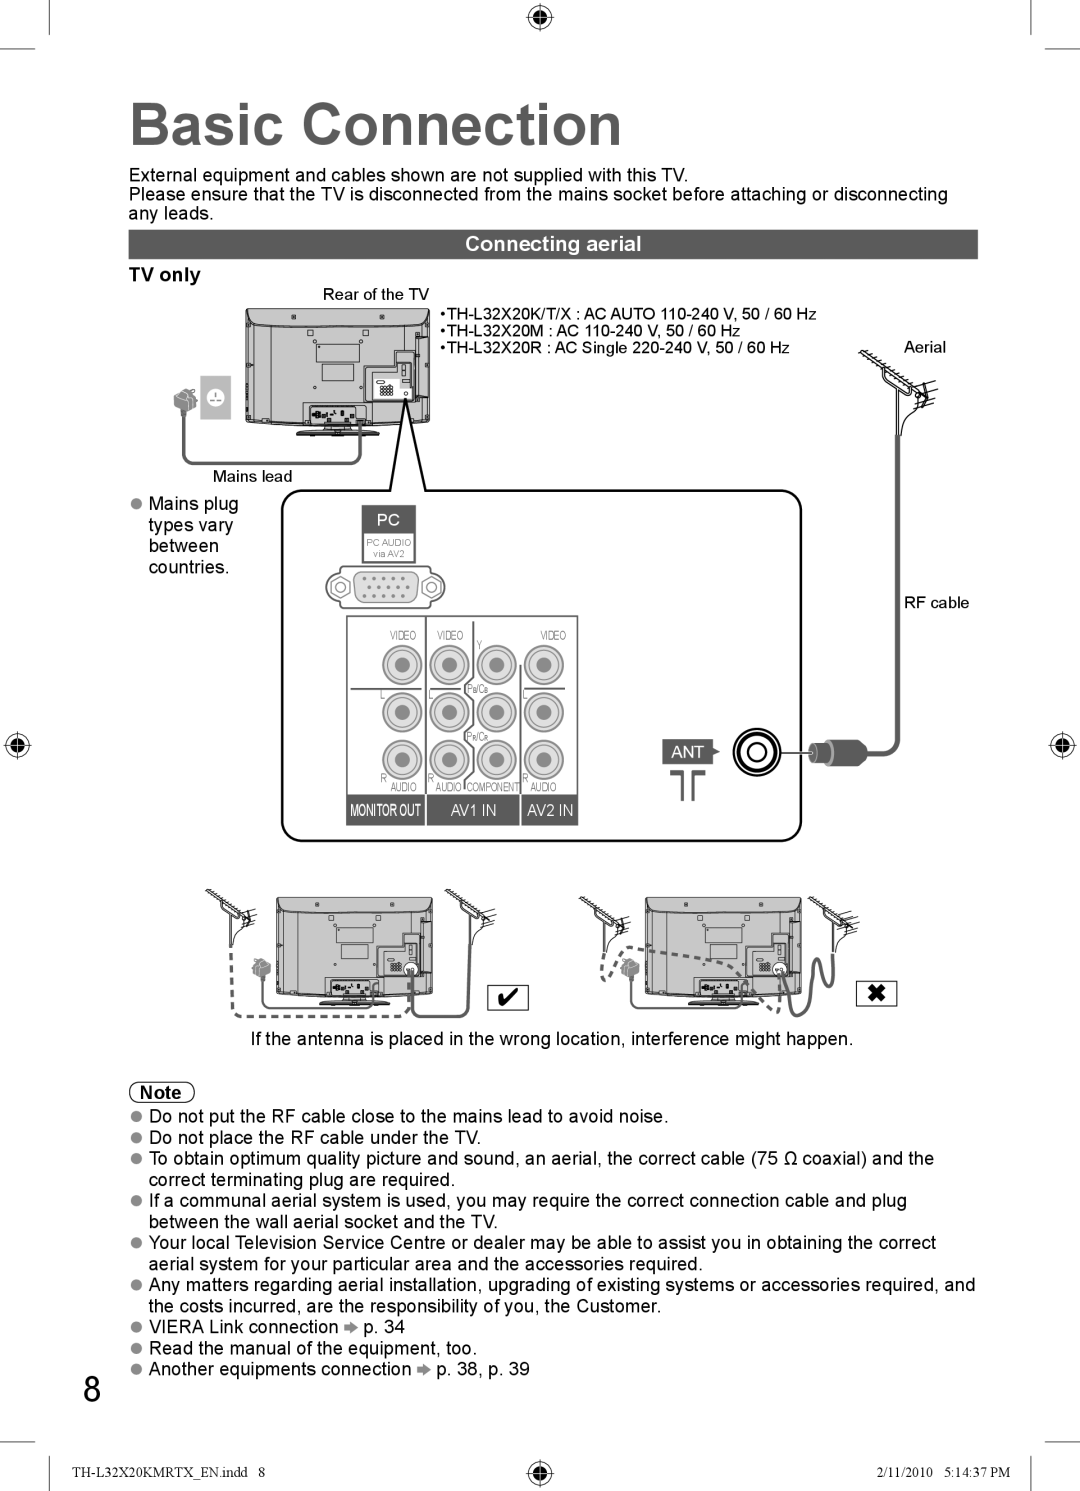
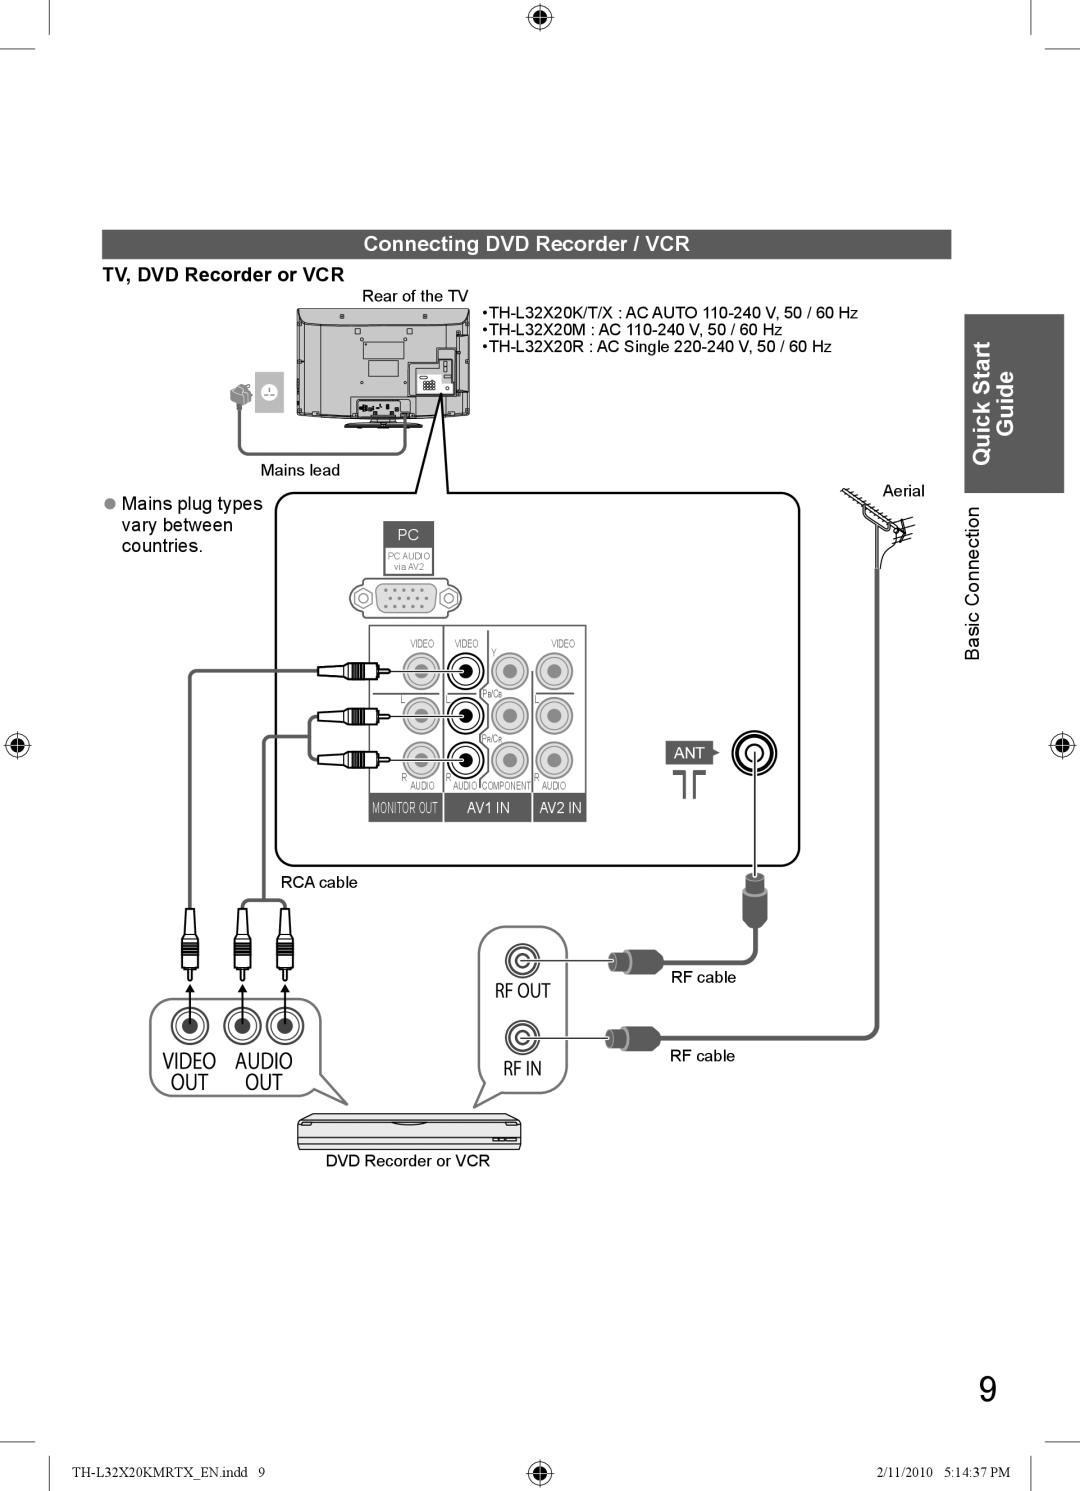
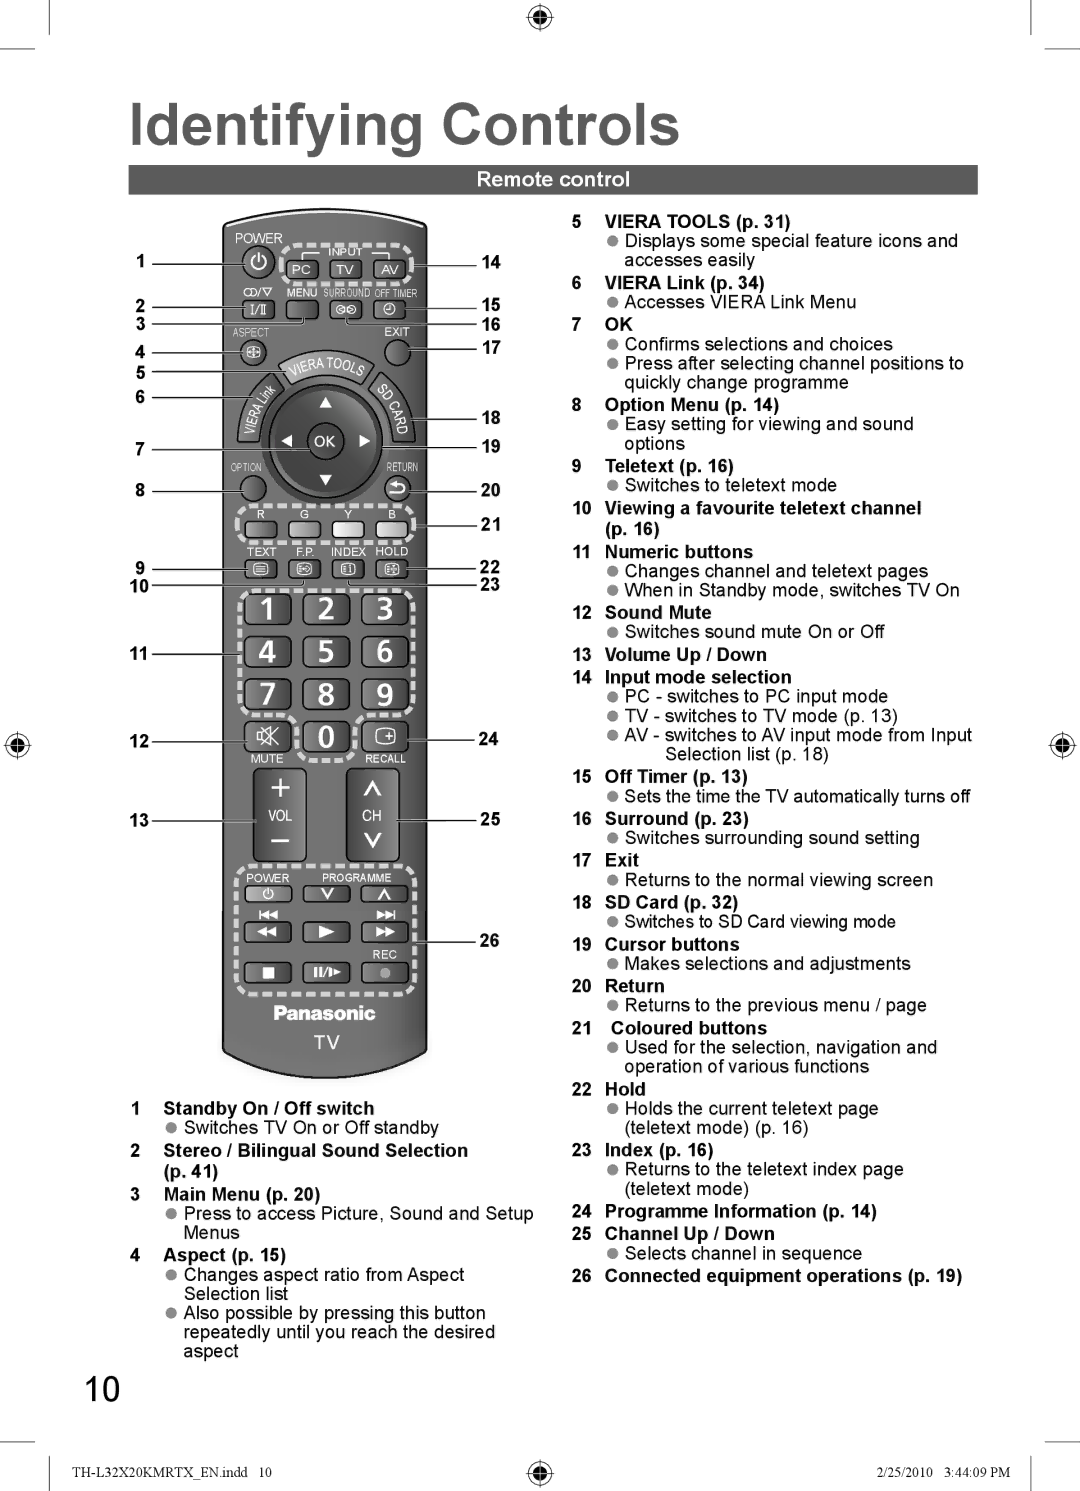
Contents English Operating InstructionsAmplifier with Personal Speaker System Computer SD CardBlu-ray Disc player Contents Safety Precautions Adjust the LCD panel to your desired angle Attaching the pedestal Accessories / OptionsRear of the TV Optional accessoriesBasic Connection Connecting aerialTV only Monitor OUT AV1 AV2 Identifying Controls Remote controlUsing the On Screen Displays Select Home Auto TuningPlug the TV into mains socket and switch On Select your languageSelect a channel Turn power onOff Timer Watching TVDisplay information banner Display the selectable settings for the current programmeChange OSD language Change aspect ratio To change the mode using the Aspect button onlyDisplay Aspect Selection list Viewing Teletext Switch to TeletextSelect the page up to View sub Watch TV while waiting for updateView in multi window Store frequently viewed pagesTo return to TV Selected mode is displayed on the screen Example AV2Watching External inputs ViewOperating the equipment with the TV remote control Select the item How to Use Menu FunctionsAdjust or select Display the menu Select the menuPicture SetupHow to Use Menu Functions OverviewEco Mode Adjustments / Configurations alternativesBasic picture mode Dynamic / Normal / Cinema / Game Viewing ModeSound Setup Licence ShippingCondition System SoftwareSelect a function Tuning and Editing ChannelsDisplay the menu Select Setup Select Tuning MenuManual Tuning Auto Tuning Set all TV channels automaticallyManual Tuning Set TV channel manually Fine TuningDisplay the menu Child LockChild Lock Control channel audience Select an input terminal and set Select Display SettingsInput Labels Select Input LabelsStart Shipping Condition Shipping Condition Reset settingsFollow the on screen instructions Follow the operation of each feature How to Use Viera ToolsDisplay icons of the feature Select a featureSelect a photo to be viewed Insert the SD Card Enter SD mode Photo ViewViewing from SD Card Select a folder to display the thumbnailMulti and Collage SlideshowTo use Amplifier Viera Link FunctionsViera Link Hdavi ControlTM To use Player theatre / Blu-ray Disc theatreViera Link Functions Power on linkPower off link Easy playbackViera Link Hdavi Control Select the equipment you want to accessMenu of the accessed equipment If you access non-VIERA Link equipmentSet to Home Cinema or TV Speaker Selection Speaker controlHome Cinema To listen with speakers HeadphonesExternal Equipment Camcorder Game EquipmentHdmi equipment To record / playbackTo watch DVDs To watch satellite BroadcastsChannel Allocation Technical InformationRegular + Nicam Mono Audio SignalStereo / Bilingual Sound Selection Pressing the Stereo / Bilingual Sound Selection buttonHdmi connection Applicable Hdmi featuresDVI connection PC from D-sub 15P Input signal that can be displayedPC from Hdmi terminal PC connection Sub 15-pin connector signalData format for Card browsing SD CardDisplay panel, Cabinet, Pedestal MaintenanceMains plug Check the position, direction, and connection of the aerial FAQsAn error message appears White spots or shadow images noiseNo image can be displayed When the equipment isRemote control does Chaotic image, noisyThis product incorporates the following software LicenceTH-L32X20K/T/X TH-L32X20M TH-L32X20R SpecificationsMemo Technical SpecificationsCustomer’s Record