Installation and Setup (Continued)
TAPING HEAD SETUP
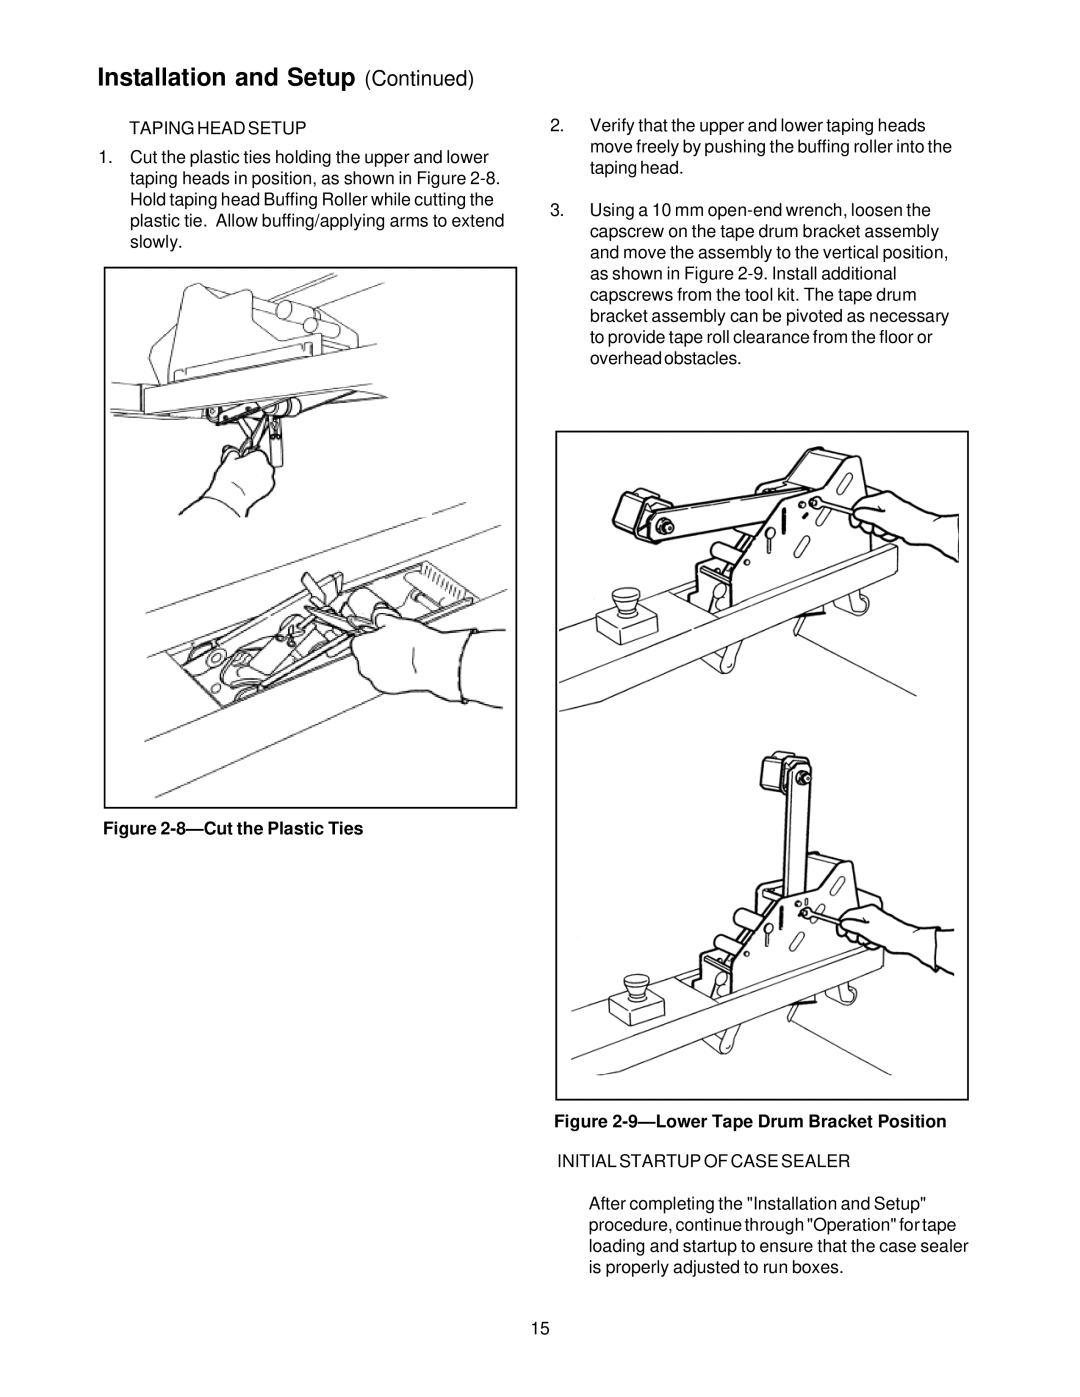
1.Cut the plastic ties holding the upper and lower taping heads in position, as shown in Figure
Figure 2-8—Cut the Plastic Ties
2.Verify that the upper and lower taping heads move freely by pushing the buffing roller into the taping head.
3.Using a 10 mm
Figure 2-9—Lower Tape Drum Bracket Position
INITIAL STARTUP OF CASE SEALER
After completing the "Installation and Setup" procedure, continue through "Operation" for tape loading and startup to ensure that the case sealer is properly adjusted to run boxes.
15