57
Installing a DIMM
Warning! DIMM of the same type, size and manufacturer must be installed into the same colored DIMM slots.
1Observe the ESD precautions and
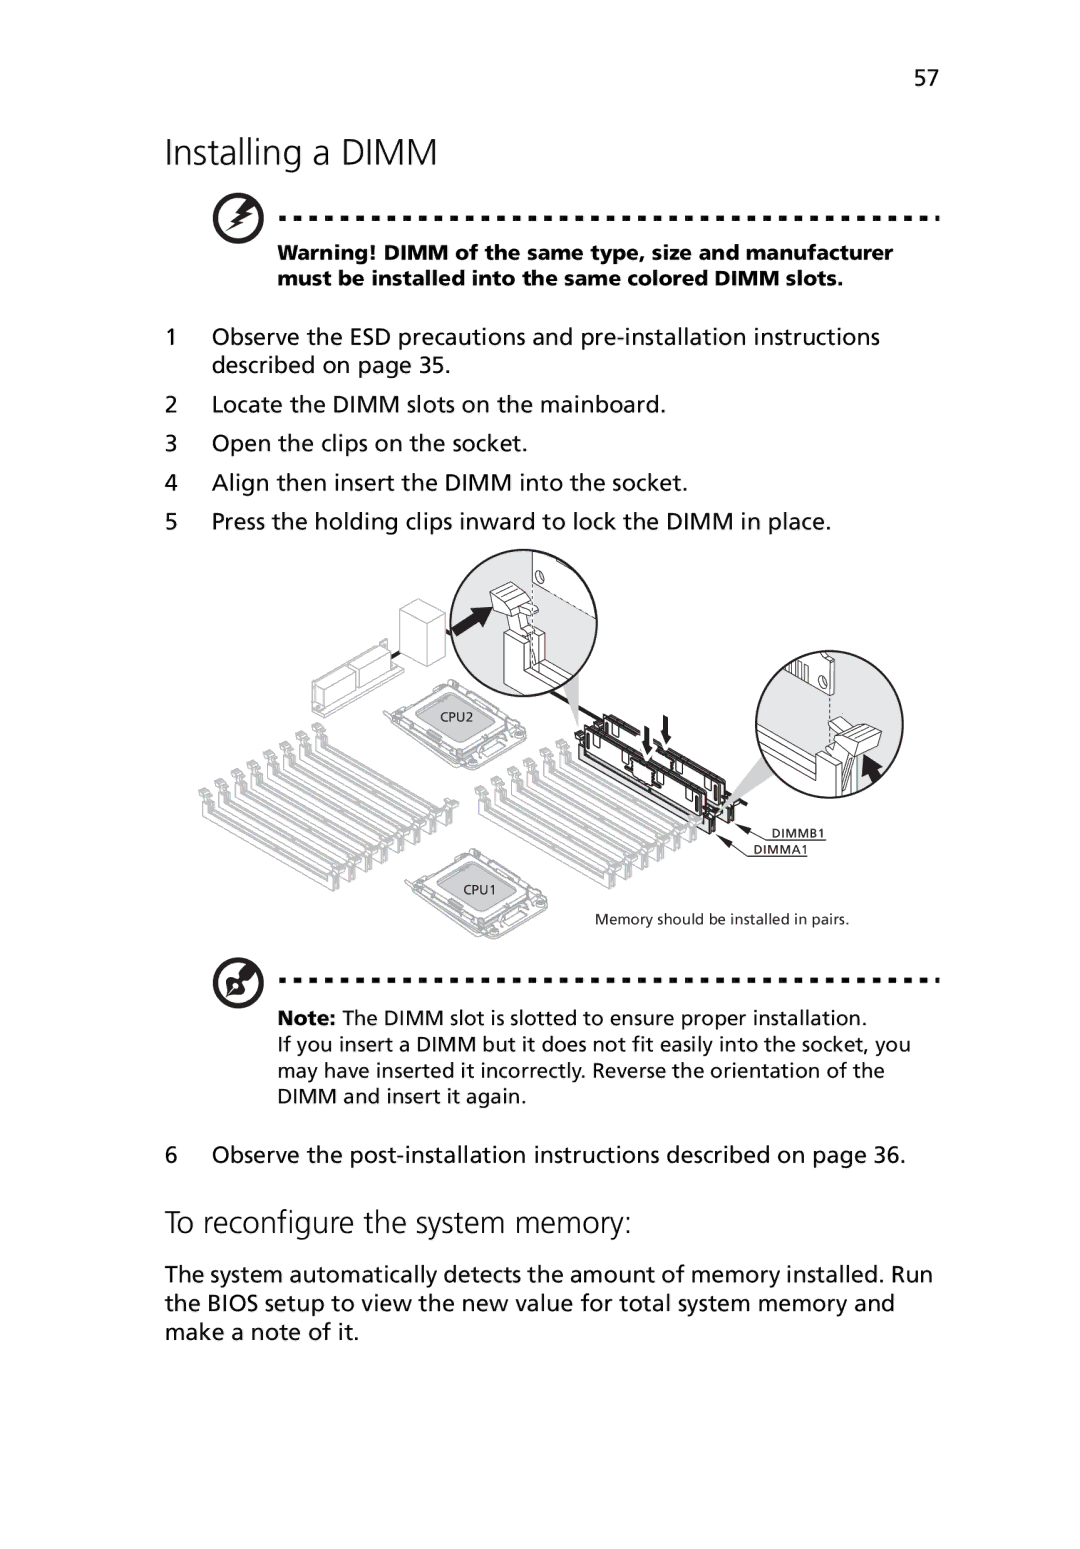
2Locate the DIMM slots on the mainboard.
3Open the clips on the socket.
4Align then insert the DIMM into the socket.
5Press the holding clips inward to lock the DIMM in place.
CPU2
CPU1
Memory should be installed in pairs.
Note: The DIMM slot is slotted to ensure proper installation.
If you insert a DIMM but it does not fit easily into the socket, you may have inserted it incorrectly. Reverse the orientation of the DIMM and insert it again.
6 Observe the
To reconfigure the system memory:
The system automatically detects the amount of memory installed. Run the BIOS setup to view the new value for total system memory and make a note of it.