49
3 Remove the HSF assembly.
Important: Before removing a CPU from the mainboard, make sure to create a backup file of all important data.
(1)Observe the ESD precautions and
Warning! The heat sink becomes very hot when the system is on. NEVER touch the heat sink with any metal or with your hands.
(2)Disconnect the CPU fan cable from its mainboard connector.
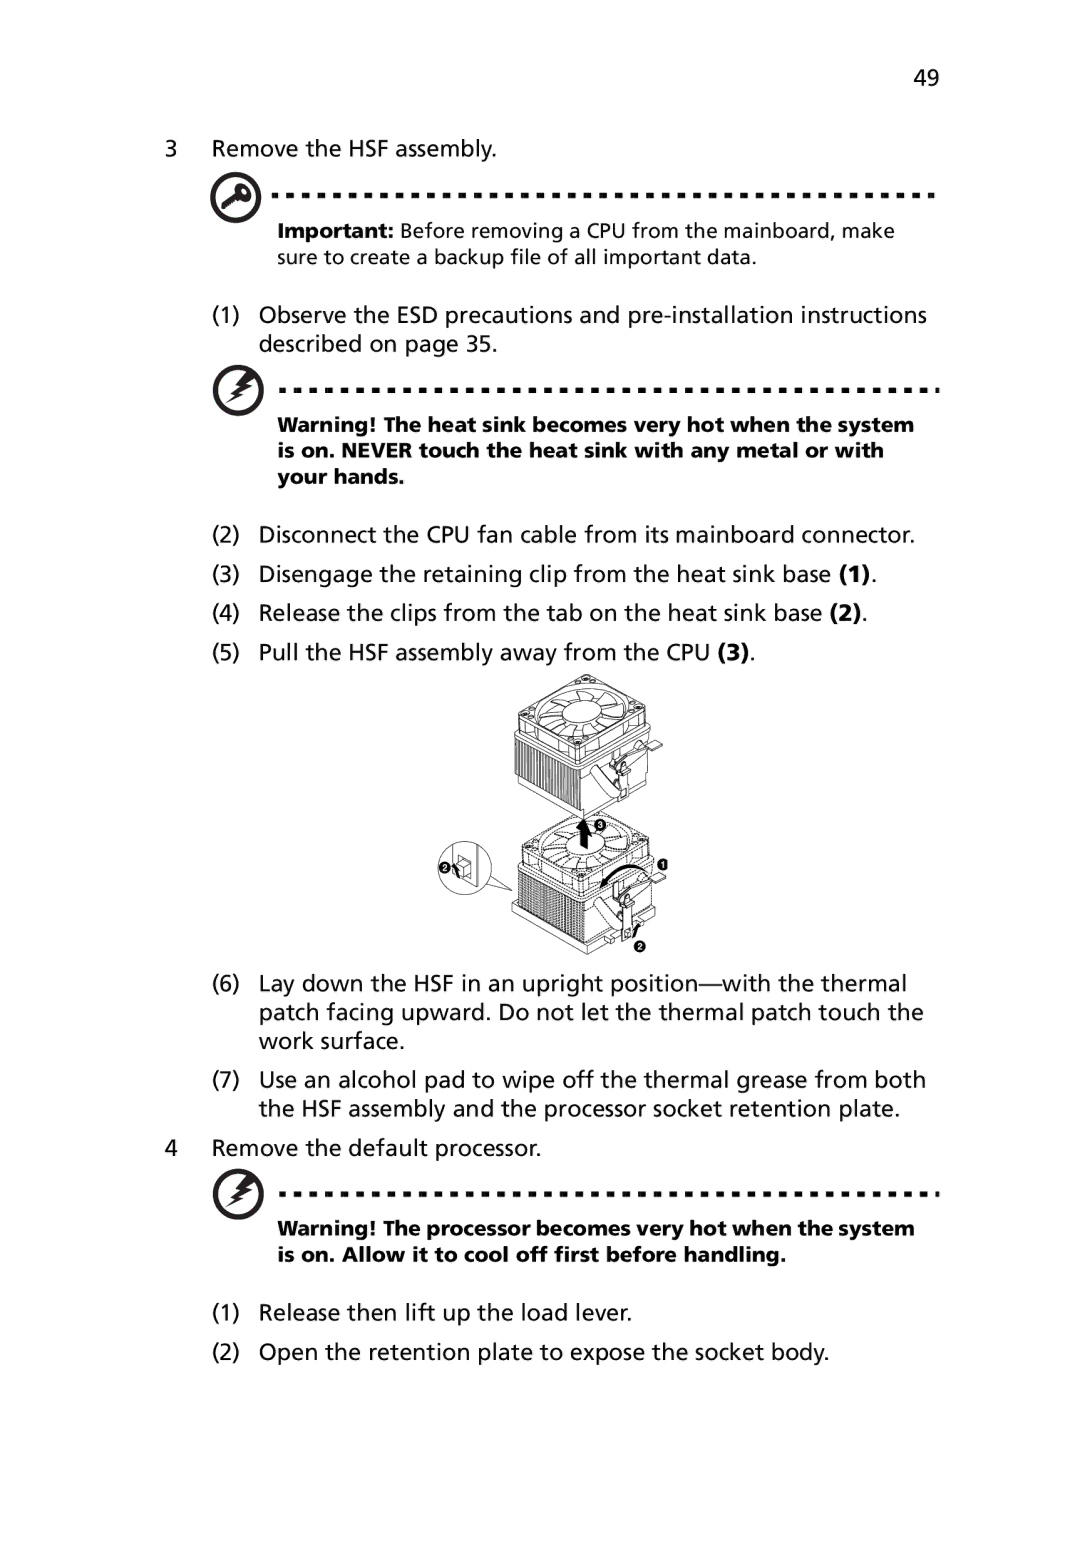
(3)Disengage the retaining clip from the heat sink base (1).
(4)Release the clips from the tab on the heat sink base (2).
(5)Pull the HSF assembly away from the CPU (3).
(6)Lay down the HSF in an upright
(7)Use an alcohol pad to wipe off the thermal grease from both the HSF assembly and the processor socket retention plate.
4 Remove the default processor.
Warning! The processor becomes very hot when the system is on. Allow it to cool off first before handling.
(1)Release then lift up the load lever.
(2)Open the retention plate to expose the socket body.