39
Configuring the hard drive
The two HDD cage bays of the Altos G5450 accommodates both
The system ships out with only a single HDD cage occupying the top cage bay. You have the option to purchase an extra HDD cage to provide the system with additional storage capacity and scalability. Contact your local Acer representative for more information.
Note: The HDD cage comes with HDD dummy covers. You need to purchase a blank HDD carrier to install a hard drive.
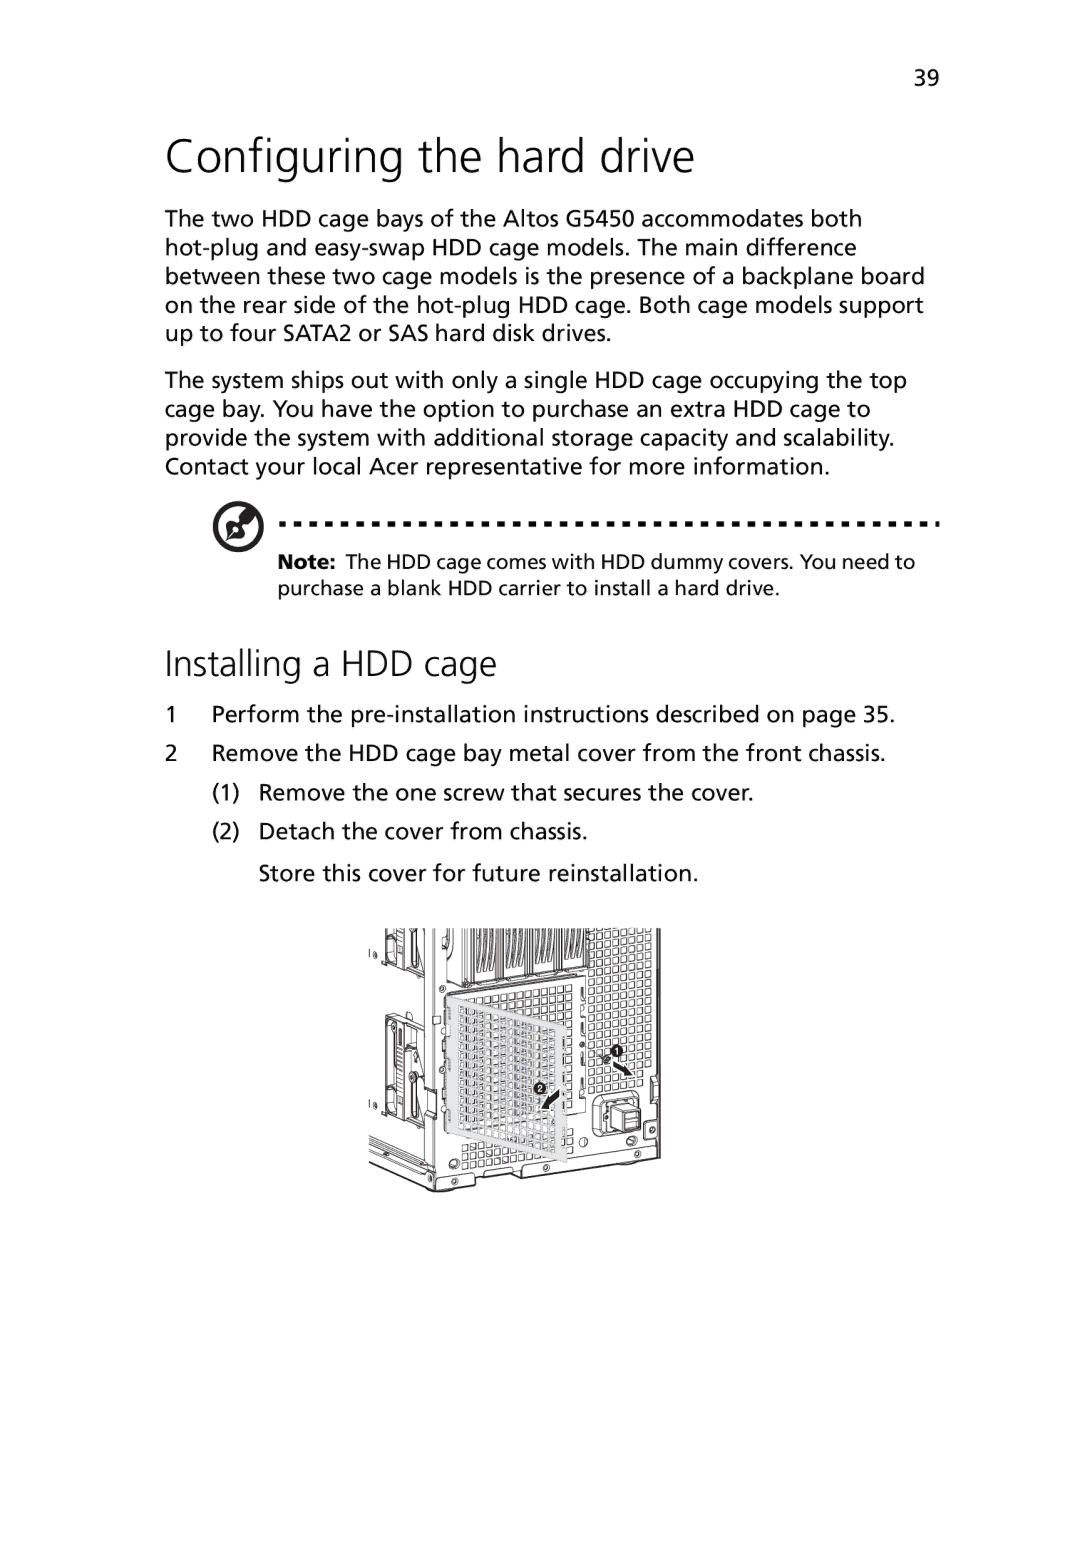
Installing a HDD cage
1Perform the
2Remove the HDD cage bay metal cover from the front chassis.
(1)Remove the one screw that secures the cover.
(2)Detach the cover from chassis.
Store this cover for future reinstallation.