MAINTENANCE
MAINTENANCE
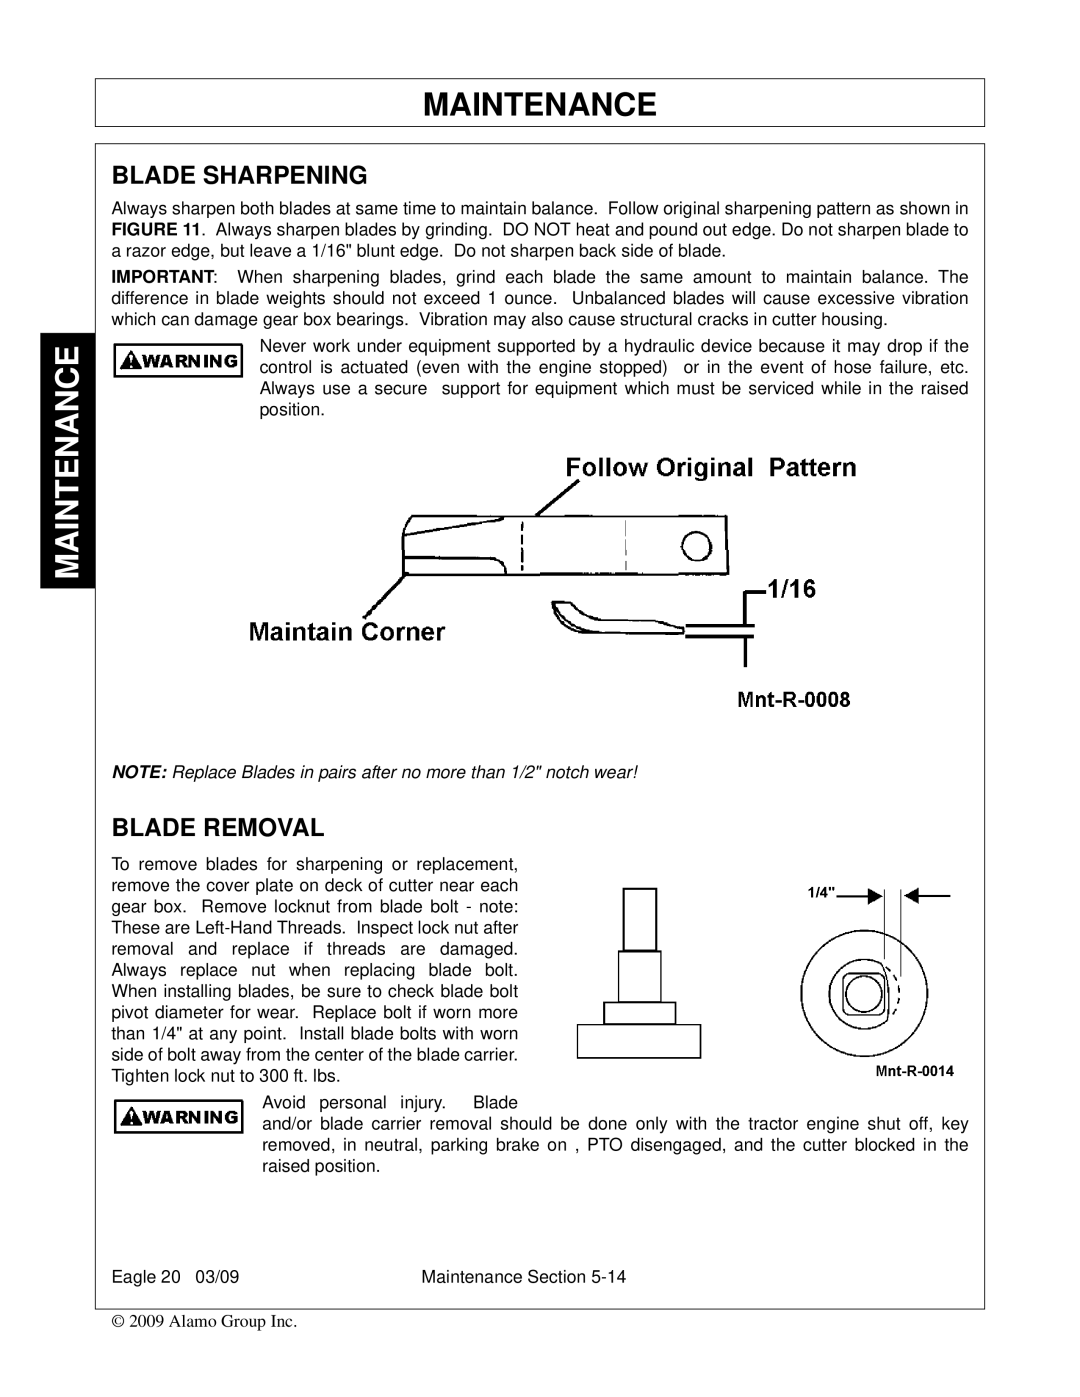
BLADE SHARPENING
Always sharpen both blades at same time to maintain balance. Follow original sharpening pattern as shown in FIGURE 11. Always sharpen blades by grinding. DO NOT heat and pound out edge. Do not sharpen blade to a razor edge, but leave a 1/16" blunt edge. Do not sharpen back side of blade.
IMPORTANT: When sharpening blades, grind each blade the same amount to maintain balance. The difference in blade weights should not exceed 1 ounce. Unbalanced blades will cause excessive vibration which can damage gear box bearings. Vibration may also cause structural cracks in cutter housing.
Never work under equipment supported by a hydraulic device because it may drop if the control is actuated (even with the engine stopped) or in the event of hose failure, etc. Always use a secure support for equipment which must be serviced while in the raised position.
NOTE: Replace Blades in pairs after no more than 1/2" notch wear!
BLADE REMOVAL
To remove blades for sharpening or replacement, remove the cover plate on deck of cutter near each gear box. Remove locknut from blade bolt - note: These are
Avoid personal injury. Blade
and/or blade carrier removal should be done only with the tractor engine shut off, key removed, in neutral, parking brake on , PTO disengaged, and the cutter blocked in the raised position.
Eagle 20 03/09 | Maintenance Section |
© 2009 Alamo Group Inc.