ASSEMBLY
Tongue Attachment |
| ||
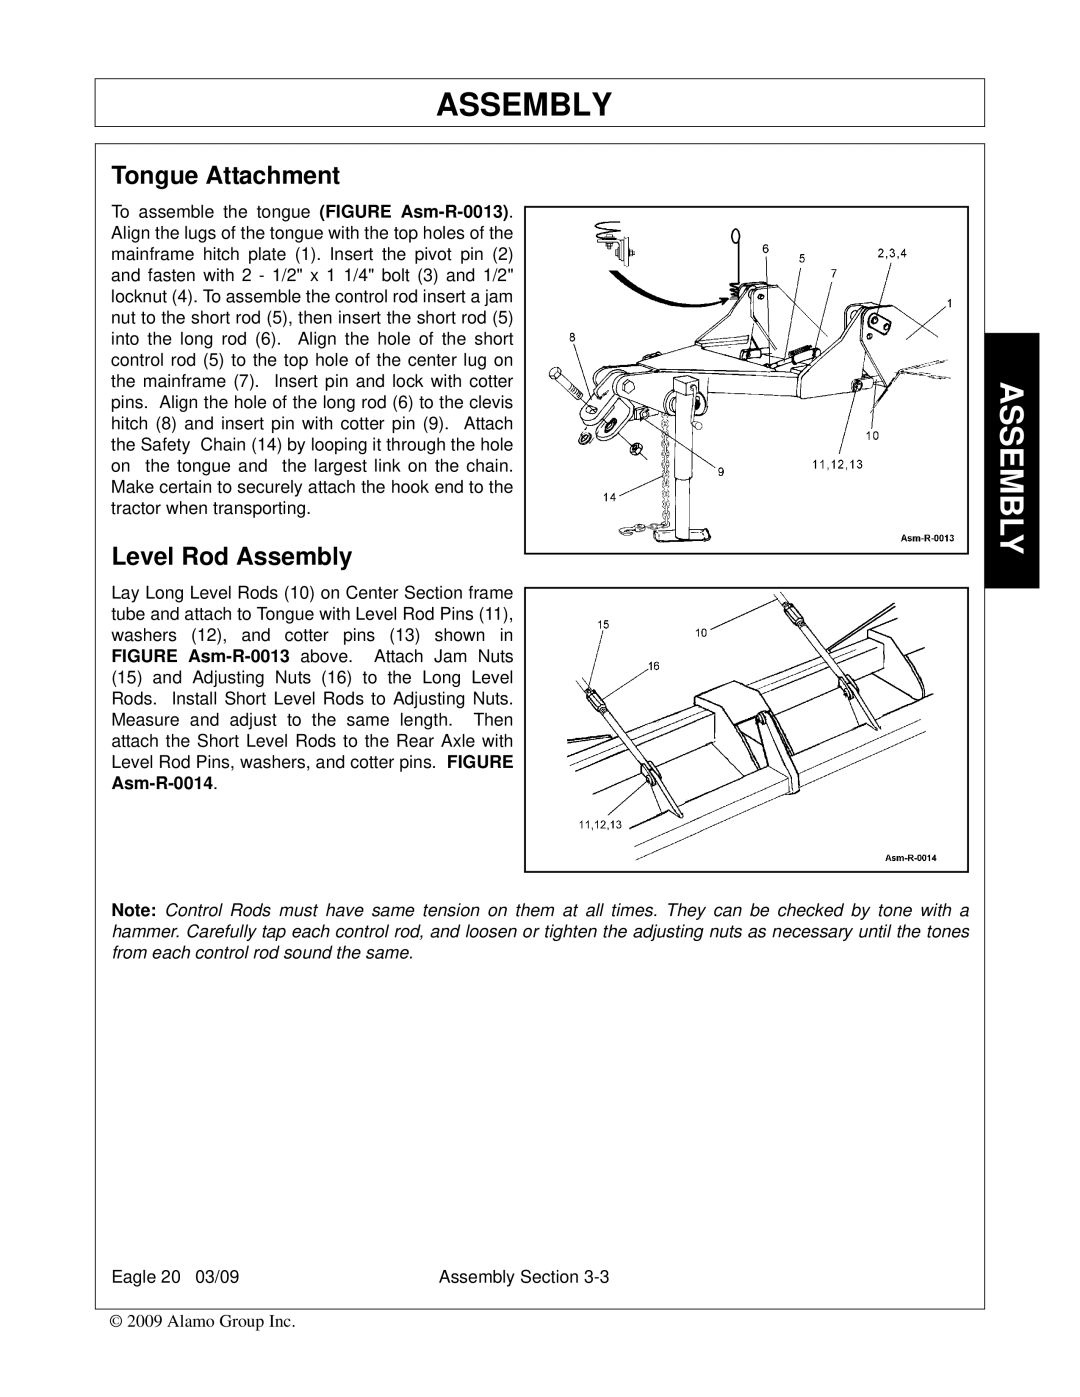
To assemble the tongue (FIGURE |
|
|
|
|
| ||
Align the lugs of the tongue with the top holes of the |
|
|
|
mainframe hitch plate (1). Insert the pivot pin (2) |
|
|
|
and fasten with 2 - 1/2" x 1 1/4" bolt (3) and 1/2" |
|
|
|
locknut (4). To assemble the control rod insert a jam |
|
|
|
nut to the short rod (5), then insert the short rod (5) |
|
|
|
into the long rod (6). Align the hole of the short |
|
|
|
| |||
control rod (5) to the top hole of the center lug on |
|
| ASSEMBLY |
the mainframe (7). Insert pin and lock with cotter |
|
| |
pins. Align the hole of the long rod (6) to the clevis |
|
| |
|
|
| |
hitch (8) and insert pin with cotter pin (9). Attach |
|
|
|
the Safety Chain (14) by looping it through the hole |
|
|
|
on the tongue and the largest link on the chain. |
|
|
|
Make certain to securely attach the hook end to the |
|
|
|
tractor when transporting. |
|
|
|
Level Rod Assembly |
|
|
|
|
|
| |
Lay Long Level Rods (10) on Center Section frame |
|
|
|
|
| ||
tube and attach to Tongue with Level Rod Pins (11), |
|
|
|
washers (12), and cotter pins (13) shown in |
|
|
|
FIGURE |
|
|
|
(15) and Adjusting Nuts (16) to the Long Level |
|
|
|
Rods. Install Short Level Rods to Adjusting Nuts. |
|
|
|
Measure and adjust to the same length. Then |
|
|
|
attach the Short Level Rods to the Rear Axle with |
|
|
|
Level Rod Pins, washers, and cotter pins. FIGURE |
|
|
|
|
|
| |
|
|
|
|
Note: Control Rods must have same tension on them at all times. They can be checked by tone with a hammer. Carefully tap each control rod, and loosen or tighten the adjusting nuts as necessary until the tones from each control rod sound the same.
Eagle 20 03/09 | Assembly Section |
© 2009 Alamo Group Inc.