ALESIS FIREWIRE CONTROL PANEL (WINDOWS)
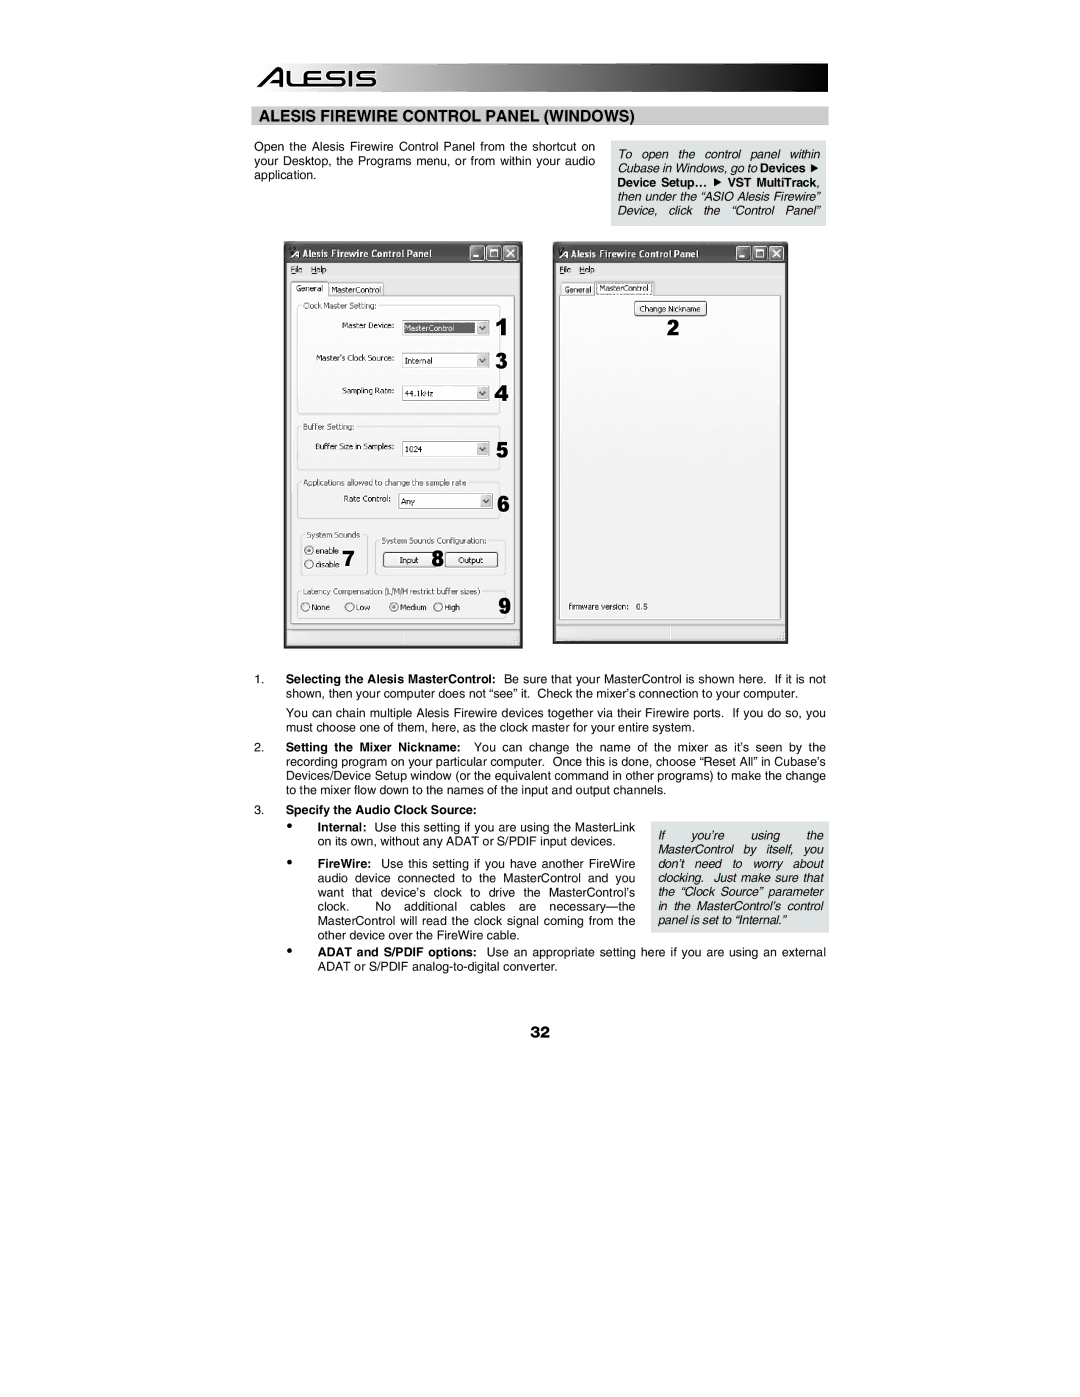
Open the Alesis Firewire Control Panel from the shortcut on your Desktop, the Programs menu, or from within your audio application.
To open the control panel within Cubase in Windows, go to Devices f Device Setup… f VST MultiTrack, then under the “ASIO Alesis Firewire” Device, click the “Control Panel”
12
3
4
5
6
7 8
9
1.Selecting the Alesis MasterControl: Be sure that your MasterControl is shown here. If it is not shown, then your computer does not “see” it. Check the mixer’s connection to your computer.
You can chain multiple Alesis Firewire devices together via their Firewire ports. If you do so, you must choose one of them, here, as the clock master for your entire system.
2.Setting the Mixer Nickname: You can change the name of the mixer as it’s seen by the recording program on your particular computer. Once this is done, choose “Reset All” in Cubase’s Devices/Device Setup window (or the equivalent command in other programs) to make the change to the mixer flow down to the names of the input and output channels.
3.Specify the Audio Clock Source:
y Internal: Use this setting if you are using the MasterLink on its own, without any ADAT or S/PDIF input devices.
y FireWire: Use this setting if you have another FireWire audio device connected to the MasterControl and you want that device’s clock to drive the MasterControl’s
clock. No additional cables are
If you’re using the MasterControl by itself, you don’t need to worry about clocking. Just make sure that the “Clock Source” parameter in the MasterControl’s control panel is set to “Internal.”
yADAT and S/PDIF options: Use an appropriate setting here if you are using an external ADAT or S/PDIF
32
