REAR PANEL FEATURES
|
|
| 5 | 5 | 5 | 65 | 6 | 6 | 7 |
|
|
|
| 1 | 1 |
|
|
|
|
|
|
|
| 9 | 9 |
| 3 | 3 | 5 | 5 | 5 | 65 | 6 | 6 | 7 | 8 | ||
|
|
| ||||||||||
2 | 2 |
| 4 |
|
|
|
|
|
|
|
|
|
![]()
![]()
![]()
![]() 13
13 ![]()
![]()
![]()
10 10 10 | 11 | 11 | 12 |
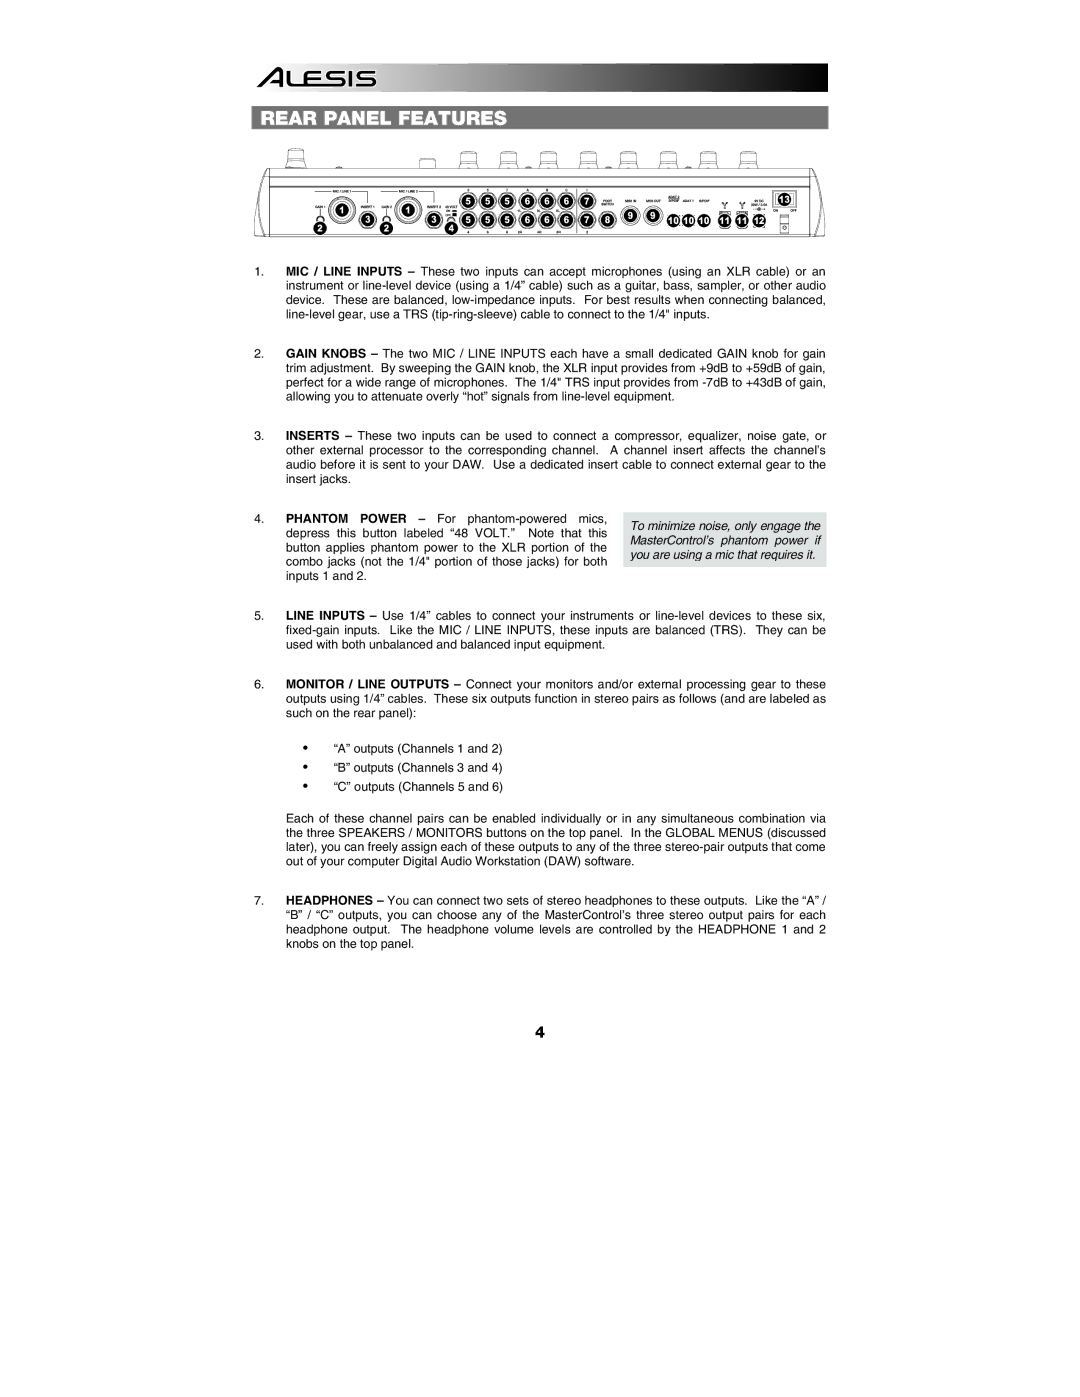
1. MIC / LINE INPUTS – These two inputs can accept microphones (using an XLR cable) or an instrument or
2. GAIN KNOBS – The two MIC / LINE INPUTS each have a small dedicated GAIN knob for gain trim adjustment. By sweeping the GAIN knob, the XLR input provides from +9dB to +59dB of gain, perfect for a wide range of microphones. The 1/4" TRS input provides from
3. INSERTS – These two inputs can be used to connect a compressor, equalizer, noise gate, or other external processor to the corresponding channel. A channel insert affects the channel’s audio before it is sent to your DAW. Use a dedicated insert cable to connect external gear to the insert jacks.
4. PHANTOM POWER – For
To minimize noise, only engage the
depress this button labeled “48 VOLT.” Note that this
button applies phantom power to the XLR portion of the
MasterControl’s phantom power if you are using a mic that requires it.
combo jacks (not the 1/4" portion of those jacks) for both inputs 1 and 2.
5.LINE INPUTS – Use 1/4” cables to connect your instruments or
6.MONITOR / LINE OUTPUTS – Connect your monitors and/or external processing gear to these outputs using 1/4” cables. These six outputs function in stereo pairs as follows (and are labeled as such on the rear panel):
y“A” outputs (Channels 1 and 2)
y“B” outputs (Channels 3 and 4)
y“C” outputs (Channels 5 and 6)
Each of these channel pairs can be enabled individually or in any simultaneous combination via the three SPEAKERS / MONITORS buttons on the top panel. In the GLOBAL MENUS (discussed later), you can freely assign each of these outputs to any of the three
7.HEADPHONES – You can connect two sets of stereo headphones to these outputs. Like the “A” / “B” / “C” outputs, you can choose any of the MasterControl’s three stereo output pairs for each headphone output. The headphone volume levels are controlled by the HEADPHONE 1 and 2 knobs on the top panel.
4
