(B) DAW CONTROL: CHANNELS
4 | 3 |
|
|
| |
| 3 |
|
|
| 5 |
| 3 |
|
|
| 6 |
| 3 |
|
| 1 | 2 |
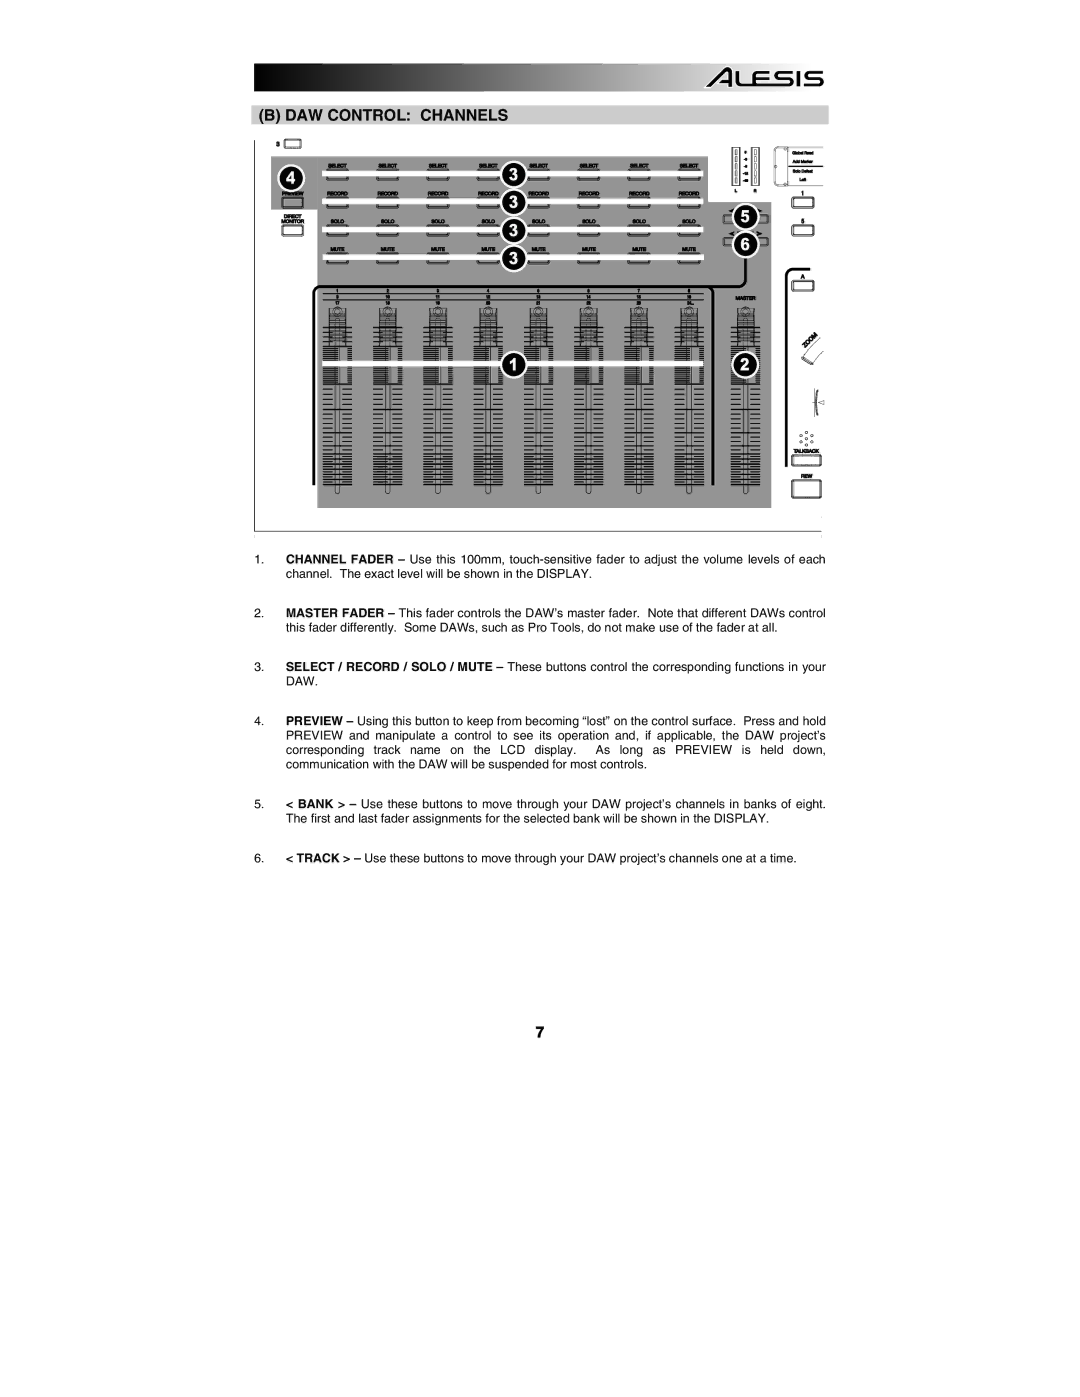
1.CHANNEL FADER – Use this 100mm,
2.MASTER FADER – This fader controls the DAW’s master fader. Note that different DAWs control this fader differently. Some DAWs, such as Pro Tools, do not make use of the fader at all.
3.SELECT / RECORD / SOLO / MUTE – These buttons control the corresponding functions in your DAW.
4.PREVIEW – Using this button to keep from becoming “lost” on the control surface. Press and hold PREVIEW and manipulate a control to see its operation and, if applicable, the DAW project’s corresponding track name on the LCD display. As long as PREVIEW is held down, communication with the DAW will be suspended for most controls.
5.< BANK > – Use these buttons to move through your DAW project’s channels in banks of eight. The first and last fader assignments for the selected bank will be shown in the DISPLAY.
6.< TRACK > – Use these buttons to move through your DAW project’s channels one at a time.
7
