User’s Guide
For US Customers
Address
Model Number
Trade Name
Responsible party
Important Safety Instructions
Table of Contents
Printing on Photo Realistic Labels
What to Do If the Power Is Shut Off While Printing
Introduction
Product Support Supplies
Service, Support and Supplies
Warranty
For US Customers
Product Label
Learn the Major Functions Operations of Your Printer
Major Functions Operations
Remove the packing materials
Getting Your Printer Ready
Getting Your Printer Ready
Removing the outside packing materials
Removing the carriage packing material
Opening the front cover
Locating the printer
How to attach the Macintosh interface module
How to remove the Macintosh interface module
Closing the front cover
Check the Scsi device number
Connecting Cables
Connecting the printer to your computer
Power cord connections
Printer Front View
Name and Function of Each Part of the Printer
Inside the Printer
Printer Rear View
Control Panel
Paper Feed Switch
Identifying Ink Cartridge and Paper Types
Installing Ink Cartridges
Place the ink cartridges
Installing Ink Cartridges
Take up any slack in the ribbon
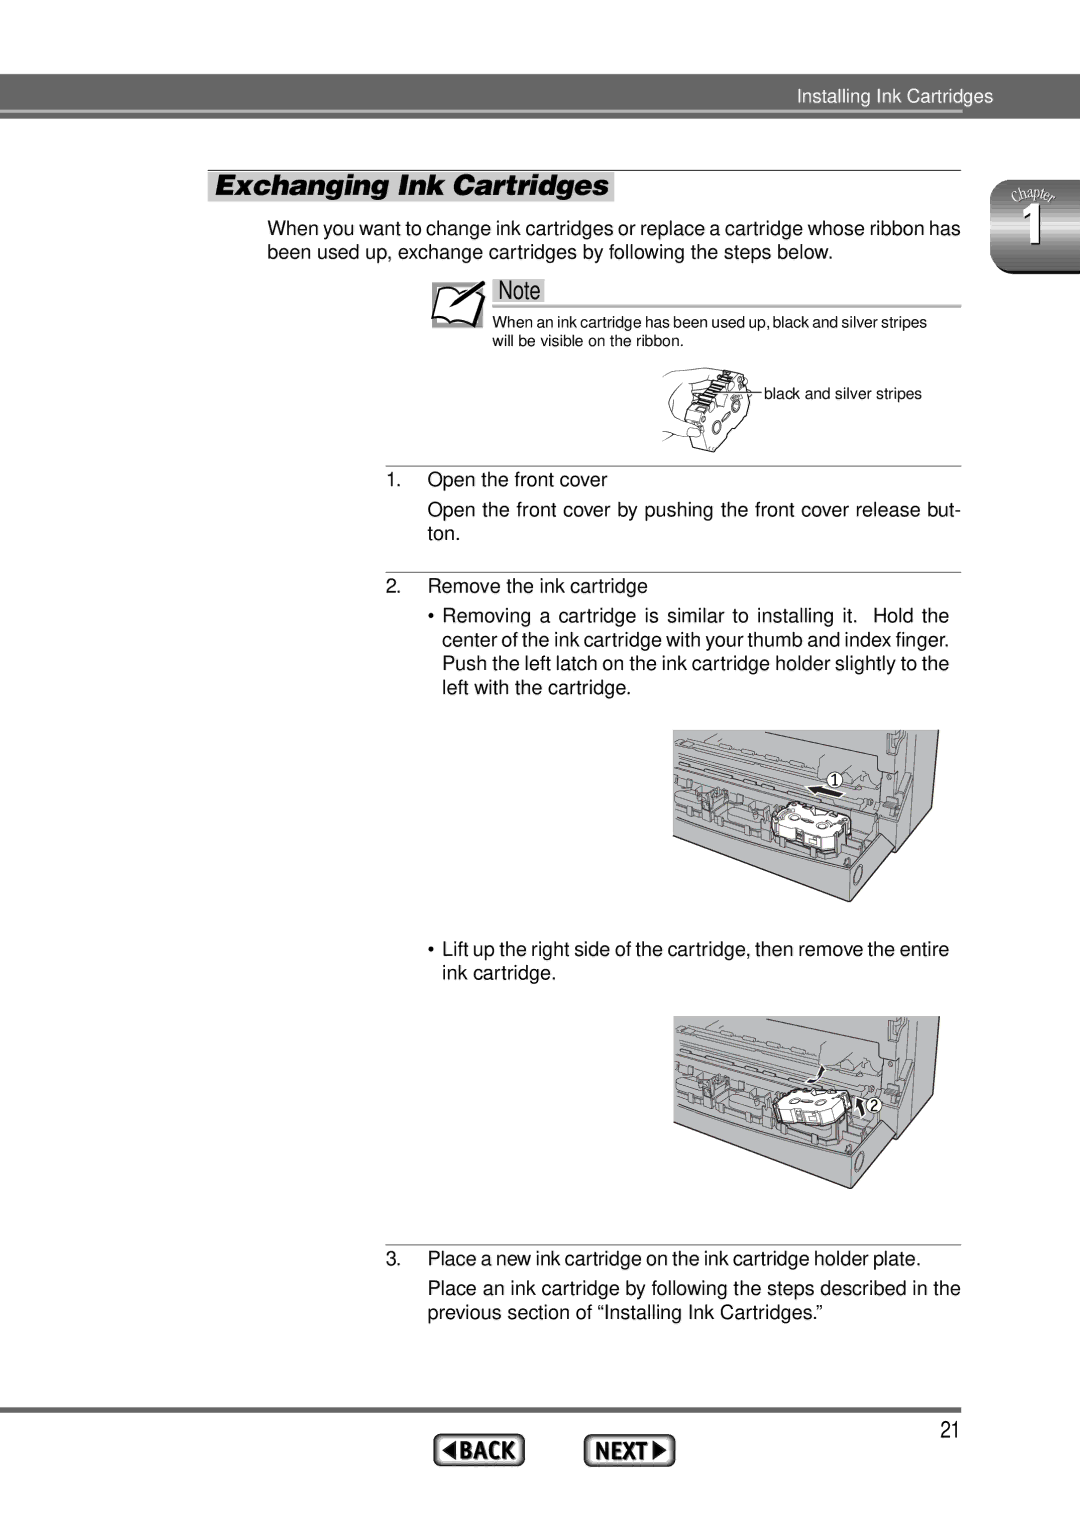
Open the front cover
Major Functions and Operations
Place a new ink cartridge on the ink cartridge holder plate
Exchanging Ink Cartridges
Remove the ink cartridge
Paper Types and Available Feeding Modes
Loading Paper
Loading Paper
Place the paper in the sheet feeder
Loading Paper in Automatic Feed Mode
Pull out the paper support Switch the paper feed mode
Push the paper support
Adjust the paper feed guide to the paper size
Load paper
Lift the paper stopper
Set the paper feed switch to position M
Loading Paper in Manual Feed Mode
Insert paper straight into the sheet feeder
Insert paper
System Requirements
Installing the Printer Driver
Preparing for Installation
Purpose of the Printer Driver
Installing the Printer Driver
Contents of the Installation Disks
From the Apple menu, select the Chooser
Using Balloon Help
Selecting the MD-1300 Driver
Click on the OK button to close the dialog box
Click on the MD-1300 printer driver icon
MD-1300
Click on the close box to close the Chooser
Print Dialog Box
Testing the Printer
Setup Dialog Box
Using the Print Desktop command
Print Preview
Turning off the Power
Turning the Power On or Off
Turning on the Power
Placing an ink cartridge in your printer
Printing Operations
Printing Monochrome
Requirements
Loading the paper in your printer
Setting up the printer driver for printing
After making any changes, click Print to start printing
∙ Printing data for color printing
Printing Color
Placing ink cartridges in your printer
∙ Ink cartridges
Setting up the printer driver for printing
Printing
To Print in Colors Similar to Those in a Photograph
¨Open the ColorSyncTM System Characteristic Document
¨ Set the Monitor
¨ Set the Characteristic
¨ Start Printing
¨ Enable the ColorSyncTM Function During Printing
¨ Display the Print Dialog Box
Major Functions and Operations
Learning to Use the Many Functions Your Printer
Various Printing Operations
Requirements
Photographic-Quality Color Printing
¨ Prepare the Image to Be Printed
¨ Install the Photographic-Quality Ink Cartridges
Various Printing Operations
¨ Print
¨ Set Up the Printer Driver for Printing
Color matching is normally set to Drivers Matching
Printing on Photographic-Quality Paper 4 x 6 / 100 x 148 mm
¨ Prepare the Image to be Printed
Guide sheet
¨ Set Up the Printer Driver for Printing
Make sure that Colors is set to Millions of Colors
Printing on Photographic-Quality Labels
Stickers
¨ Create Data for Printing on Photographic-Quality La- bels
¨ Load the Photographic-Quality Labels in Your Printer
¨ Set Up the Printer Driver for Printing
¨ Print
Photo Realistic Labels Part No
Printing Full Color Data at 1200 x 600 dpi
¨ Load Paper
¨ Install the Ink Cartridges
Photo Realistic Paper selected
Make color matching selections as required
Full Color & Photo Realistic Finishing Glossy Finish
Printing Method
∙ Multi spot color printing
Printing in Spot Color Metallic and White Color printing
Types of Spot Color Printing
∙ Single spot color printing
¨ Create Data for Spot Color Printing
Single Spot Color Printing
¨ Install the Ink Cartridge
¨ Set Up the Printer Driver for Printing
Page
Click Print in the Print dialog box
Multi Spot Color Printing
¨ Create Data for Spot Color Printing
Page
Spot color
∙ Color compositions using Cymk settings n/100%
¨ Load Paper in Your Printer
¨ Install the Spot Ink Cartridges
¨ Set Up the Printer Driver for Printing
Click Preview in the Print dialog box
Printing starts
Full Color + Spot Color Printing in Multi-page Mode
¨ Create an Image for Full Color + Spot Color Printing
¨ Prepare the Spot Color Image
¨ Install the Spot Color Ink Cartridges
¨ Set Up the Printer Driver for Printing
¨ Print
Click Preview in the Print dialog box
Open the full color data file in your application
¨ Prepare the Full Color Data
¨ Change the Cartridges
Simultaneous Full Color + Spot Color Printing
Create the full color and spot color data to be printed
¨ Create the Full Color + Spot Color Print Image
Color composition for indicating spot colors
¨ Install the Ink Cartridges
¨ Set Up the Printer Driver for Printing
Click Print in the Print dialog box to start printing
Printing Greeting Cards
¨Load the Greeting Card into the Printer
Install the ink cartridges into the ink cartridge holders
¨ Print
To start printing, click Print in the Print dialog box
100
101
Printing on Photo Realistic Labels
102
Select Print from the File menu
¨Set Up the Printer Driver for Printing
103
¨Print
104
∙ Iron
Printing on Back Print Film
105
∙ Paper to transfer the image to
106
Set the paper feed switch to position M
Insert the back print film into the printer
107
108
¨ Transfer the Image to Paper with an Iron
109
¨ Curl Correction
110
Unroll them, and the curl should be corrected
111
¨ Obtain a Matte Finish
Leave them rolled up for five minutes
Apply the iron
Examples
112
113
Making Iron-on Transfers
∙ Cloth to transfer the image to T-shirt, handkerchief, etc
114
Insert the iron-on transfer sheet into the printer
115
116
¨ Transfer the Iron-On to Cloth
Once the settings have been finished, click the OK but- ton
117
118
Material Selection
Transfer Procedure
119
Iron-on transfers can be used not only onto fabric items
120
Printing on Overhead Transparencies
121
¨ Set up the Transparency Separators
122
¨ Install the Ink Cartridges and Overhead Transparencies
123
124
125
Undercoating with a White Ink Cartridge
¨ Create Data for Full Color Printing
¨ Install the White Ink Cartridge
126
127
128
129
Photo Realistic Finishing Glossy Finish in Multi-page Mode
¨ Execute Full Color Printing
¨ Install Ink Cartridges
130
¨ Create Data
131
132
Printer Driver Functions
Printer Driver
134
Using the Chooser
Chooser Settings
Functions of the Printer Driver
135
Selecting a Device
Selecting the Scsi Port
136
Using AppleTalk
Background Printing
137
Setup Dialog Box
Default values are set as follows
Type
138
Size
Custom Paper Sizes Edit Button
Printer Effects
OK/Cancel
Reduce/Enlarge
Orientation
Print Dialog Box
Print
Cancel
Quality
Options
142
Multi-page Mode
Preview
Colors Dialog Box
143
Colors Dialog Box
Blends
Brightness
144
Spot Color Print
Multi-pass Black
Color Matching Options
Choose ColorSyncTM System Profile from the Control Pan- els
145
146
Using Background Printing
Using Background Printing
147
Using the Queue Monitor
148
Preferences settings
Queue Monitor Window
149
Error Display
Error Display
150
Appendix
Clean the inside of the printer
Cleaning the Printer
Cleaning the Main Unit
Clean the outside of the printer
153
Cleaning the Print Head
Slowly peel off the tape
Cleaning the Platen
154
155
How to remove the cleaning pad
How to install a cleaning pad
156
Ready / insert Button Functions
Alarm status shown by indicator lights
Indicator Lights Summary
Normal Printing Mode
Indicator light status
Close the front cover
Troubleshooting
158
159
What to Do When a Cartridge Change Error Occurs
160
Clearing Paper Jams
161
Troubleshooting
Power does not come on
Icon does not appear in the Chooser
162
MD-1300 printer cannot be selected in the Chooser
MD-1300 printer does not print or stops printing
163
164
Color printing is not working or is extremely slow
Is the head dirty? Is there something stuck on the head?
Printing is light, distorted, or has gaps
165
Has one of the ribbons separated from the head?
166
Has the packing tape been removed?
167
Has the carriage packing material been removed?
168
Mechanism or cartridge change error occurred
Ink cartridges are not correctly recognized
169
Printing Quality, Hue, and Resolution
Black portions are printed using the four colors
Cartridges run out very fast with monochrome printing
Ink and Paper
170
How should I use white ink?
171
Other problems and operations
Connection Method
172
How do I uninstall the printer driver?
173
Specifications
General Specifications
Interface
DIP Switches
Connector
Connector Signals
Maximum Print area
Using cardboard, thick paper or back print film
Printable Area
175
176
Photo Realistic Labels 16 stickers
Photographic-Quality Labels 2 Stickers
177
Photographic-Quality Labels 20 Stickers
Print media
Available Supplies
MD-1300 Supplies List
Ink cartridges
179
Index
180
181
182
183