Macintosh User’s Guide
Apple Computer, Inc
Contents
Chapter
Working on the Desktop
Setting Up Your Programs
Part
Using Disks
Organizing Your Files
Finding out about available fonts
Viii Contents
178
Other ways to use the LaserWriter Font Utility
191
Using access privileges
Setting Scsi ID numbers
197
Shift-Click
Travel, Storage, and Service
227
234
Printers
Troubleshooting PowerBook Screen Memory Scsi devices
Using Caps Lock Typing special characters and symbols
Xii Contents
Appendix C Map
Welcome to Macintosh
Xiii
Xiv
Radio and television interference
Page
Setting Up Your Macintosh PowerBook
Power adapter port Setting Up Your Macintosh PowerBook
Setting up the computer
Plug in the power adapter
Open the display
Slide the latch to the right and lift up the display
Power button
Turn on the computer
Trouble?
Contrast control Brightness control
Insert metal end first
Installing system software
Press the Return key on your keyboard to continue
Continuing your work
What to do next
Speaker Elevation feet Printer port
Reset button
Your computer at a glance
´ Interrupt button
Before you begin
Adjust the screen brightness and contrast controls
Learning the basics
Take the Macintosh Basics tour first
Finding the tour
Starting the tour from the hard disk
Setting Up Your Macintosh PowerBook
Now your screen should look like the following illustration
Page
Starting the tour from a floppy disk
After a moment, your screen should look like this
Setting Up Your Macintosh PowerBook
Conserve power when you won’t be using it for several hours
Turning the PowerBook on and off
To turn the PowerBook off
Off
Automatic sleep
To put the PowerBook to sleep
Sleep
On/off summary
To turn the PowerBook on
When the PowerBook is on, you can do your work
When you turn on your computer
Trash icon
Choose Restart from the Special menu
Press and release the reset button
Restarting a computer that’s already on
Hold down the power button for 5 seconds
Restart from a floppy disk
± Warning
Do not use the computer in or near water
Do not drop or jar the computer
Do not use the computer in wet or dusty environments
Do not touch the screen with any sharp or pointed objects
Health concerns associated with computer use
Repetitive stress injuries
Keyboard and trackball
Arranging your work space and equipment
Chair
Change hand positions often to avoid fatigue
Mouse
Built-in display
General suggestions
Page
Working on the Desktop
Use the trackball
Point
Click
Press
Drag
Choose a command
Telling the Macintosh to do something involves two steps
Dots, indicating that it has been opened
Open an icon
Click the startup hard disk icon to select it
Look at the contents of a window
Continues
Size box Working on the Desktop
Make a window larger or smaller
Active window
Zoom box
Click the zoom box near the right end of the title bar
Click the zoom box again
Move the hidden contents of a window into view
Horizontal scroll bar
Scroll arrow
Scroll box
Close a window
Click the close box
Close box
Title bar
Move a window
Point to the title bar of the active Macintosh HD window
What’s on the desktop?
Icons represent containers
Working on the Desktop
Windows let you see what’s inside all these containers
Windows let you see what’s inside containers
Menus offer you choices
Memo
Modifier keys
Modifier keys
Arrow keys
Working on the Desktop
Make sure that your computer is on
How to switch between programs
Why it’s important to save your work, and how to save it
Open the TeachText icon
Open a program
Open the Macintosh HD icon
TeachText menus
You will be changing this text later in this chapter
Create a document
Save your work
Choose Save from the File menu
Click Save
Switch programs
Type Opening Lines
Here is another way to make a program active
Close a document
Close the Opening Lines window
Because most Macintosh programs work in similar ways
Open a document
Next step describes a different way to open an icon
Change a document
Now you’re ready to change the text
Click the trackball button once
With people selected, type the words human beings
Now you’ll rearrange some text
Save your work so far
Save regularly, and save often
Make more changes
Taking a shortcut
With each other selected, type one another
Quit a program
With togetherness selected, type brotherhood
To use memory
Make a copy of a document
Click the Opening Lines icon to select it
Quitting a program Prompts you to save your work
Change the name of an icon
Choose Duplicate from the File menu
Pressing Return saves the new name
Use the Trash
Press the Return key
Click OK
Open the Trash icon
Choose Empty Trash from the Special menu
Close the Trash window by clicking its close box
Working With Disks
Second hole
Insert a floppy disk
Double-sided 800K disk
Working With Disks
Floppy disks and hard disks
Another dialog box appears
Initialize a disk
Read the message on your screen
Type Practice
Click Erase
Third dialog box appears
Copy the contents of a disk
Open the Practice folder icon
Close all the windows on the Macintosh desktop
Take a floppy disk out of its drive
Protect the contents of a disk
On your own Install your programs
Lock the program disk
Throw away extra System Folders
Look for a System Folder in the program folder
Page
Learning More About Your Computer
To open the PowerBook control panel
Open the Battery desk accessory
Open the PowerBook control panel
Choose Control Panels from the Apple K menu
Turn on Balloon Help
Open the PowerBook icon
Use Balloon Help
Many Macintosh programs also have Balloon Help
Point to the File menu
Turn off Balloon Help
Click your hard disk icon to select it
At this point, you could
Start learning how to use your application programs
Use Part III of this book
Page
Setting Up Your Programs
Before you install, reinstall, or update system software
Before you install
Installing system software
Installer program opens automatically
Easy Install dialog box appears
Restart your Macintosh
Click the Customize button
Installing customized system software
Easy Install dialog box appears
Click Install
Starting up with a floppy disk
Installing your programs
Installing programs without a floppy disk drive
Checking for computer viruses
Hiding and showing windows on the desktop
Switching programs
Finding out what programs are open
Open programs
Close the Info window
Preferred size must always be larger than Minimum size
Copying items from the Scrapbook
Using the Scrapbook
Storing items in the Scrapbook
Deleting items from the Scrapbook
Creating a RAM disk
Using a RAM disk
Remember a few precautions if you use a RAM disk
Click the On button below the words RAM disk
Drag the items you want to the RAM disk icon
Erasing a RAM disk
Resizing or removing a RAM disk
Drag the slider to 0% if you want to remove the RAM disk
Making a RAM disk the startup disk
Page
101
Monitoring the battery charge level
Using the Battery desk accessory
What you should do
Responding to low-power messages
Battery desk accessory appears
What you should know
Plug in the power adapter as shown
Recharging the battery
Recharging with the power adapter
Power adapter port Power Management
Power Management
To recharge a battery, follow these steps
Recharging with a recharger
Door is physically attached to the battery
Removing or replacing the battery
Place the battery in the recharger as shown
Battery Hours Batteries
Replacement batteries come with a door attached
Maximizing battery life
Keep virtual memory turned off in the Memory control panel
Ways to conserve battery power
Maximizing work time
Easiest approach
Adjusting the battery conservation settings
Close the PowerBook control panel
Your computer’s printer or modem port is in use
More about automatic sleep
Using the battery conservation options
Don’t sleep when plugged
System Hard disk
Processor cycling
To turn processor cycling back on, click Allow cycling
Preparing a new disk for use
Initializing a hard disk
Hard disk’s Scsi ID number Hard disk’s name
Using Disks
Click Initialize Click Init to initialize the hard disk
Type a name for the disk
Initializing a floppy disk
Third message asks you to name the disk
Click the icon of the disk you want to erase
Erasing a floppy disk
Designating a startup disk
Locking a floppy disk
Protecting the information on a disk
Scanning order for startup disks
Internal hard disk
Locking a file
If you can’t save files on a floppy disk
Backing up your files
All three methods also work with CD-ROM discs
Ejecting a disk
If you can’t eject a floppy disk
Disk is ejected and its icon disappears from the desktop
Caring for disks
Testing and repairing disks
Hard disk precautions
If a hard disk icon doesn’t appear
Using Disk First Aid
Click Open
Testing a hard disk
For assistance if necessary
Straightening up your files
Choose New Folder from the File menu
Using folders to organize your files
Creating and naming folders
Type a name for the folder and press Return
Filing documents when you save them
Uses for aliases
Making items easier to find
Creating an alias
Choose Make Alias from the File menu
Locating the original of an alias
Installing an item in the Apple menu
Moving an item to the desktop
Click the Find Original button
Choose Find from the File menu
Finding an item
Finding an item by name
Click the Find button
Date here One at a time
Finding an item using other criteria
Search Type text or set
Pop-up menu
Location for the search
Folders Organizing Your Files
Items found are shown highlighted in an outline view
Ways to use the Find command
Finding items that meet two criteria
Creating a template or stationery
Getting information about your files
Using the Info window
Get Info command displays information about a selected item
File’s Info window View menu
Type of list displayed is underlined
Using the View menu
Assigning a label to a file
On another hard disk
Tips on transferring files
On floppy disks
Page
Adapting Your Computer to Your Own Use
139
Specifying which items you want opened at startup
Installing an item in the Apple menu
Installing files in the System Folder
To have a program or a document open automatically when
Removing files from the System Folder
Setting the time and date
Changing the items in the Label menu
Setting a time for the Alarm Clock to go off
Choose Alarm Clock from the Apple K menu
Changing time and date formats
Turning the alarm off
Click the close box to close the Alarm Clock
Click OK to close the control panel
Changing the date format
Dialog box that appears, make the changes you want
Changing the time format
Make the changes you want
Type the currency symbol here
Make the changes that you want Close the control panel
Adjusting the way the trackball or mouse works
Click the double-clicking speed you want
Adjusting the way the keyboard works
Close the Keyboard control panel
Modifier
Adjusting the keyboard for very slow typing
Making keyboard shortcuts easier to type
Sticky Keys Key has been
Adjusting the blinking of a menu item
Click the button for the blinking rate you want
Changing the way the contents of windows appear
Changing an icon
Select the picture you want to use for the icon
Turning off the Empty Trash warning
You can turn off this warning in the Trash’s Info box
Making the most of your memory
Managing memory
Checking memory use
Remember the following tips on memory management
Adjusting the disk cache
Using hard disk space as memory
Turning on 32-bit addressing
Click the beep sound that you want your computer to use
Setting the beep sound
Drag the slider up or down to set the volume
Close the Sound control panel
Installing a sound
Removing a sound
Recording sounds
Your computer
Changing the background pattern
Type a name for the sound, and click OK
Continues
Magnifying the screen image
To save the new pattern, double-click the sample pattern
Choose Restart from the Special menu
Turns CloseView on
Inverts screen image
167
Before you print
Choosing a printer
Close the Chooser window
If your printer is connected directly to your computer
If your printer is connected over a network
Printing
Close the Chooser
Choose Chooser from the Apple K menu
Click the icon of the printer you want to use
Your computer is connected to a
Percentage
Selecting Page Setup options
Printed copy as a
Original’s size To the printed image
Updating printer software on networked computers
Make sure that the hard disk indicated is the correct one
Printer software available
Printing your work
Choose Print from the File menu
Paper-feed
Printing the contents of a window or the desktop
Make sure that the printer is turned on and warmed up
Solutions to common printing problems
Check the cable connections to the printer
Current document
Controlling background printing
Click to stop printing
Working with fonts
Outline fonts and bitmap fonts
Installing fonts
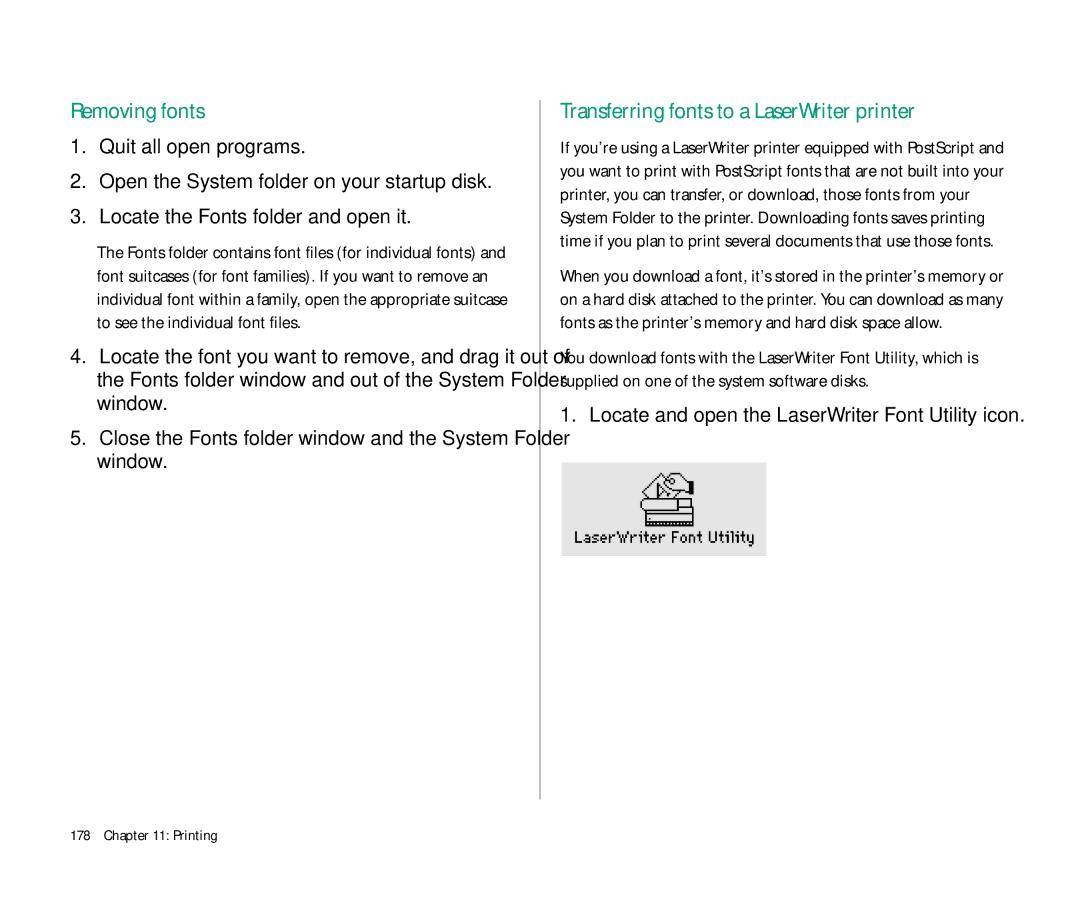
Locate and open the LaserWriter Font Utility icon
Removing fonts
Transferring fonts to a LaserWriter printer
To the printer
Choose Download Fonts from the File menu
Fonts you added are listed in the Font Utility dialog box
Initializing a hard disk attached to a printer
Finding out about available fonts
Other ways to use the LaserWriter Font Utility
Click Initialize
Restarting a LaserWriter printer
Turning the printer’s start page on or off
Transferring a PostScript file to a LaserWriter
Type a name for the log, and then click Save
What networking offers
183
Setting up your computer on a network
Using Your Computer on a Network
Printer port Icon
Connecting to a network
Turning on AppleTalk
Close the Sharing Setup control panel
Naming your computer and its owner
Connecting to a shared disk
AppleShare icon
Capitalization does not need to match
Click the name of the computer you want to use
Click OK Click Guest or Registered User
Icon of the shared disk appears on your desktop
Disconnecting from a shared disk
Click the name of a shared disk to select it
Connect to a shared disk
Connecting quickly to a shared disk
Connecting automatically when you start up
Click OK Close the Chooser
Changing your password
Creating a new folder on another computer
Bullet appears for each letter you type
Click OK Click OK in the dialog box that appears
How file sharing works
Sharing your own files
Giving folder ownership to someone else
User or group that you named assumes ownership immediately
Section labeled File Sharing, click the Start button
Turning on guest access
Turning file sharing on
Open the Guest icon
Selecting a folder or disk to share
Close the window and click Save in the box that appears
Taking back a shared folder or disk
Any shared folder or disk can be made private again
To register more users, repeat steps 2
Naming a registered user
Type the name of a person you want to register
Naming a group of users
Setting a registered user’s password
Type a password in the User Password box, then press Tab
Close the window, and then click Save in the dialog box
To see the names of all group members, open the group icon
Seeing who’s in a group
Drag user icons to the new group icon
You don’t need to include the Guest icon in any group
Remove the X marks in this row
Selecting a user or group to share a folder or disk
Close the window and click Save in the dialog box
To deny access to guests, open the Guest icon
Removing a user from a group
Removing a user or group from your list of registered users
Giving away ownership of a folder or disk on your computer
Turning file sharing off
To turn file sharing off immediately, type the number
Monitoring file-sharing activity
Section labeled File Sharing, click the Stop button
Disconnecting someone who is connected to your computer
Gaining access to your computer from another computer
Open the owner icon the one with the bold outline
Using access privileges
Understanding access privileges
See Files allows people to see, open, and copy files
Setting access privileges to folders and disks
There are three types of access to shared items
Select a folder or disk Choose Sharing from the File menu
To prevent the folder from being changed, place an
Access privilege strategies
Choose a registered user or group to share the item with
Using Your Computer on a Network
Plain tab indicates that you can open and use the folder
Checking your access privileges
Working with privileges that others have set
To files in this This folder
You can only link to programs that are shared
Linking programs
Linking to a program on another computer
Select the program you want to link to
Two programs are now linked
Disconnecting a program link
Allowing other people to link to your programs
Then you make a program available for linking by sharing it
Open the program
Turning program linking on
Selecting a program for linking
If the box is dimmed, the program does not support linking
Allowing guests to link to your programs
Naming specific users to link to your programs
Using Your Computer on a Network
Scsi port Scsi port icon 217
Using Scsi devices
Scsi port on Macintosh PowerBook computers looks like this
Expanding Your Computer System
Installing software
Setting Scsi ID numbers
Make sure the Scsi device is turned off
Small hole gives you access to the ID number switch
ID number indicator ID number switch
Check the ID numbers of all the devices you want to connect
If you are attaching more than one Scsi device
Checking that the Scsi chain is properly terminated
If you are attaching one Scsi device
Repeat for each additional device you want to connect
Connecting cables
Illustration shows where to add cable terminators
Terminator
See the documentation that came with the modem
Connecting a modem
Connect the modem to a power source and to the phone line
External modem is ready to use
Connecting a printer
Connecting a mouse or other ADB device
Sound output devices
Connecting a microphone
Decide where you want to place the microphone
Open the door covering the back panel of your computer
Adding memory to your computer
Page
227
Traveling with the PowerBook
Do not check your computer as baggage. Carry it with you
Store the computer in a cool, dry place
Storing the PowerBook
Short-term storage up to 2 weeks
Plug in the power adapter or use the recharger
Service and support
If the PowerBook malfunctions or is damaged
Long-term storage more than 2 weeks
Mariani Avenue
How to get help
Apple Computer, Inc Apple Canada, Inc Customer Relations
Canada
Page
Page
Selecting icons
Shift-click
Working with icons
Hold down the Shift key while clicking
Moving, copying, and renaming an icon
Working with windows
Opening an icon
Making a window the active window
Scrolling through the contents of a window
Opening higher-level folder windows
Using the outline form in list views
Working with menus
To choose an item in a submenu
Choosing an item from a menu
Choosing an item from a submenu
Drag to the menu item so that the submenu appears
Troubleshooting
PowerBook
Computer just stopped
Power
Battery is draining too fast
Battery can’t be recharged
Screen
Screen looks blurred or out of focus
Memory
Scsi devices
Disk drives and disks
See for more information about working with Scsi devices
Hard disk keeps stopping and starting again
You can’t delete a file on a floppy disk
Printer may be turned off. Turn it on
Modems
Printers
Network printer keeps restarting
Networks
Application programs
You can’t open a shared disk or folder
Message says that a program could not be found
Outlined button
253
Appendix a Keyboard and Character Sets
Using Caps Lock
To turn Caps Lock on or off, press the Caps Lock key
Diacritical mark Key combination
Option-c
Page
Insert a blank disk into your floppy disk drive
Initializing a disk in MS-DOS format
Locate the Apple File Exchange icon and open it
257
Type a name for the disk, and then click OK
Appendix B Exchanging Disks and Files With MS-DOS Computers
Disk name
Converting files to and from MS-DOS format
Follow these steps to translate an MS-DOS or ProDOS file
Pull down the translation menu you want
Click Translate
Other file-conversion options
Page
Setting your location
263
Your current location is indicated by a blinking cross
Comparing locations
Click the Set button
Appendix C Map
Finding a location
Changing or removing a location
Adding or removing a location
Adding a location
Click the Add City button
Page
Page
Setting
About This MacintoshCommand 155, 158 Accent marks, typing
Network passwords
Restricting
Application menu
Battery Conservation settings 83, 109-112, 242
Safety instructions
Processor speed Recharging 23, 25, 102-106, 108, 228-229
Virtual memory 157-158Copy command 96 copying
Battery conservation 82-83, 109-112, 242 beep sound
Easy Access File sharing 194-195, 197-198, 201, 202
Control panels
Desktop
Currency formats, changing
Delete key 53, 253 deleting
Dragging an object on
Backing up
Don’t sleep when plugged in option 110
Adjusting speed of 148 icons 58, 94 selecting text by
Adding to System Folder 140-141aliases for
203
Changing your password 191-192
Copying contents of 74-75, 78-79, 119 double-sided 70
Finder
Locking and unlocking 77, 117 obtaining
Removing 141, 178 troubleshooting 174, 249 TrueType
Battery consumption and 101, 104 capacity Caring for
Folders 47, 126. See also file sharing System Folder
11-14
Initialize Printer’s Disk command
Saving space on
Hard disk icon Failure to appear 121-122opening
Key Caps desk accessory 180, 254-255kilobyte K
Adjusting blinking of 151 positioning
Installing
Background printing with 175 choosing Connecting
Mouse control panel 148 moving Icons 129, 234 text
Macintosh desktop computer, connecting to
Viruses
Multiple programs
Naming Document 53-54, 66-67, 127 a folder An icon 66-67
Network administrator 184, 187, 191, 192 Network icon
206-207 Checking your access privileges Connecting to
Network 183-216. See also
System sleep adjustment 110, 111, 242
Changing your own 191-192, 206-207troubleshooting
Preventing automatic sleep while using 110
Battery
171-172
Power problems
Printer Update document Printing 167-182. See also fonts
ProDOS file format 257, 259 program linking
Adding
Quit command RAM. See random-access memory RAM RAM disk
As startup disk 99, 109
Bit addressing
Magnifying image on 164-166opening Position of 3
Connecting 221
Changing your password 191-92,206-207connecting to
Scroll bars
From floppy disks 22
Waking the computer from 10, 17, 18, 110 when to use 18
Speakers 9 Special characters, typing 254-255Special menu
239
System Folder
Symbols, typing
Pointing with 7, 32 pressing with 34 using
Translator files 257
Undo command 252 unlocking Files
Modems Networks 188, 189, 197, 206, 248, 249 Passwords
Automatically connecting to a shared disk
Assigning a password
Hiding and showing program 94 moving 45-46
Finding lost
Views control panel 136, 152 virtual memory
Apple Computer, Inc