Embedded Voicemail Installation Guide
Example Auto Attendant Setup
The following process shows by example the setup for an auto attendant on embedded voicemail.
For this example;
∙The customer wants all incoming calls to go to an
∙The
∙Separate time profiles have already been configured for the customer's morning and afternoon hours of business.
1.Start IP Office Manager and receive the Small Office Edition system configuration.
2.In the ![]() Auto Attendant. The
Auto Attendant. The
3.Place the cursor over the
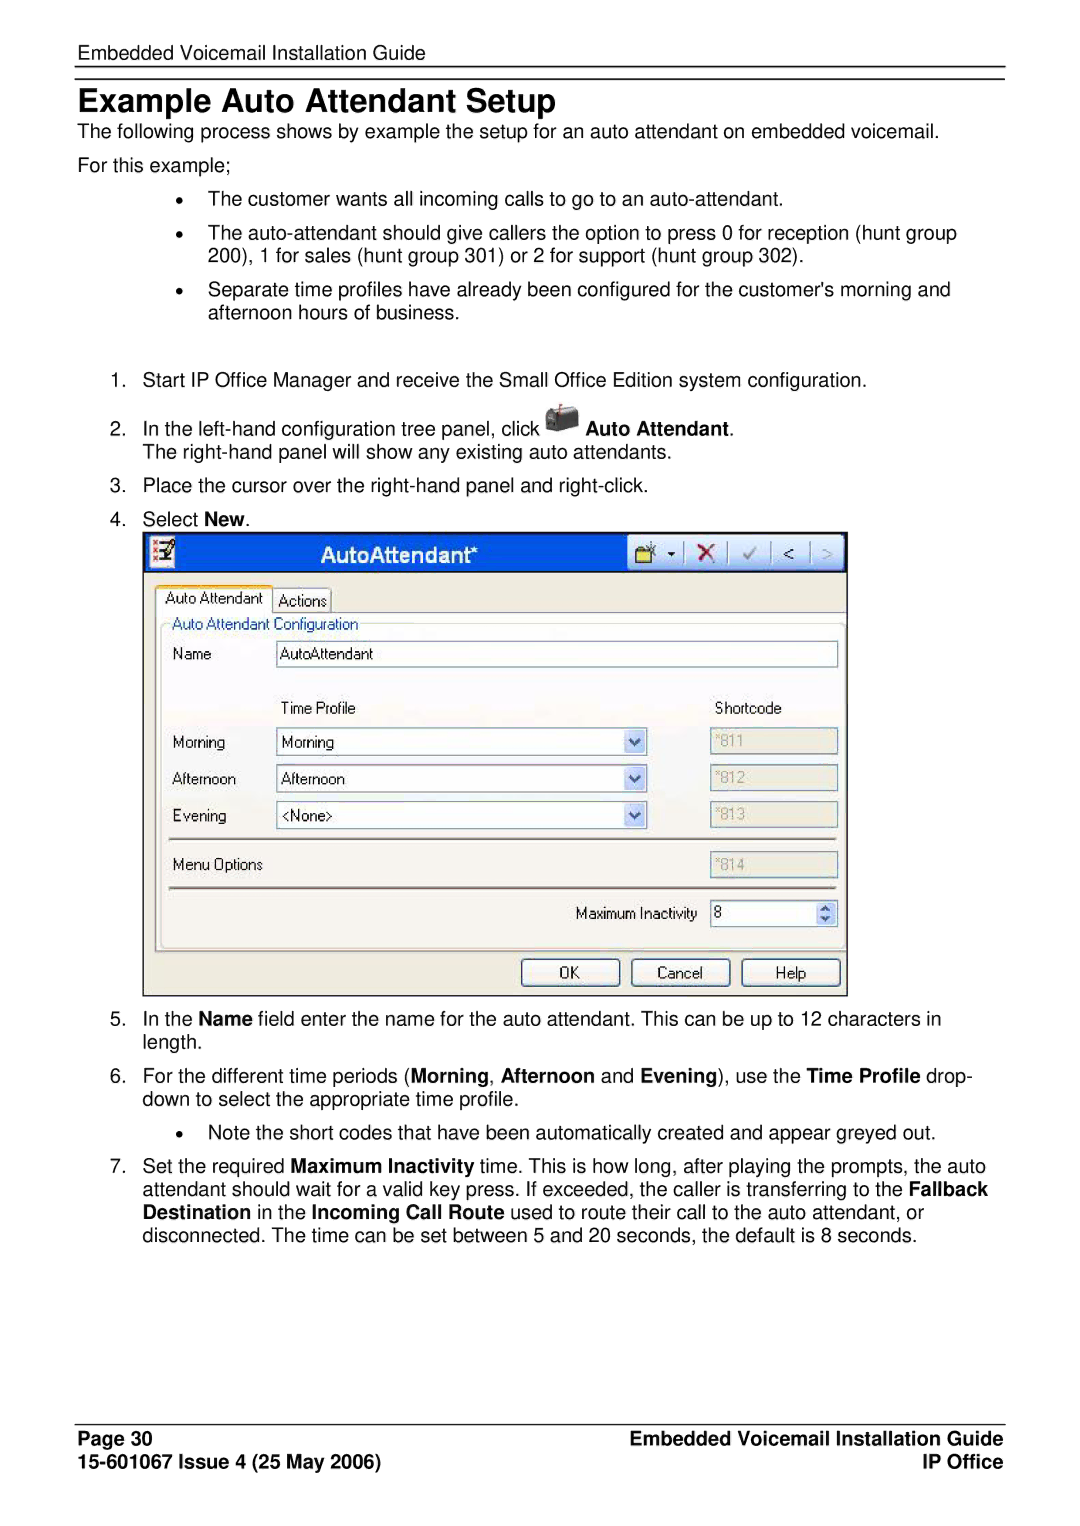
4.Select New.
5.In the Name field enter the name for the auto attendant. This can be up to 12 characters in length.
6.For the different time periods (Morning, Afternoon and Evening), use the Time Profile drop- down to select the appropriate time profile.
∙Note the short codes that have been automatically created and appear greyed out.
7.Set the required Maximum Inactivity time. This is how long, after playing the prompts, the auto attendant should wait for a valid key press. If exceeded, the caller is transferring to the Fallback Destination in the Incoming Call Route used to route their call to the auto attendant, or disconnected. The time can be set between 5 and 20 seconds, the default is 8 seconds.
Page 30 | Embedded Voicemail Installation Guide |
| IP Office |