Embedded Voicemail Installation Guide
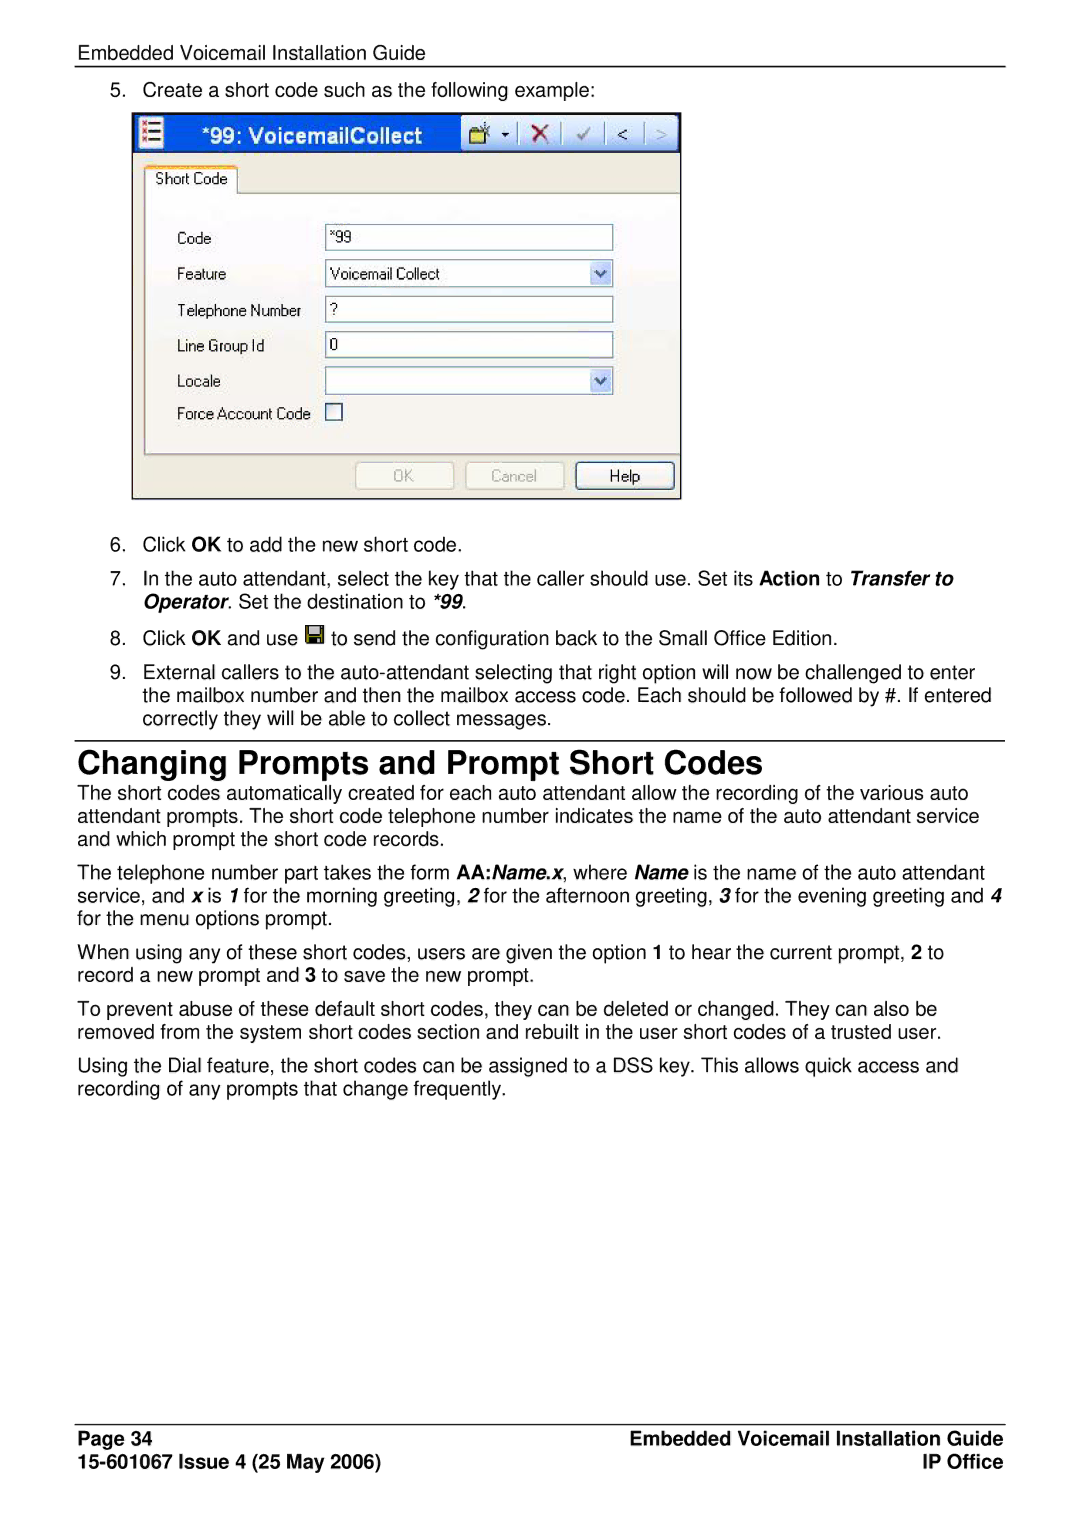
5. Create a short code such as the following example:
6.Click OK to add the new short code.
7.In the auto attendant, select the key that the caller should use. Set its Action to Transfer to Operator. Set the destination to *99.
8.Click OK and use ![]() to send the configuration back to the Small Office Edition.
to send the configuration back to the Small Office Edition.
9.External callers to the
Changing Prompts and Prompt Short Codes
The short codes automatically created for each auto attendant allow the recording of the various auto attendant prompts. The short code telephone number indicates the name of the auto attendant service and which prompt the short code records.
The telephone number part takes the form AA:Name.x, where Name is the name of the auto attendant service, and x is 1 for the morning greeting, 2 for the afternoon greeting, 3 for the evening greeting and 4 for the menu options prompt.
When using any of these short codes, users are given the option 1 to hear the current prompt, 2 to record a new prompt and 3 to save the new prompt.
To prevent abuse of these default short codes, they can be deleted or changed. They can also be removed from the system short codes section and rebuilt in the user short codes of a trusted user.
Using the Dial feature, the short codes can be assigned to a DSS key. This allows quick access and recording of any prompts that change frequently.
Page 34 | Embedded Voicemail Installation Guide |
| IP Office |
