Setting Up - NetWare
Controlled Access Printers
7. Press Cancel to close the NDPS Manager
To install the printer on the workstation, See “Installing an NDPS Printer on a Workstation” on page 49.
Follow these steps to create a controlled access printer as an object in the Directory Tree, using the NetWare administrator utility:
1.Log in as Admin.
2.Start the NW Admin utility on any Workstation (SYS:PUBLIC\WIN32\nwadmin32.exe).
3.Browse the context your NDPS Manager resides in.
4.From the Object menu, select Create. The New Object dialog appears.
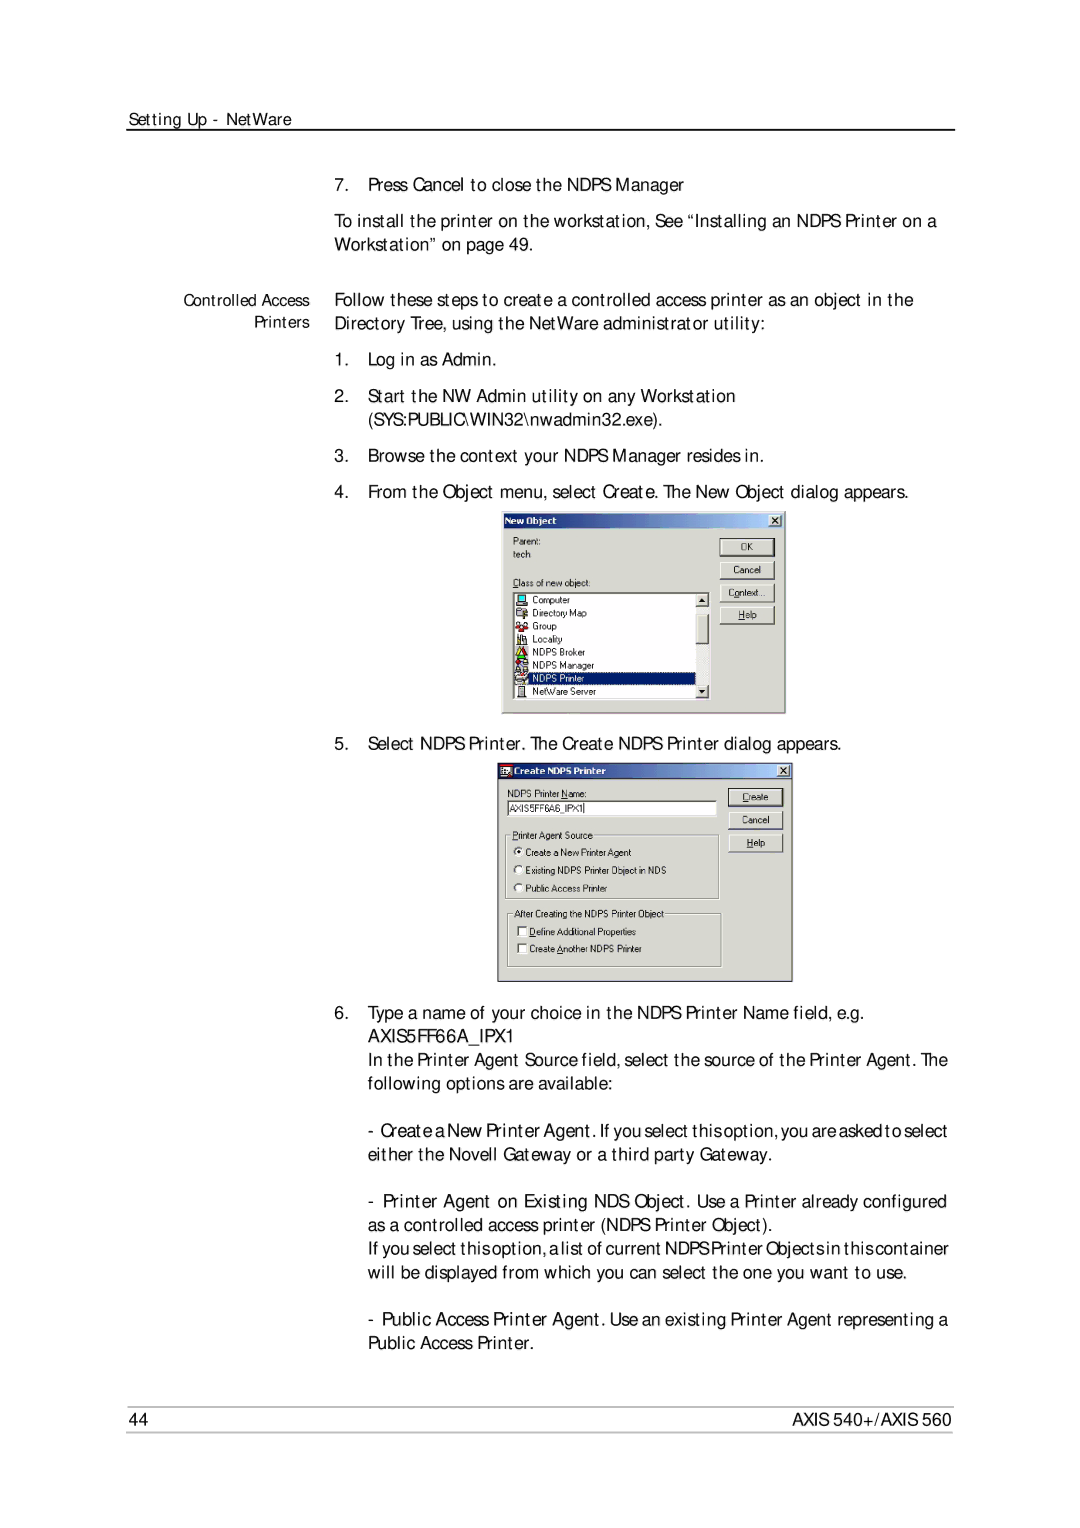
5. Select NDPS Printer. The Create NDPS Printer dialog appears.
6.Type a name of your choice in the NDPS Printer Name field, e.g.
AXIS5FF66A_IPX1
In the Printer Agent Source field, select the source of the Printer Agent. The following options are available:
-Create a New Printer Agent. If you select this option, you are asked to select either the Novell Gateway or a third party Gateway.
-Printer Agent on Existing NDS Object. Use a Printer already configured as a controlled access printer (NDPS Printer Object).
If you select this option, a list of current NDPS Printer Objects in this container will be displayed from which you can select the one you want to use.
-Public Access Printer Agent. Use an existing Printer Agent representing a Public Access Printer.
44 | AXIS 540+/AXIS 560 |