Assembly Guide
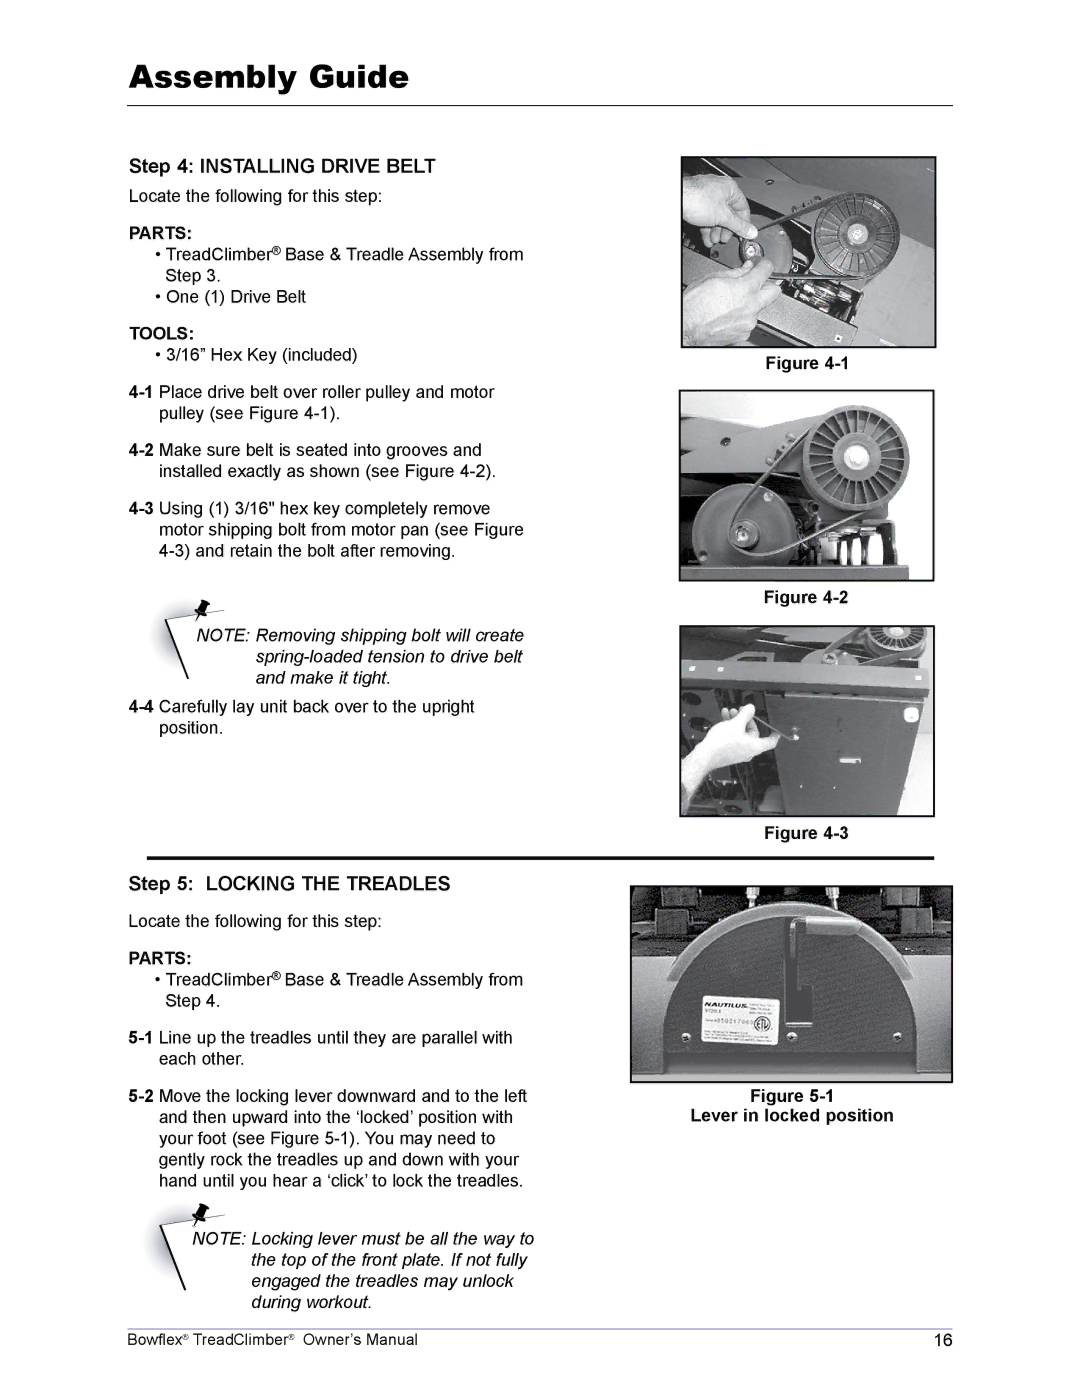
Step 4: INSTALLING DRIVE BELT
Locate the following for this step:
PARTS:
•TreadClimber® Base & Treadle Assembly from Step 3.
•One (1) Drive Belt
TOOLS:
• 3/16” Hex Key (included)
Note: Removing shipping bolt will create
Figure
Figure
Figure
Step 5: LOCKING THE TREADLES
Locate the following for this step:
PARTS:
•TreadClimber® Base & Treadle Assembly from Step 4.
Line up the treadles until they are parallel with |
| |
| each other. |
|
Move the locking lever downward and to the left |
| |
Figure | ||
| and then upward into the ‘locked’ position with | Lever in locked position |
your foot (see Figure
Note: Locking lever must be all the way to the top of the front plate. If not fully engaged the treadles may unlock during workout.
Bowflex® TreadClimber® Owner’s Manual | 16 |