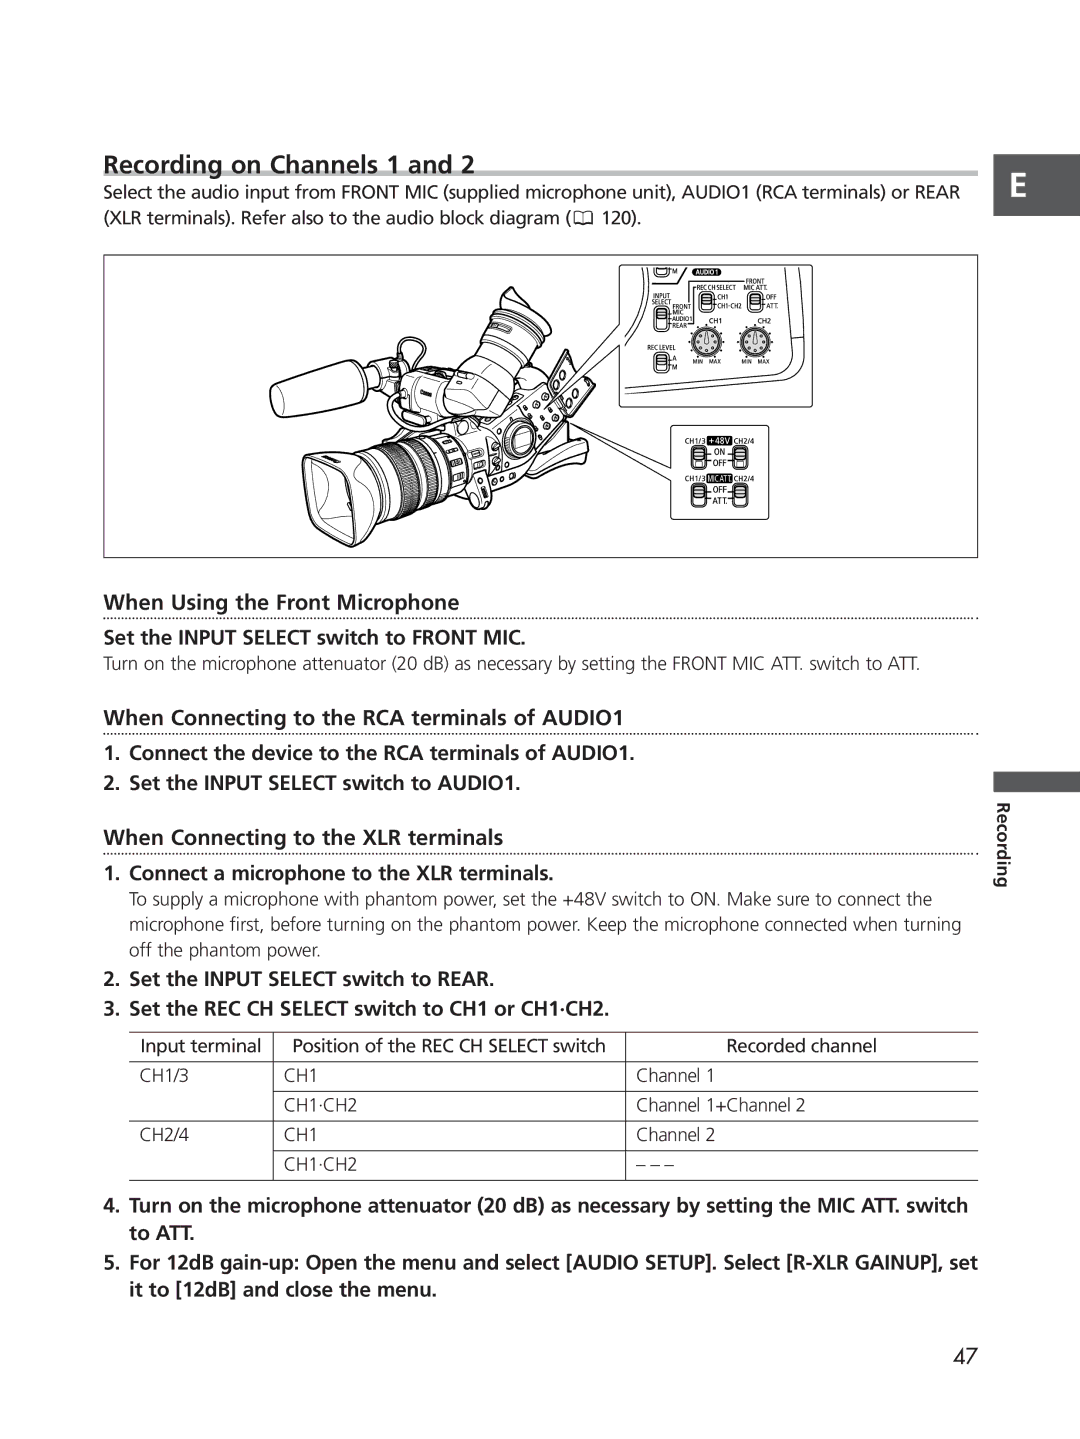
Recording on Channels 1 and 2
Select the audio input from FRONT MIC (supplied microphone unit), AUDIO1 (RCA terminals) or REAR (XLR terminals). Refer also to the audio block diagram (![]() 120).
120).
When Using the Front Microphone
Set the INPUT SELECT switch to FRONT MIC.
Turn on the microphone attenuator (20 dB) as necessary by setting the FRONT MIC ATT. switch to ATT.
E
When Connecting to the RCA terminals of AUDIO1
1.Connect the device to the RCA terminals of AUDIO1.
2.Set the INPUT SELECT switch to AUDIO1.
When Connecting to the XLR terminals
1.Connect a microphone to the XLR terminals.
To supply a microphone with phantom power, set the +48V switch to ON. Make sure to connect the microphone first, before turning on the phantom power. Keep the microphone connected when turning off the phantom power.
2.Set the INPUT SELECT switch to REAR.
3.Set the REC CH SELECT switch to CH1 or CH1·CH2.
Input terminal | Position of the REC CH SELECT switch | Recorded channel |
|
|
|
CH1/3 | CH1 | Channel 1 |
|
|
|
| CH1·CH2 | Channel 1+Channel 2 |
|
|
|
CH2/4 | CH1 | Channel 2 |
|
|
|
| CH1·CH2 | – – – |
|
|
|
4.Turn on the microphone attenuator (20 dB) as necessary by setting the MIC ATT. switch to ATT.
5.For 12dB
Recording
47