6.OPERATING CONTROLS
6.1PUNCHING PATTERNS
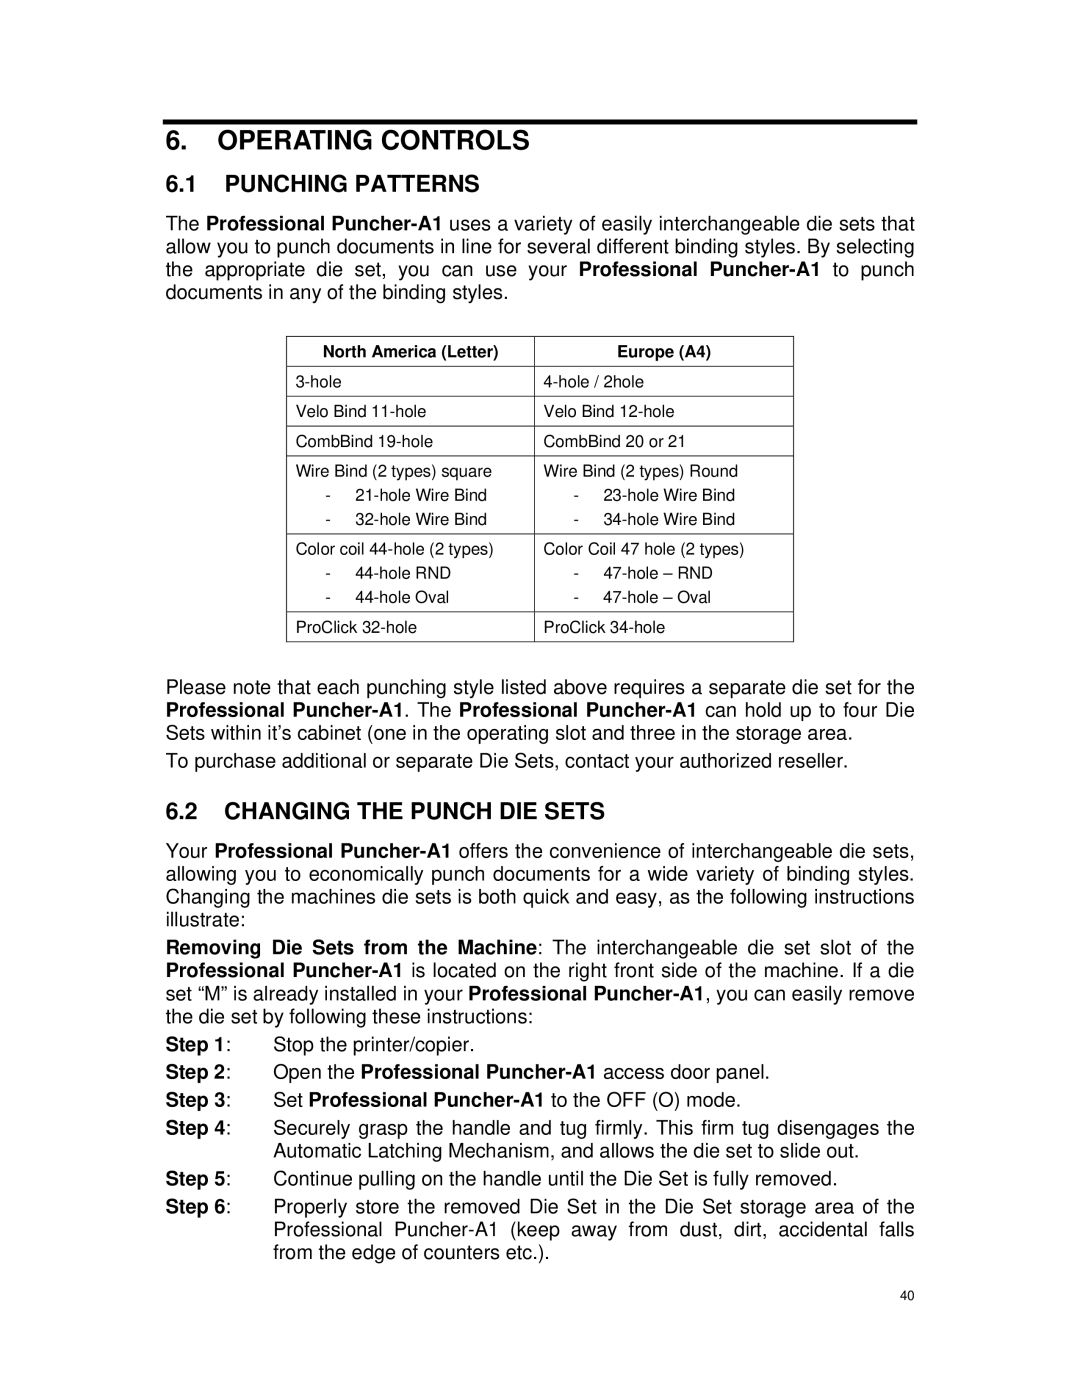
The Professional Puncher-A1uses a variety of easily interchangeable die sets that allow you to punch documents in line for several different binding styles. By selecting the appropriate die set, you can use your Professional Puncher-A1to punch documents in any of the binding styles.
North America (Letter) | | Europe (A4) |
| | |
3-hole | | 4-hole / 2hole |
| |
Velo Bind 11-hole | Velo Bind 12-hole |
| |
CombBind 19-hole | CombBind 20 or 21 |
| |
Wire Bind (2 types) square | Wire Bind (2 types) Round |
- | 21-hole Wire Bind | - | 23-hole Wire Bind |
- | 32-hole Wire Bind | - | 34-hole Wire Bind |
| |
Color coil 44-hole (2 types) | Color Coil 47 hole (2 types) |
- | 44-hole RND | - | 47-hole – RND |
- | 44-hole Oval | - | 47-hole – Oval |
| |
ProClick 32-hole | ProClick 34-hole |
| | | |
Please note that each punching style listed above requires a separate die set for the Professional Puncher-A1. The Professional Puncher-A1can hold up to four Die Sets within it’s cabinet (one in the operating slot and three in the storage area.
To purchase additional or separate Die Sets, contact your authorized reseller.
6.2CHANGING THE PUNCH DIE SETS
Your Professional Puncher-A1offers the convenience of interchangeable die sets, allowing you to economically punch documents for a wide variety of binding styles. Changing the machines die sets is both quick and easy, as the following instructions illustrate:
Removing Die Sets from the Machine: The interchangeable die set slot of the Professional Puncher-A1is located on the right front side of the machine. If a die set “M” is already installed in your Professional Puncher-A1, you can easily remove the die set by following these instructions:
Step 1: Stop the printer/copier.
Step 2: Open the Professional Puncher-A1 access door panel.
Step 3: Set Professional Puncher-A1 to the OFF (O) mode.
Step 4: Securely grasp the handle and tug firmly. This firm tug disengages the Automatic Latching Mechanism, and allows the die set to slide out.
Step 5: Continue pulling on the handle until the Die Set is fully removed.
Step 6: Properly store the removed Die Set in the Die Set storage area of the Professional Puncher-A1 (keep away from dust, dirt, accidental falls from the edge of counters etc.).
40