Using a Household Power Source
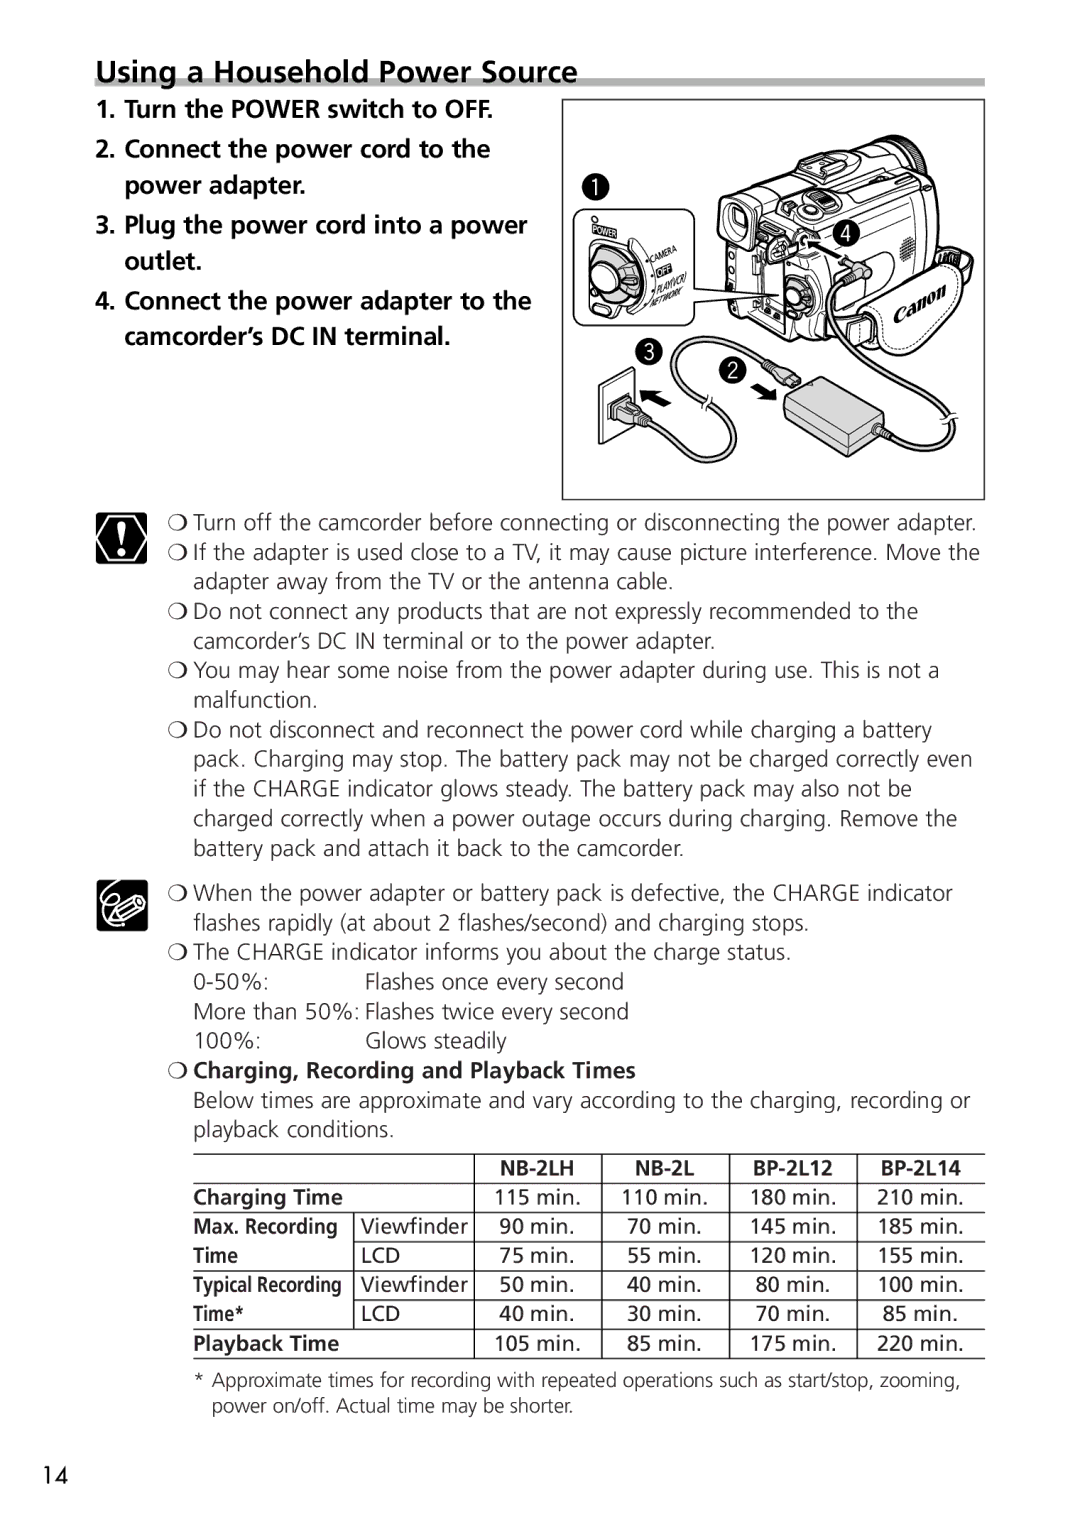
1.Turn the POWER switch to OFF.
2.Connect the power cord to the power adapter.
3.Plug the power cord into a power outlet.
4.Connect the power adapter to the camcorder’s DC IN terminal.
q |
|
| r |
e | w |
|
❍Turn off the camcorder before connecting or disconnecting the power adapter.
❍If the adapter is used close to a TV, it may cause picture interference. Move the adapter away from the TV or the antenna cable.
❍Do not connect any products that are not expressly recommended to the camcorder’s DC IN terminal or to the power adapter.
❍You may hear some noise from the power adapter during use. This is not a malfunction.
❍Do not disconnect and reconnect the power cord while charging a battery pack. Charging may stop. The battery pack may not be charged correctly even if the CHARGE indicator glows steady. The battery pack may also not be charged correctly when a power outage occurs during charging. Remove the battery pack and attach it back to the camcorder.
❍When the power adapter or battery pack is defective, the CHARGE indicator flashes rapidly (at about 2 flashes/second) and charging stops.
❍The CHARGE indicator informs you about the charge status.
More than 50%: Flashes twice every second
100%: | Glows steadily |
❍Charging, Recording and Playback Times
Below times are approximate and vary according to the charging, recording or playback conditions.
|
|
| |||
Charging Time |
| 115 min. | 110 min. | 180 min. | 210 min. |
Max. Recording | Viewfinder | 90 min. | 70 min. | 145 min. | 185 min. |
Time | LCD | 75 min. | 55 min. | 120 min. | 155 min. |
Typical Recording | Viewfinder | 50 min. | 40 min. | 80 min. | 100 min. |
Time* | LCD | 40 min. | 30 min. | 70 min. | 85 min. |
Playback Time |
| 105 min. | 85 min. | 175 min. | 220 min. |
*Approximate times for recording with repeated operations such as start/stop, zooming, power on/off. Actual time may be shorter.
14