Chapter 2 The Basics
Getting to Know Your Cisco LCD Professional Series Display
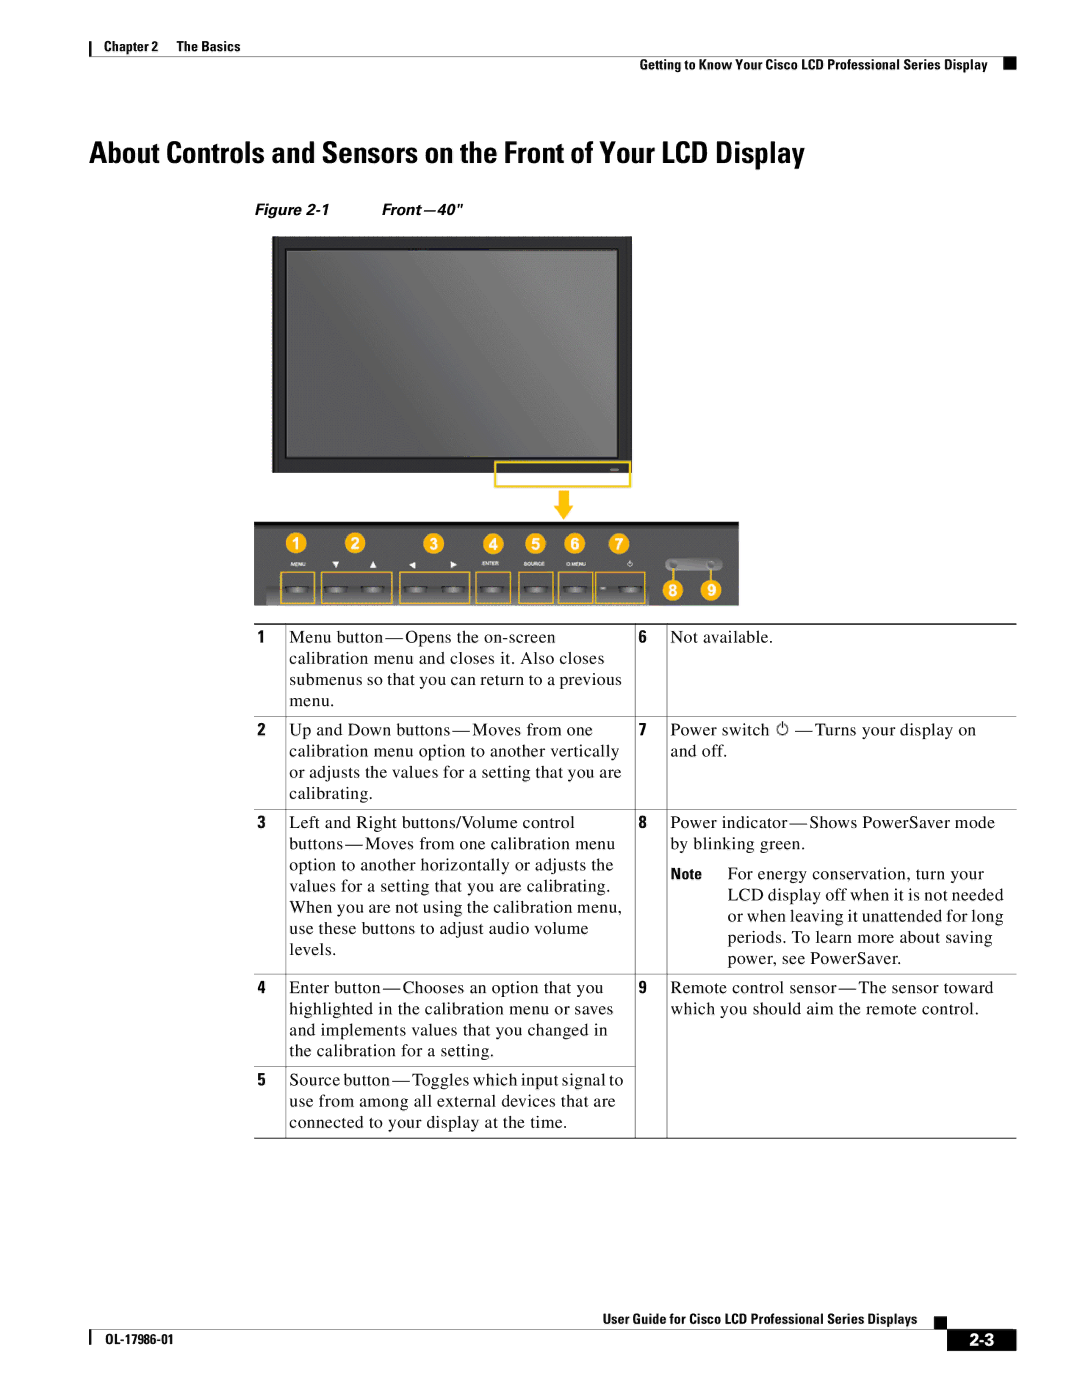
About Controls and Sensors on the Front of Your LCD Display
Figure |
1 | Menu button — Opens the | 6 | Not available. |
| calibration menu and closes it. Also closes |
|
|
| submenus so that you can return to a previous |
|
|
| menu. |
|
|
|
|
|
|
2 | Up and Down buttons — Moves from one | 7 | Power switch — Turns your display on |
| calibration menu option to another vertically |
| and off. |
| or adjusts the values for a setting that you are |
|
|
| calibrating. |
|
|
|
|
|
|
3 | Left and Right buttons/Volume control | 8 | Power indicator — Shows PowerSaver mode |
| buttons — Moves from one calibration menu |
| by blinking green. |
| option to another horizontally or adjusts the |
| Note For energy conservation, turn your |
| values for a setting that you are calibrating. |
| |
|
| LCD display off when it is not needed | |
| When you are not using the calibration menu, |
| |
|
| or when leaving it unattended for long | |
| use these buttons to adjust audio volume |
| |
|
| periods. To learn more about saving | |
| levels. |
| |
|
| power, see PowerSaver. | |
|
|
| |
|
|
|
|
4 | Enter button — Chooses an option that you | 9 | Remote control sensor — The sensor toward |
| highlighted in the calibration menu or saves |
| which you should aim the remote control. |
| and implements values that you changed in |
|
|
| the calibration for a setting. |
|
|
|
|
|
|
5 | Source button — Toggles which input signal to |
|
|
| use from among all external devices that are |
|
|
| connected to your display at the time. |
|
|
|
|
|
|
User Guide for Cisco LCD Professional Series Displays
|
| ||
|
|
