System Board
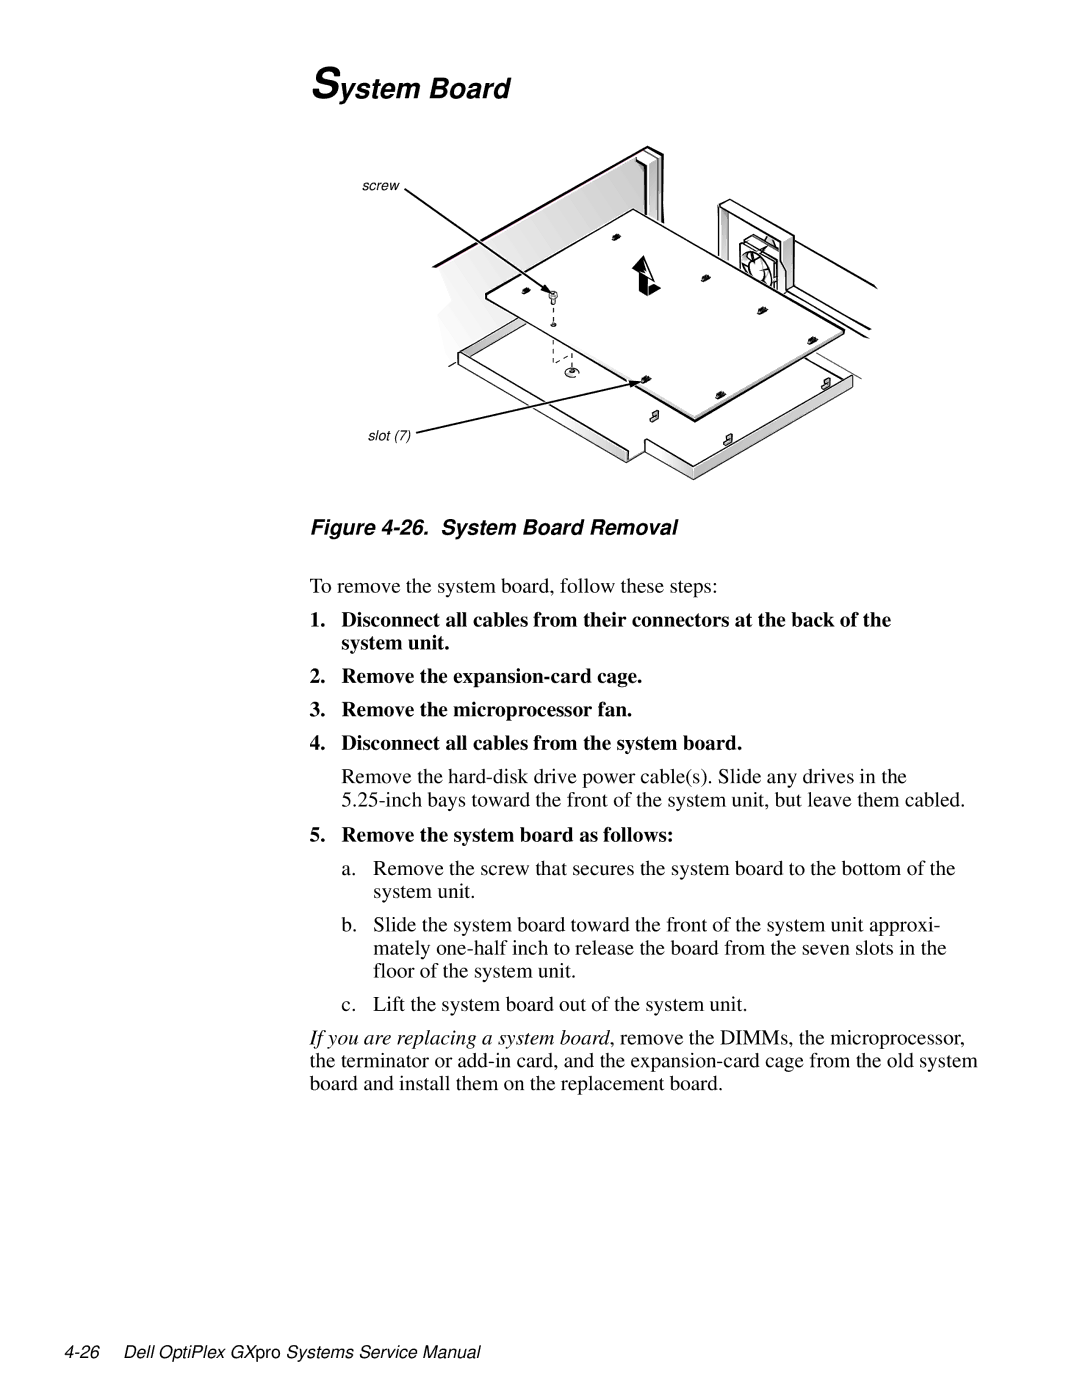
screw
slot (7)
Figure 4-26. System Board Removal
To remove the system board, follow these steps:
1.Disconnect all cables from their connectors at the back of the system unit.
2.Remove the
3.Remove the microprocessor fan.
4.Disconnect all cables from the system board.
Remove the
5.Remove the system board as follows:
a.Remove the screw that secures the system board to the bottom of the system unit.
b.Slide the system board toward the front of the system unit approxi- mately
c.Lift the system board out of the system unit.
If you are replacing a system board, remove the DIMMs, the microprocessor, the terminator or
