w w w . d e l l . c o m s u p p o r t . d e l l . c o m
4Connect the other end of the CAT 5 cable to the desired Analog Rack Interface (ARI) port on the back of your Remote Console Switch unit.
5Repeat steps
NOTE: Power down the Remote Console Switch unit before servicing. Always disconnect the power cord from the wall outlet. Power down the Remote Console Switch unit before servicing. Always disconnect the power cord from the wall outlet.
NOTE: In addition to Dell SIPs, the Remote Console Switch may also be connected to devices using Avocent AVRIQ’s, including Sun and Serial AVRIQ’s Network Configuration Menu.
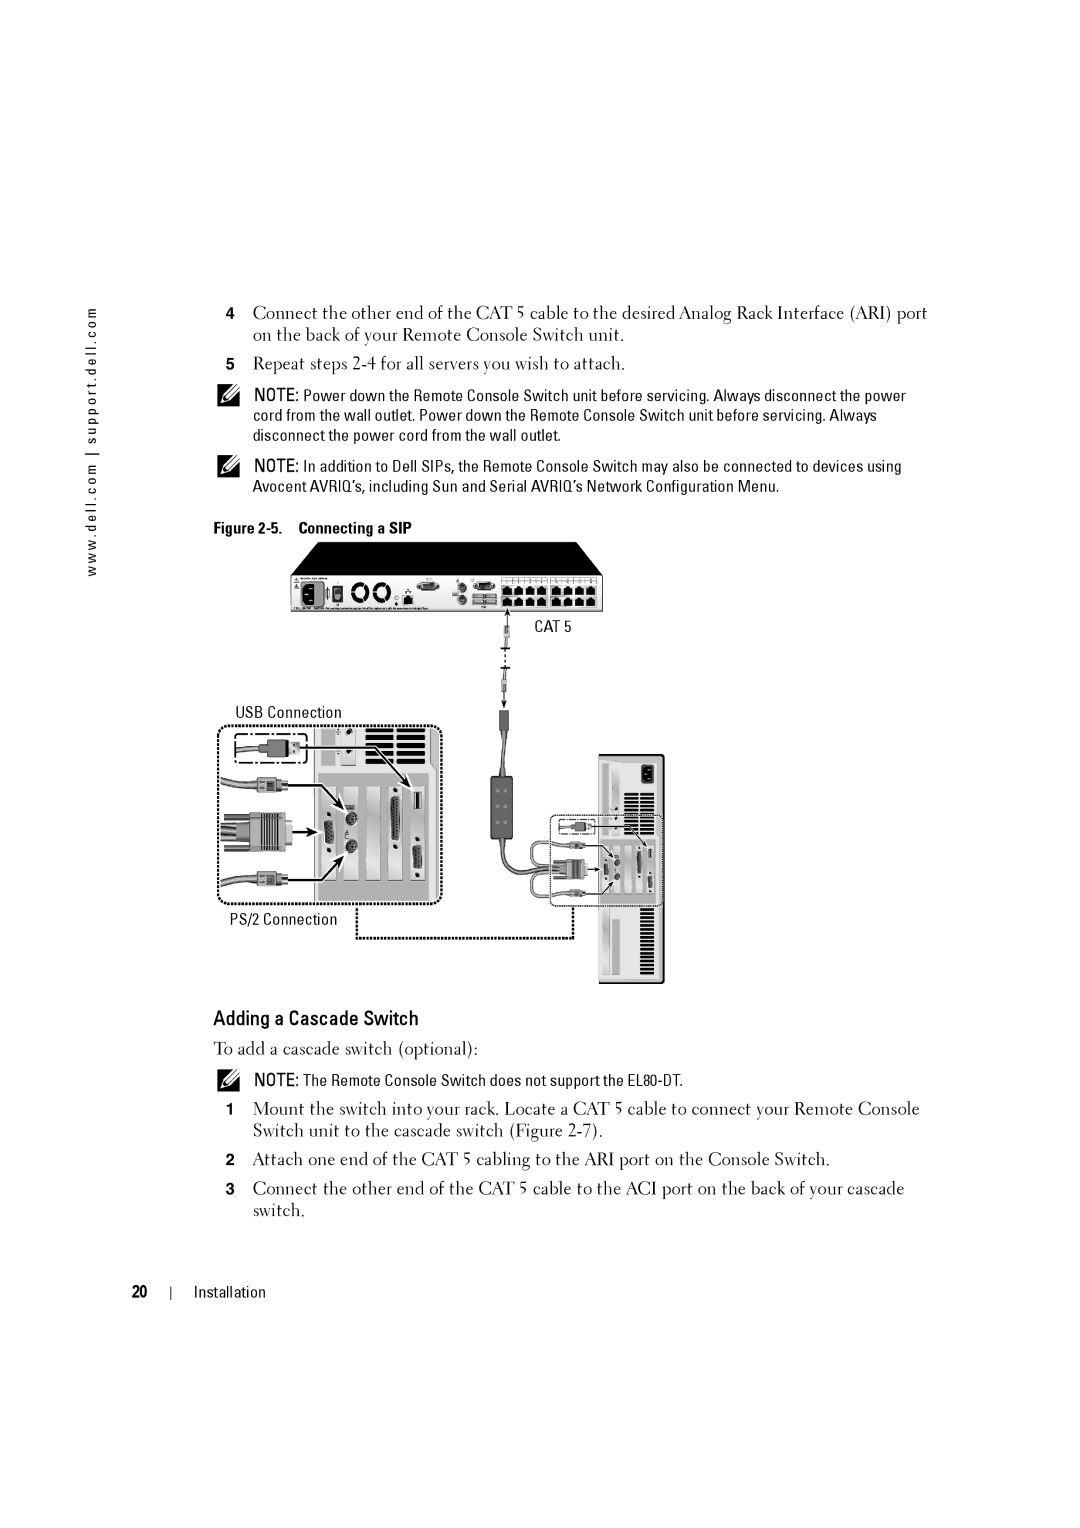
Figure 2-5. Connecting a SIP
CAT 5
USB Connection
PS/2 Connection
Adding a Cascade Switch
To add a cascade switch (optional):
NOTE: The Remote Console Switch does not support the
1Mount the switch into your rack. Locate a CAT 5 cable to connect your Remote Console Switch unit to the cascade switch (Figure
2Attach one end of the CAT 5 cabling to the ARI port on the Console Switch.
3Connect the other end of the CAT 5 cable to the ACI port on the back of your cascade switch.
20
Installation