CANopen Communication Module DVPCOPM-SL
| Item | Function | Default |
| | with DVP-SV | |
| Address | Communication address of DVP-SV | 1 |
| | | |
| Baud rate | Communication speed between the PC and | 9,600 (bps) |
| DVP-SV |
| | |
| Data Bits | COmmuniction protocol between the PC and | 7 |
| | |
| Parity | Even Parity |
| DVP-SV |
| | |
| Stop Bit | 1 |
| |
| | | |
| Mode | Communication mode between the PC and | ASCII |
| DVP-SV |
| | |
Click on “OK” and return to the main page.
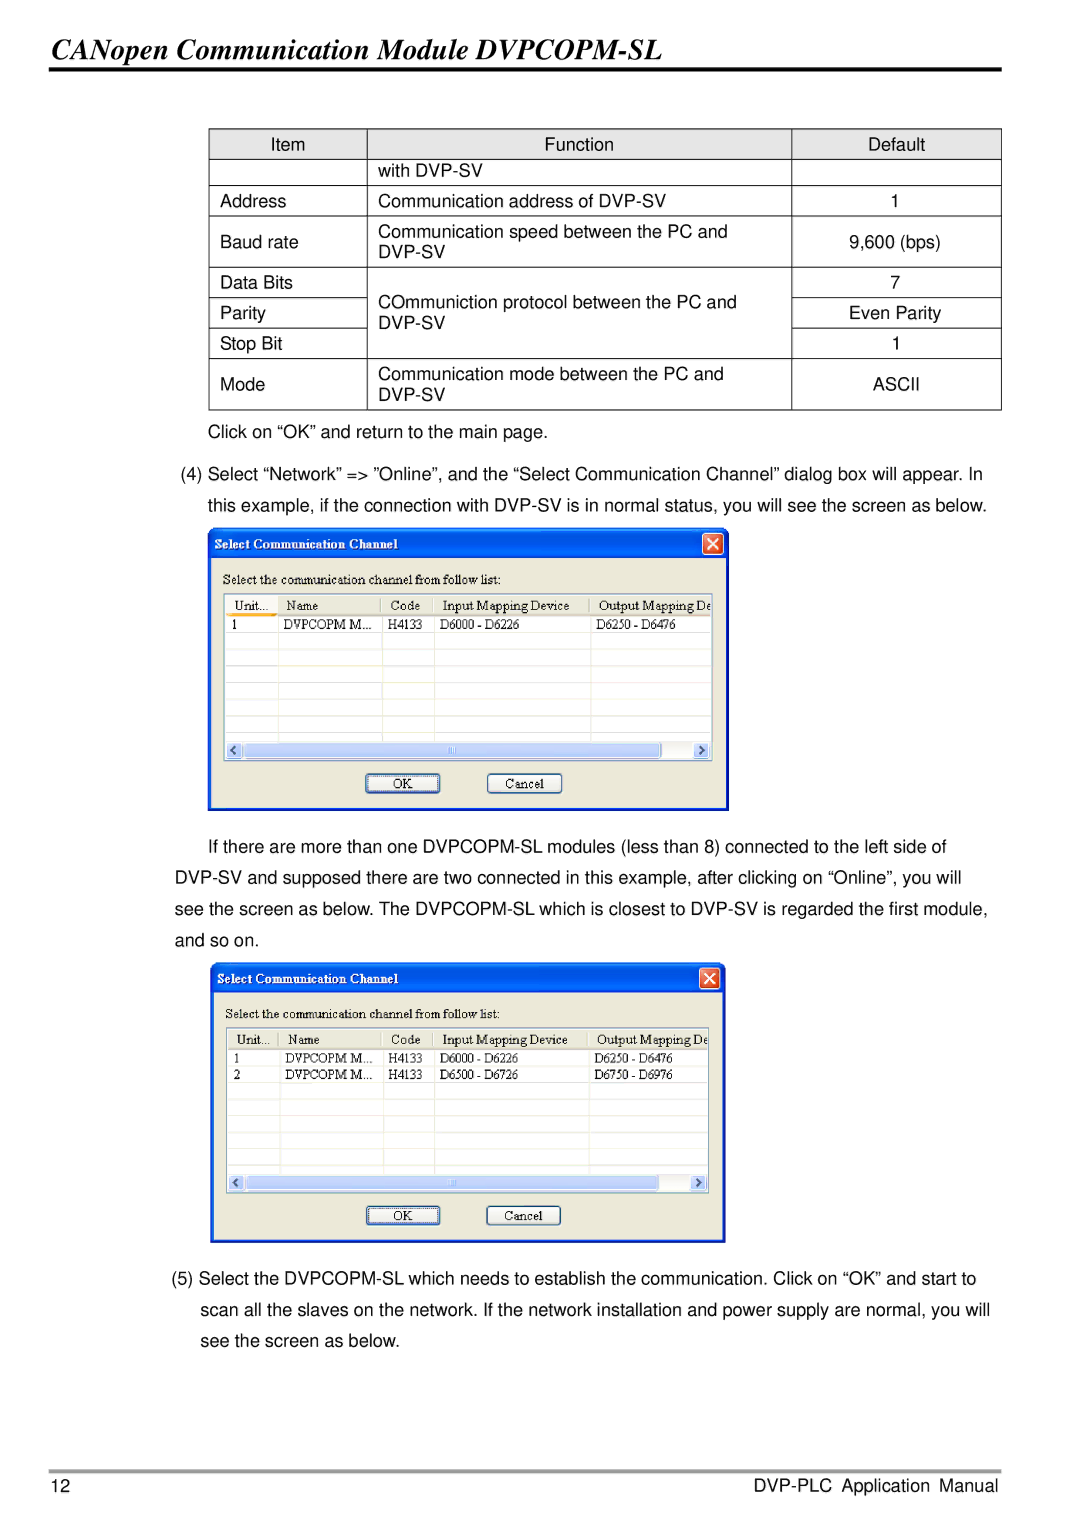
(4)Select “Network” => ”Online”, and the “Select Communication Channel” dialog box will appear. In this example, if the connection with DVP-SV is in normal status, you will see the screen as below.
If there are more than one DVPCOPM-SL modules (less than 8) connected to the left side of DVP-SV and supposed there are two connected in this example, after clicking on “Online”, you will see the screen as below. The DVPCOPM-SL which is closest to DVP-SV is regarded the first module, and so on.
(5)Select the DVPCOPM-SL which needs to establish the communication. Click on “OK” and start to scan all the slaves on the network. If the network installation and power supply are normal, you will see the screen as below.
12 | DVP-PLC Application Manual |

