Setting up the router | 7 |
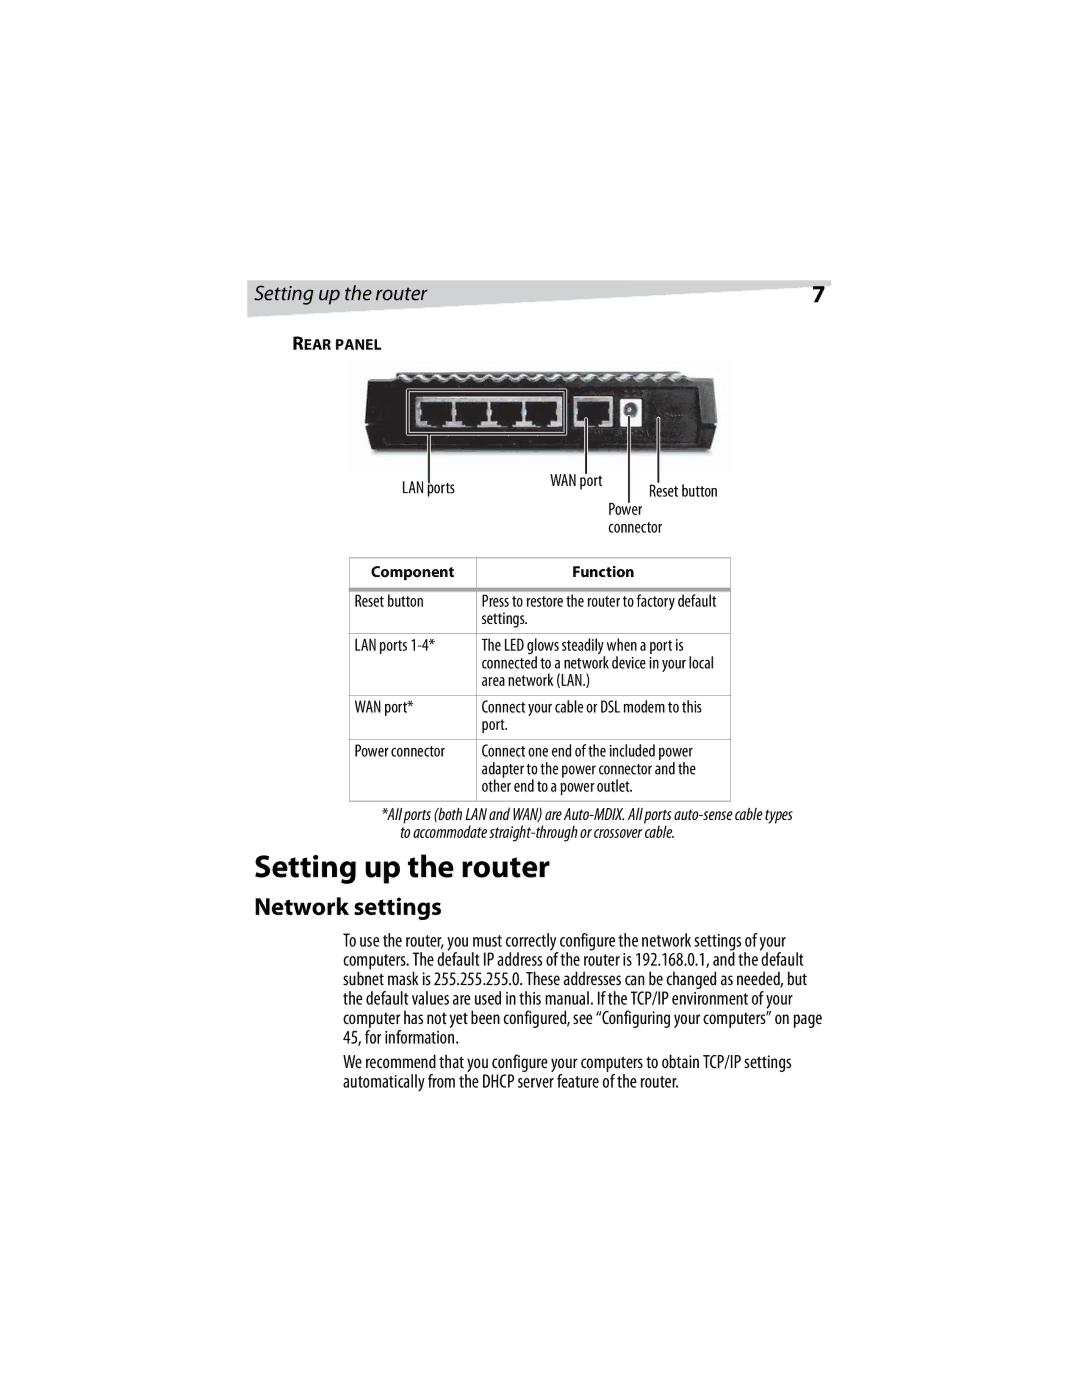
REAR PANEL
|
|
|
|
|
|
|
|
|
|
|
|
|
|
|
|
|
|
|
|
|
|
|
|
|
|
|
|
|
| WAN port |
|
|
| ||
LAN ports |
| Reset button | ||||||
|
|
|
| |||||
|
|
|
|
| Power |
|
| |
|
|
|
|
| connector | |||
|
|
|
|
|
|
|
|
|
Component |
| Function |
|
| ||||
|
|
|
|
|
|
|
| |
Reset button | Press to restore the router to factory default | |||||||
|
|
| settings. |
|
| |||
|
|
|
|
|
|
|
| |
LAN ports | The LED glows steadily when a port is | |||||||
|
|
| connected to a network device in your local | |||||
|
|
| area network (LAN.) |
|
| |||
|
|
|
|
|
|
|
| |
WAN port* | Connect your cable or DSL modem to this | |||||||
|
|
| port. |
|
| |||
|
|
|
|
|
|
|
| |
Power connector | Connect one end of the included power | |||||||
|
|
| adapter to the power connector and the | |||||
|
|
| other end to a power outlet. |
|
| |||
|
|
|
|
|
|
|
|
|
*All ports (both LAN and WAN) are
Setting up the router
Network settings
To use the router, you must correctly configure the network settings of your computers. The default IP address of the router is 192.168.0.1, and the default subnet mask is 255.255.255.0. These addresses can be changed as needed, but the default values are used in this manual. If the TCP/IP environment of your computer has not yet been configured, see “Configuring your computers” on page 45, for information.
We recommend that you configure your computers to obtain TCP/IP settings automatically from the DHCP server feature of the router.