Operation, cont’d
Memory Presets menu
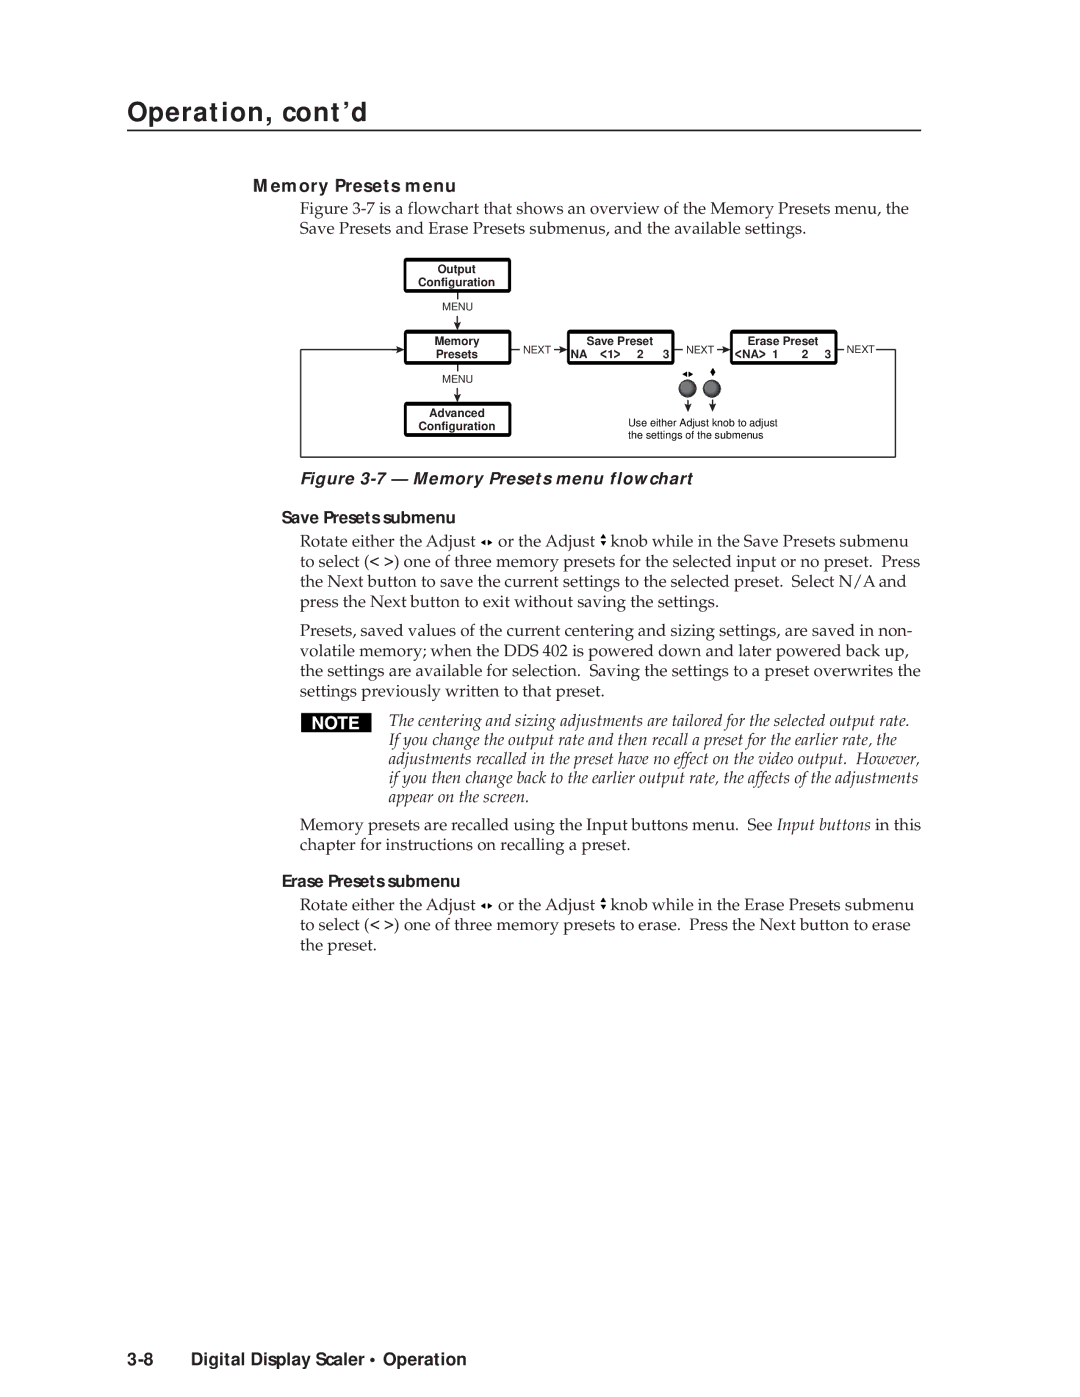
Figure 3-7 is a flowchart that shows an overview of the Memory Presets menu, the Save Presets and Erase Presets submenus, and the available settings.
Output
Configuration
MENU
Memory
Presets
MENU
Advanced
Configuration
|
| Save Preset |
|
|
| Erase Preset |
|
| ||
NEXT |
| NA | <1> 2 3 |
| NEXT |
| <NA> 1 | 2 3 |
| NEXT |
|
|
|
| |||||||
|
|
|
|
|
|
| ||||
Use either Adjust knob to adjust the settings of the submenus
Figure 3-7 — Memory Presets menu flowchart
Save Presets submenu
Rotate either the Adjust ![]()
![]() or the Adjust
or the Adjust ![]() knob while in the Save Presets submenu to select (< >) one of three memory presets for the selected input or no preset. Press the Next button to save the current settings to the selected preset. Select N/A and press the Next button to exit without saving the settings.
knob while in the Save Presets submenu to select (< >) one of three memory presets for the selected input or no preset. Press the Next button to save the current settings to the selected preset. Select N/A and press the Next button to exit without saving the settings.
Presets, saved values of the current centering and sizing settings, are saved in non- volatile memory; when the DDS 402 is powered down and later powered back up, the settings are available for selection. Saving the settings to a preset overwrites the settings previously written to that preset.
The centering and sizing adjustments are tailored for the selected output rate. If you change the output rate and then recall a preset for the earlier rate, the adjustments recalled in the preset have no effect on the video output. However, if you then change back to the earlier output rate, the affects of the adjustments appear on the screen.
Memory presets are recalled using the Input buttons menu. See Input buttons in this chapter for instructions on recalling a preset.
Erase Presets submenu
Rotate either the Adjust ![]()
![]() or the Adjust
or the Adjust ![]() knob while in the Erase Presets submenu to select (< >) one of three memory presets to erase. Press the Next button to erase the preset.
knob while in the Erase Presets submenu to select (< >) one of three memory presets to erase. Press the Next button to erase the preset.
