Operation, cont’d
Reset submenu
The Reset submenu resets the DDS 402 to the default values. Reset the scaler by pressing and holding the Freeze button while this submenu is active. The LCD displays Unit Reset to Factory Defaults when the reset is complete. Release the Freeze button.
Exit menu
From the Exit menu (figure
Display
Cycle
NEXT
Advanced |
| MENU |
| Exit |
| MENU |
| Input |
Configuration |
|
| Menu |
|
| Configuration | ||
|
|
|
|
|
|
Figure 3-9 — Exit menu flowchart
Picture adjustments
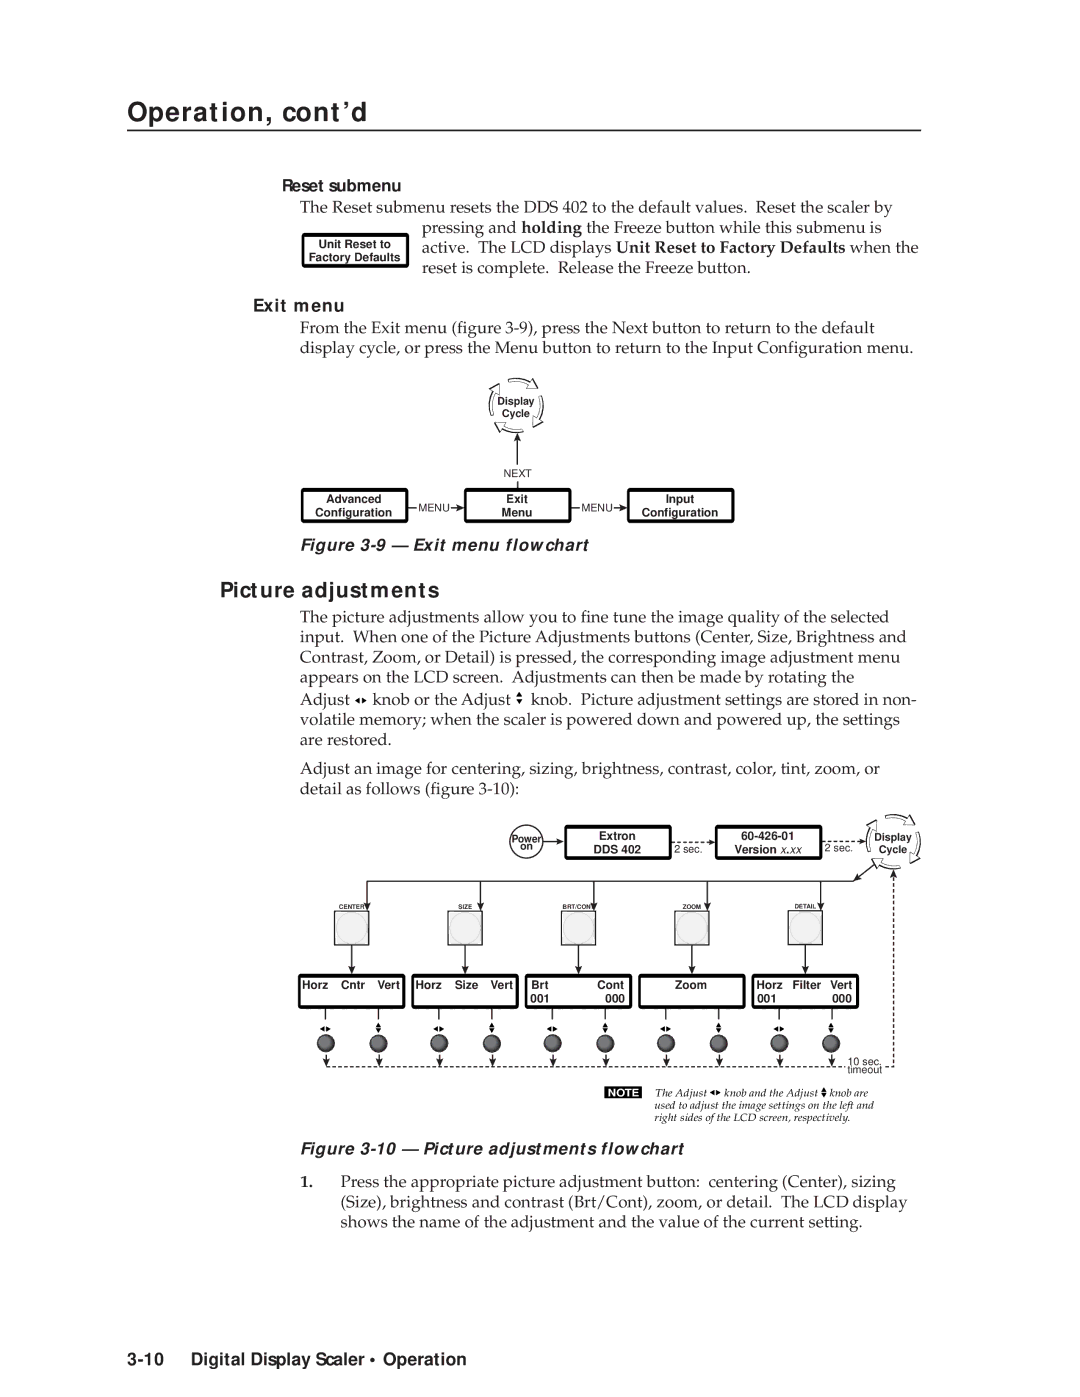
The picture adjustments allow you to fine tune the image quality of the selected input. When one of the Picture Adjustments buttons (Center, Size, Brightness and Contrast, Zoom, or Detail) is pressed, the corresponding image adjustment menu appears on the LCD screen. Adjustments can then be made by rotating the Adjust ![]()
![]() knob or the Adjust
knob or the Adjust ![]() knob. Picture adjustment settings are stored in non- volatile memory; when the scaler is powered down and powered up, the settings are restored.
knob. Picture adjustment settings are stored in non- volatile memory; when the scaler is powered down and powered up, the settings are restored.
Adjust an image for centering, sizing, brightness, contrast, color, tint, zoom, or detail as follows (figure
CENTER |
| SIZE |
| ||
|
| ||||
|
|
|
|
|
|
|
|
|
|
|
|
Power | Extron |
|
| Display | |
on | DDS 402 | 2 sec. | Version x.xx | 2 sec. | Cycle |
| BRT/CONT | ZOOM | DETAIL |
|
|
Horz Cntr Vert Horz Size Vert Brt | Cont | Zoom | Horz | Filter Vert |
001 | 000 |
| 001 | 000 |
10 sec. timeout
NOTE The Adjust ![]()
![]() knob and the Adjust
knob and the Adjust ![]() knob are used to adjust the image settings on the left and right sides of the LCD screen, respectively.
knob are used to adjust the image settings on the left and right sides of the LCD screen, respectively.
Figure 3-10 — Picture adjustments flowchart
1.Press the appropriate picture adjustment button: centering (Center), sizing (Size), brightness and contrast (Brt/Cont), zoom, or detail. The LCD display shows the name of the adjustment and the value of the current setting.
