HIGH EFFICIENCY DECATHLON SERIES GAS FRYERS
CHAPTER 1: SERVICE PROCEDURES
1.7.8 Replacing the Frypot (cont.)
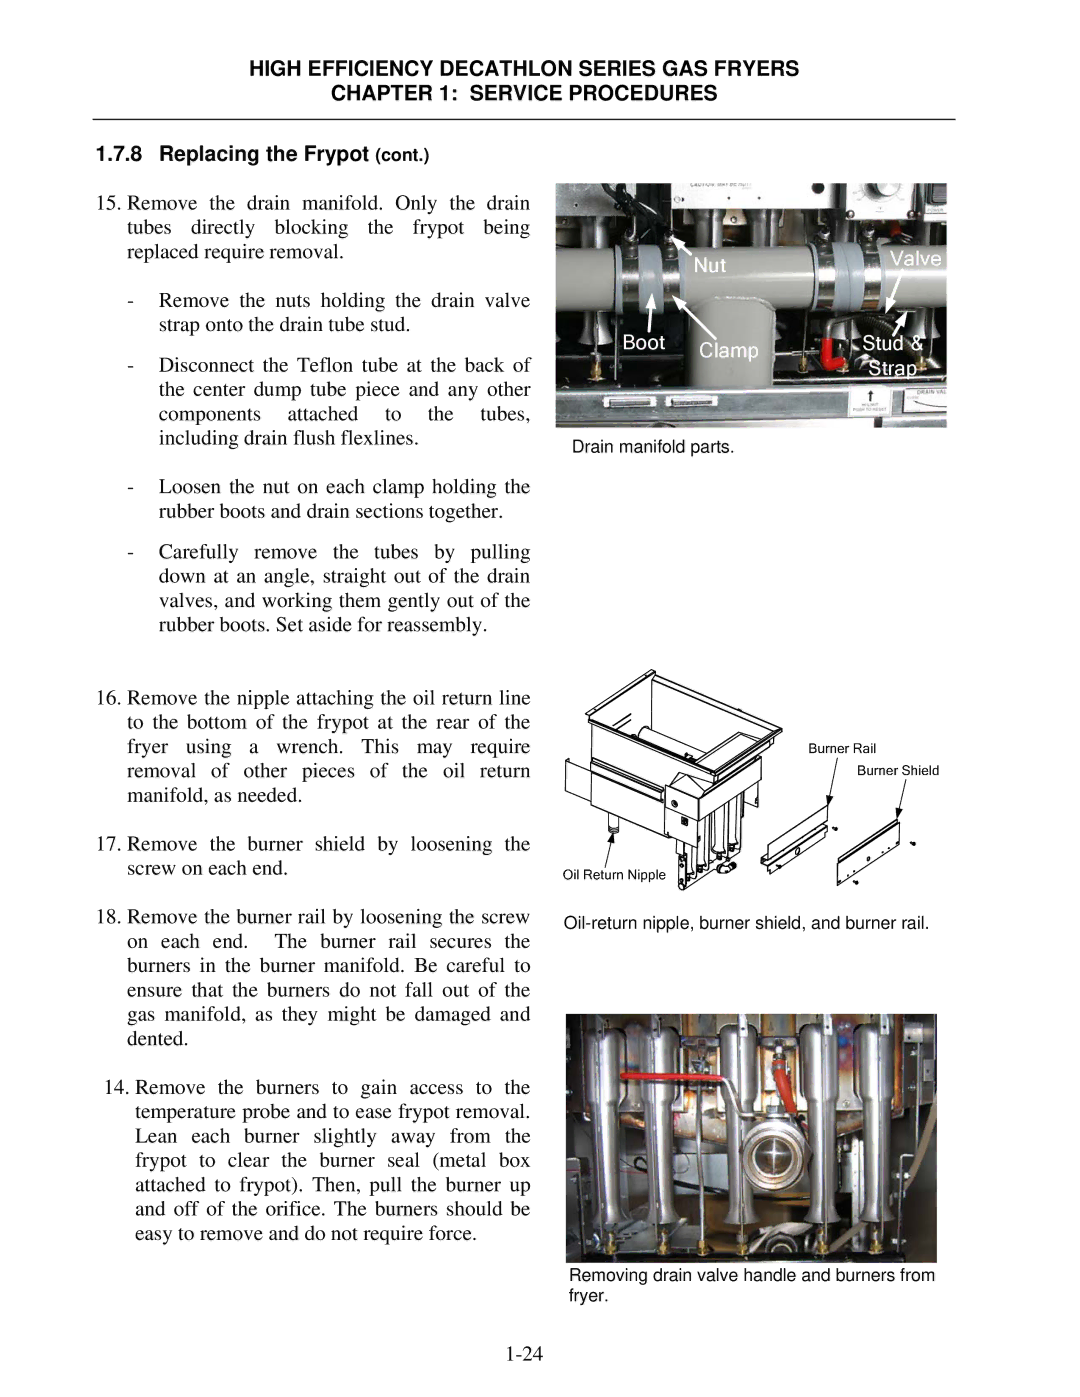
15.Remove the drain manifold. Only the drain tubes directly blocking the frypot being replaced require removal.
-Remove the nuts holding the drain valve strap onto the drain tube stud.
-Disconnect the Teflon tube at the back of the center dump tube piece and any other components attached to the tubes, including drain flush flexlines.
-Loosen the nut on each clamp holding the rubber boots and drain sections together.
| Nut | Valve |
|
| |
Boot | Clamp | Stud & |
| Strap | |
|
|
Drain manifold parts.
-Carefully remove the tubes by pulling down at an angle, straight out of the drain valves, and working them gently out of the rubber boots. Set aside for reassembly.
16.Remove the nipple attaching the oil return line to the bottom of the frypot at the rear of the fryer using a wrench. This may require removal of other pieces of the oil return manifold, as needed.
17.Remove the burner shield by loosening the screw on each end.
18.Remove the burner rail by loosening the screw on each end. The burner rail secures the burners in the burner manifold. Be careful to ensure that the burners do not fall out of the gas manifold, as they might be damaged and dented.
14.Remove the burners to gain access to the temperature probe and to ease frypot removal. Lean each burner slightly away from the frypot to clear the burner seal (metal box attached to frypot). Then, pull the burner up and off of the orifice. The burners should be easy to remove and do not require force.
Removing drain valve handle and burners from fryer.