L i f e B o o k B 6 2 0 0 S e r i e s – S e c t i o n F o u r
Memory Upgrade Module
Your notebook has been configured with a minimum of 512 MB of high speed DDR2 533 MHz RAM factory installed. In addition to the installed memory, there is a second DIMM slot in which you can install a second module. You can also increase your notebook’s memory capacity by replacing the original module with a higher capacity module (2 GB maximum). The memory upgrade must be a
INSTALLING A MEMORY MODULE
1.Turn off power to your notebook and remove any attached power adapter (AC or auto/airline).
■Do not remove any screws from the memory upgrade module compartment except the ones specifically shown in the directions for installing and removing the memory upgrade module.
■The memory upgrade module can be severely damaged by electrostatic dis- charge (ESD). To minimize risk to the module, observe the following precau- tions:
■Before handling a memory module, touch a grounded metal object to discharge static electricity built up in your body.
■When installing or removing a memory module, hold it by the edge so as not to touch any contacts or chips. Be careful not to touch any internal computer terminals or components; the oil from your fingers could cause a short circuit.
■Power down your system before adding or removing memory modules. Even if the system is in hibernate or standby states, data could be lost or the memory could be damaged if power is still available to the system.
2.Make sure that all connector covers are closed.
3.Turn the notebook bottom side up.
4.Remove the memory upgrade compartment screws, then remove the cover. (Figure
Do not remove any screws from the memory upgrade module compartment except those specifically shown in the directions for installing and removing the memory upgrade module.
Figure 4-10. Removing the Memory Module Cover
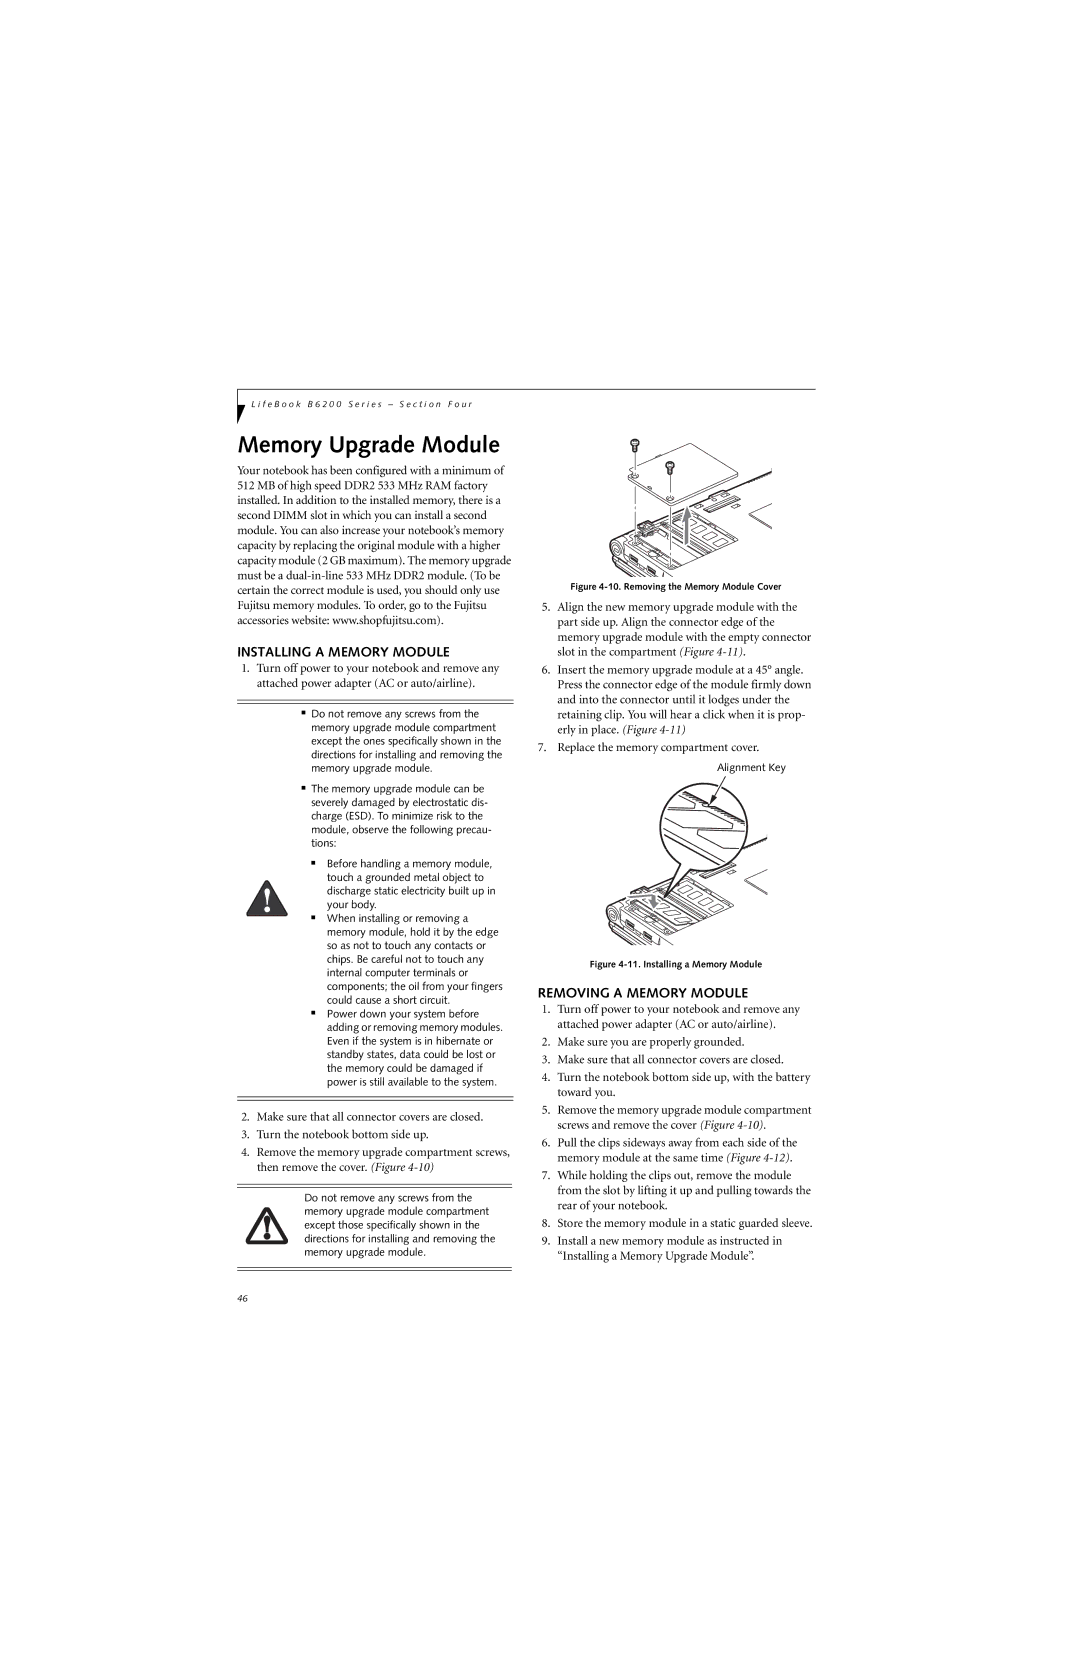
5.Align the new memory upgrade module with the part side up. Align the connector edge of the memory upgrade module with the empty connector slot in the compartment (Figure
6.Insert the memory upgrade module at a 45° angle. Press the connector edge of the module firmly down and into the connector until it lodges under the retaining clip. You will hear a click when it is prop- erly in place. (Figure
7.Replace the memory compartment cover.
Alignment Key
Figure 4-11. Installing a Memory Module
REMOVING A MEMORY MODULE
1.Turn off power to your notebook and remove any attached power adapter (AC or auto/airline).
2.Make sure you are properly grounded.
3.Make sure that all connector covers are closed.
4.Turn the notebook bottom side up, with the battery toward you.
5.Remove the memory upgrade module compartment screws and remove the cover (Figure
6.Pull the clips sideways away from each side of the memory module at the same time (Figure
7.While holding the clips out, remove the module from the slot by lifting it up and pulling towards the rear of your notebook.
8.Store the memory module in a static guarded sleeve.
9.Install a new memory module as instructed in “Installing a Memory Upgrade Module”.
46