L i f e B o o k N 6 4 0 0 S e r i e s U s e r ’ s G u i d e
a. | b. | c. | d. |
| Figure |
| |
EMERGENCY OPTICAL DRIVE TRAY RELEASE | USING THE OPTICAL PLAYER SOFTWARE | ||
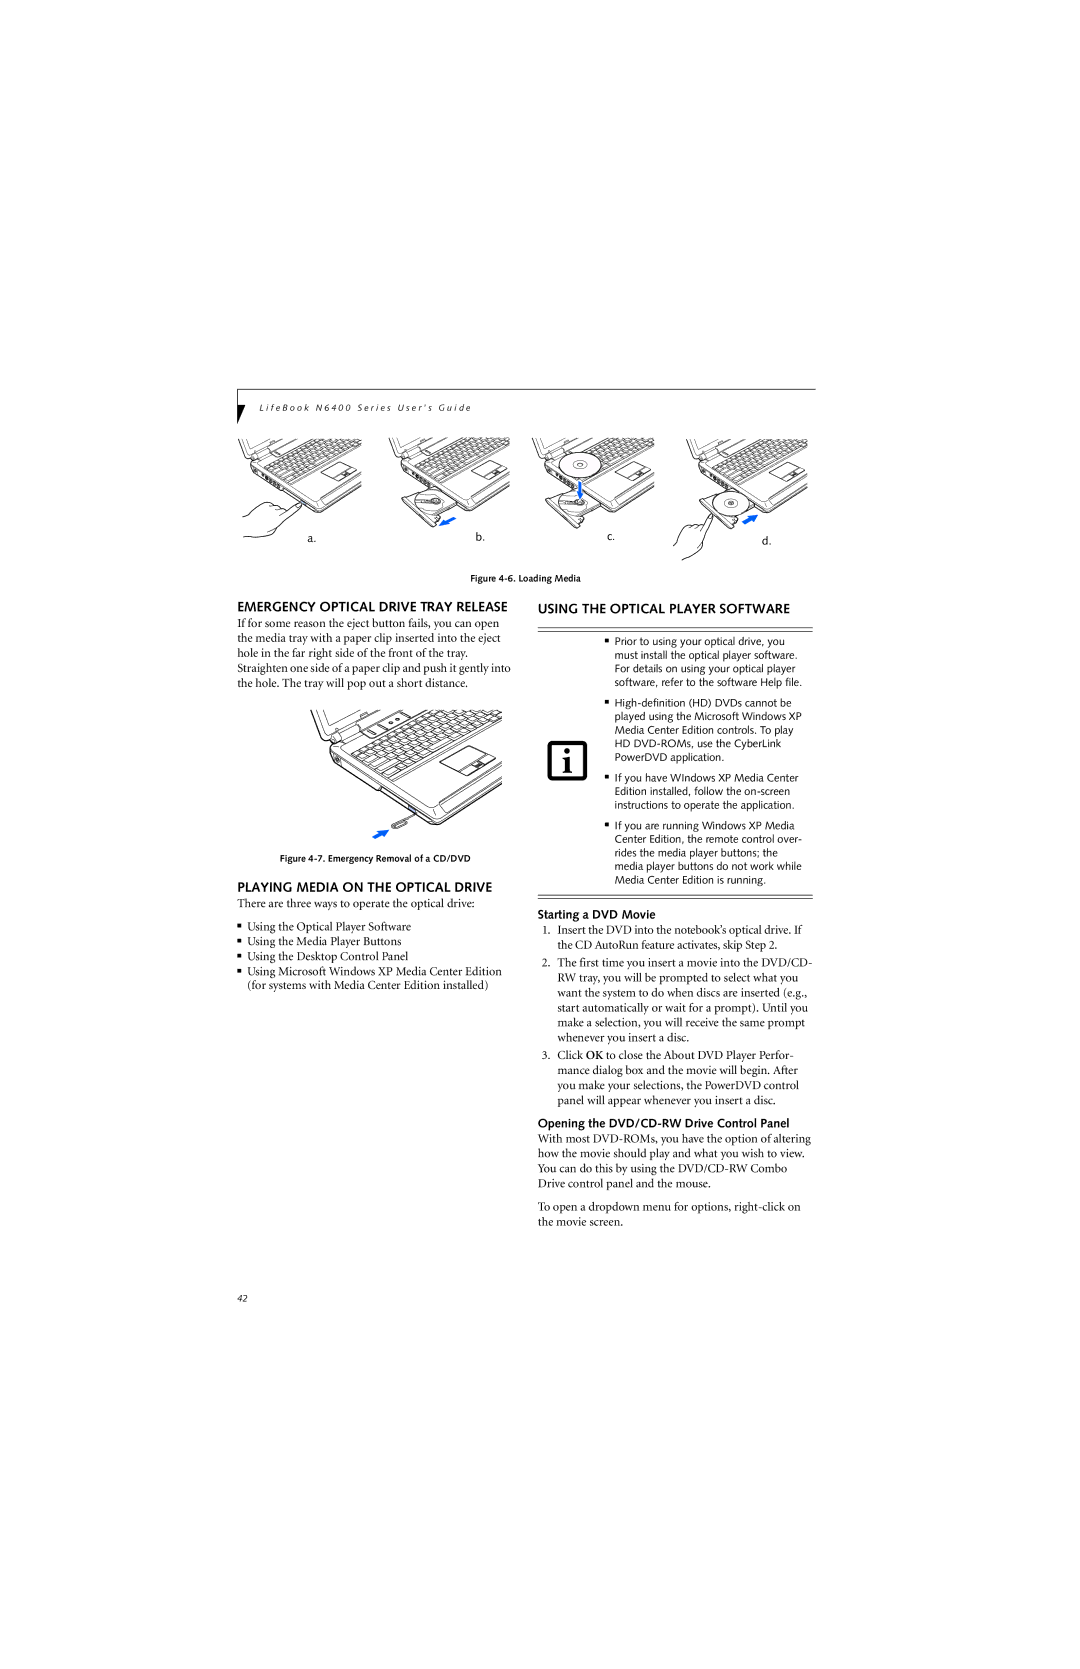
If for some reason the eject button fails, you can open the media tray with a paper clip inserted into the eject hole in the far right side of the front of the tray.
Straighten one side of a paper clip and push it gently into the hole. The tray will pop out a short distance.
Figure 4-7. Emergency Removal of a CD/DVD
PLAYING MEDIA ON THE OPTICAL DRIVE
There are three ways to operate the optical drive:
■Using the Optical Player Software
■Using the Media Player Buttons
■Using the Desktop Control Panel
■Using Microsoft Windows XP Media Center Edition (for systems with Media Center Edition installed)
■Prior to using your optical drive, you must install the optical player software. For details on using your optical player software, refer to the software Help file.
■
played using the Microsoft Windows XP Media Center Edition controls. To play HD
■If you have WIndows XP Media Center Edition installed, follow the
■If you are running Windows XP Media Center Edition, the remote control over- rides the media player buttons; the media player buttons do not work while Media Center Edition is running.
Starting a DVD Movie
1.Insert the DVD into the notebook’s optical drive. If the CD AutoRun feature activates, skip Step 2.
2.The first time you insert a movie into the DVD/CD- RW tray, you will be prompted to select what you want the system to do when discs are inserted (e.g., start automatically or wait for a prompt). Until you make a selection, you will receive the same prompt whenever you insert a disc.
3.Click OK to close the About DVD Player Perfor- mance dialog box and the movie will begin. After you make your selections, the PowerDVD control panel will appear whenever you insert a disc.
Opening the DVD/CD-RW Drive Control Panel
With most
To open a dropdown menu for options,
42
