Stepl
Preparing for l~ll~”on
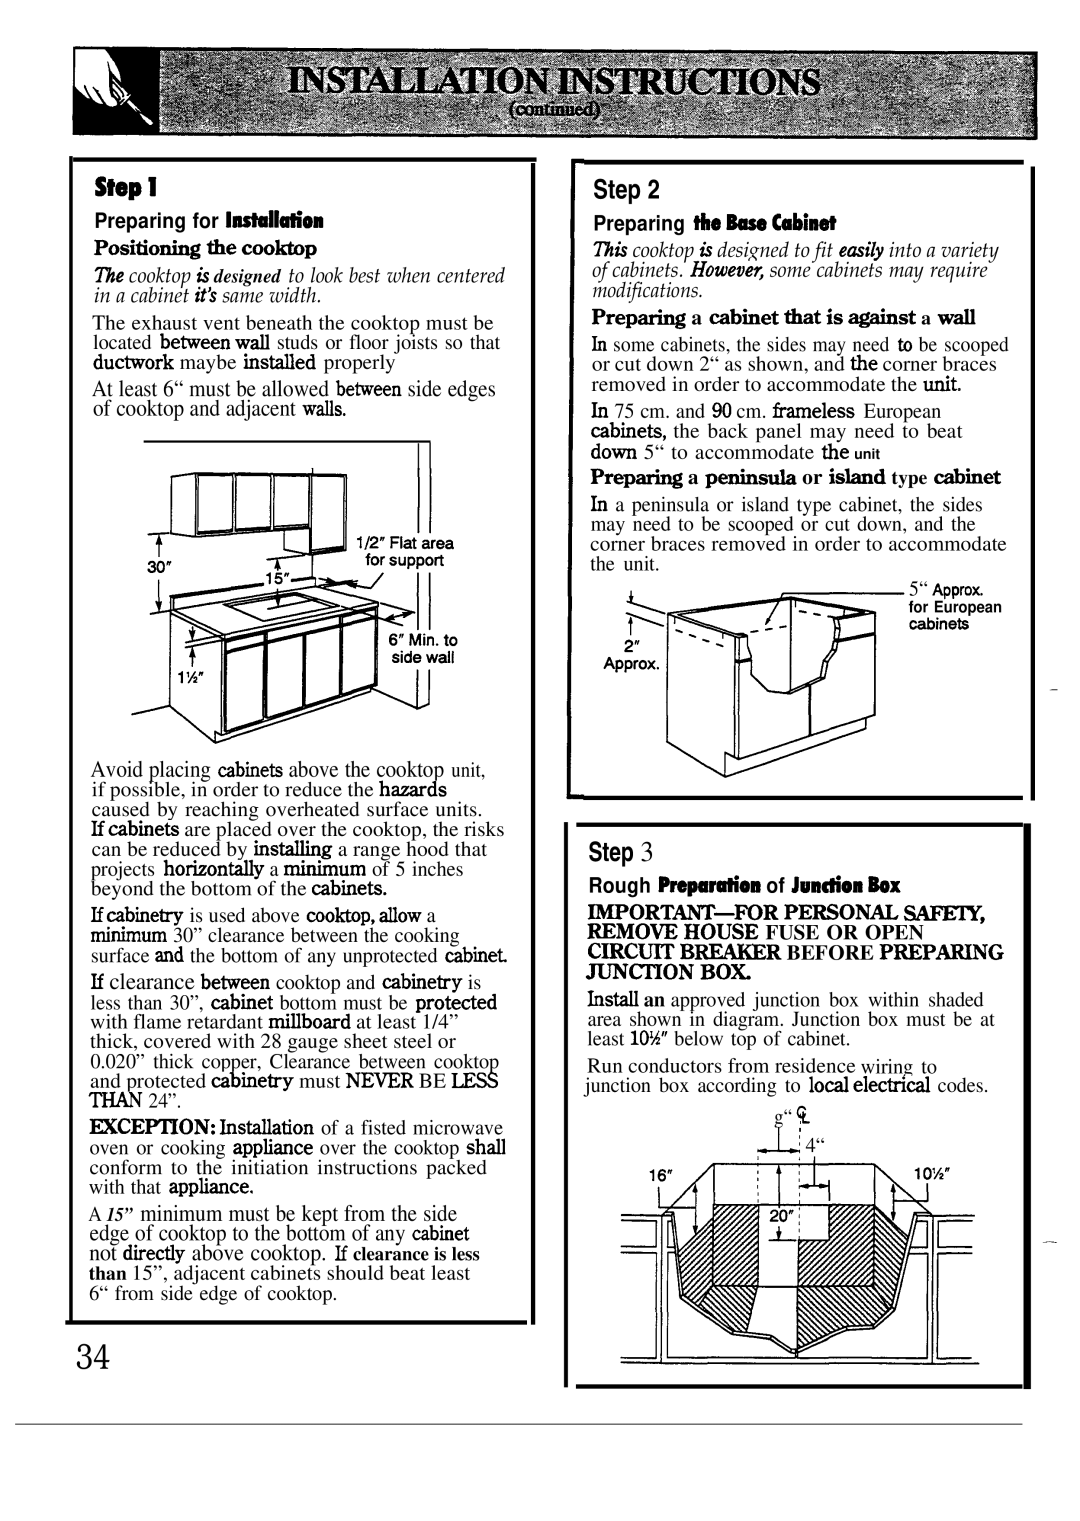
Positio* tie cootip
me cooktop is designed to look best when centered in a cabinet itk same width.
The exhaust vent beneath the cooktop must be located be~een wd studs or floor joists so that duc~ork maybe instied properly
At least 6“ must be allowed be~een side edges of cooktop and adjacent wds.
Avoid placing abinets above the cooktop unit,
if possible, in order to reduce the h~ds caused by reaching overheated surface units. Mubinets are placed over the cooktop, the risks can be reduced by ins~g a range hood that projects hotiontiy a hum of 5 inches beyond the bottom of the mbinets.
Hnbinetry is used above moktop, Wow a rninirnum 30” clearance between the cooking surface md the bottom of any unprotected ~binet
H clearance be~een cooktop and ~binetry is less than 30”, mbinet bottom must be proteded with flame retardant mi~board at least 1/4” thick, covered with 28 gauge sheet steel or 0.020” thick copper, Clearance between cooktop and protected ~binetry must NE~R BE ~ ~ 24”.
=CE~ON: kstiation of a fisted microwave oven or cooking apptiance over the cooktop sh~ conform to the initiation instructions packed with that apptiance.
A 15” minimum must be kept from the side edge of cooktop to the bottom of any =binet not directiy above cooktop. H clearance is less than 15”, adjacent cabinets should beat least 6“ from side edge of cooktop.
34
Step 2
Preparing ho ~ tibinti
~is cooktop & designed to fit emi& into a variety of cabinets. Howeveq some cabinets may require modifications.
Prep- a mbtiet bat is _st a ti
k some cabinets, the sides may need to be scooped or cut down 2“ as shown, and the corner braces removed in order to accommodate the unit.
h 75 cm. and W cm. frameless European abinets, the back panel may need to beat do~ 5“ to accommodate the unit
Prep- a p~~ or iskd type Ainet
h a peninsula or island type cabinet, the sides may need to be scooped or cut down, and the corner braces removed in order to accommodate the unit.
5“ Approx. for European c*ineb
—
Step 3
Rough Propation of Jundon Mx
~~~O~~~OUSE FUSE OR OPEN ~R BEFORE
~~ON BOX
hsti an approved junction box within shaded area shown in diagram. Junction box must be at least 10%” below top of cabinet.
Run conductors from residence wiring to junction box according to lod electrid codes.
g“ ~ L![]() : 4“
: 4“
—