R6530 DVD Recorder
Remote Control
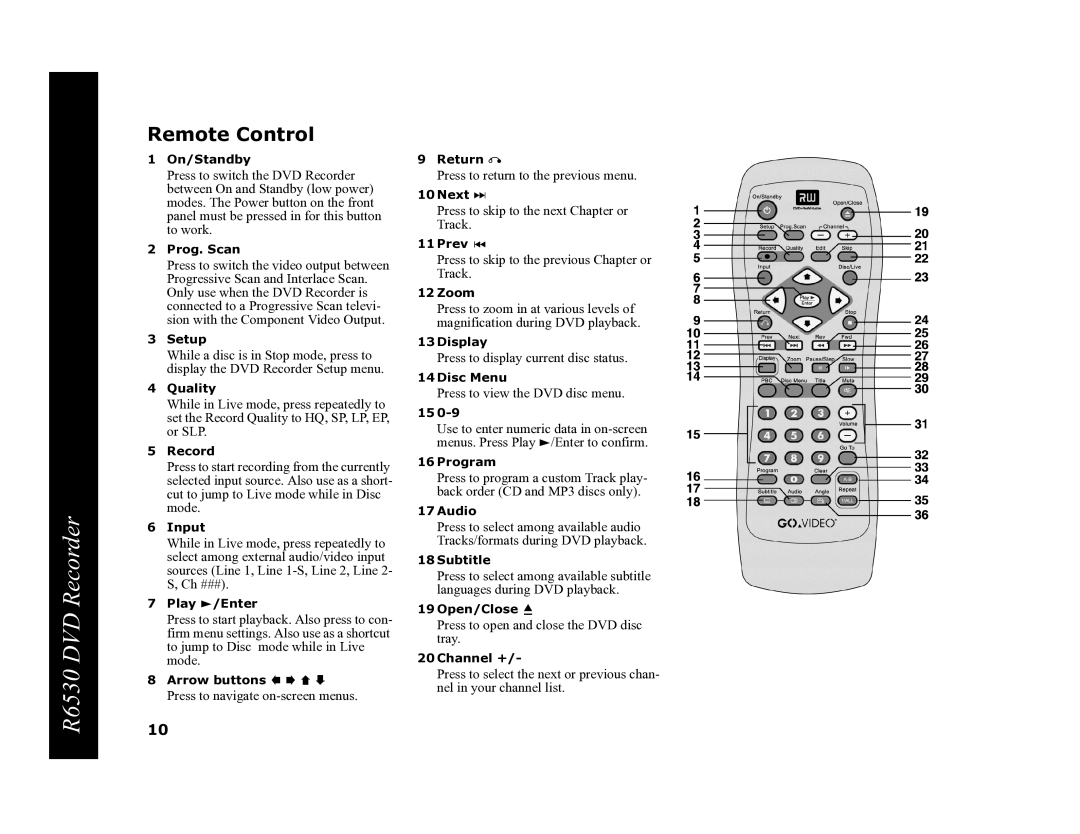
1On/Standby
Press to switch the DVD Recorder between On and Standby (low power) modes. The Power button on the front panel must be pressed in for this button to work.
2Prog. Scan
Press to switch the video output between Progressive Scan and Interlace Scan. Only use when the DVD Recorder is connected to a Progressive Scan televi- sion with the Component Video Output.
3Setup
While a disc is in Stop mode, press to display the DVD Recorder Setup menu.
4Quality
While in Live mode, press repeatedly to set the Record Quality to HQ, SP, LP, EP, or SLP.
5Record
Press to start recording from the currently selected input source. Also use as a short- cut to jump to Live mode while in Disc mode.
6Input
While in Live mode, press repeatedly to select among external audio/video input sources (Line 1, Line
7Play ![]() /Enter
/Enter
Press to start playback. Also press to con- firm menu settings. Also use as a shortcut to jump to Disc mode while in Live mode.
8Arrow buttons ![]()
![]()
![]()
![]()
Press to navigate
10
9Return ![]()
Press to return to the previous menu.
10Next ![]()
Press to skip to the next Chapter or Track.
11Prev ![]()
Press to skip to the previous Chapter or Track.
12Zoom
Press to zoom in at various levels of magnification during DVD playback.
13Display
Press to display current disc status.
14Disc Menu
Press to view the DVD disc menu.
15
Use to enter numeric data in ![]() /Enter to confirm.
/Enter to confirm.
16Program
Press to program a custom Track play- back order (CD and MP3 discs only).
17Audio
Press to select among available audio Tracks/formats during DVD playback.
18Subtitle
Press to select among available subtitle languages during DVD playback.
19Open/Close ![]()
Press to open and close the DVD disc tray.
20Channel +/-
Press to select the next or previous chan- nel in your channel list.