Working with the menu settings
Menu system overview
The main menu contains those settings that you will need to access most often as you work on an assignment. It also provides
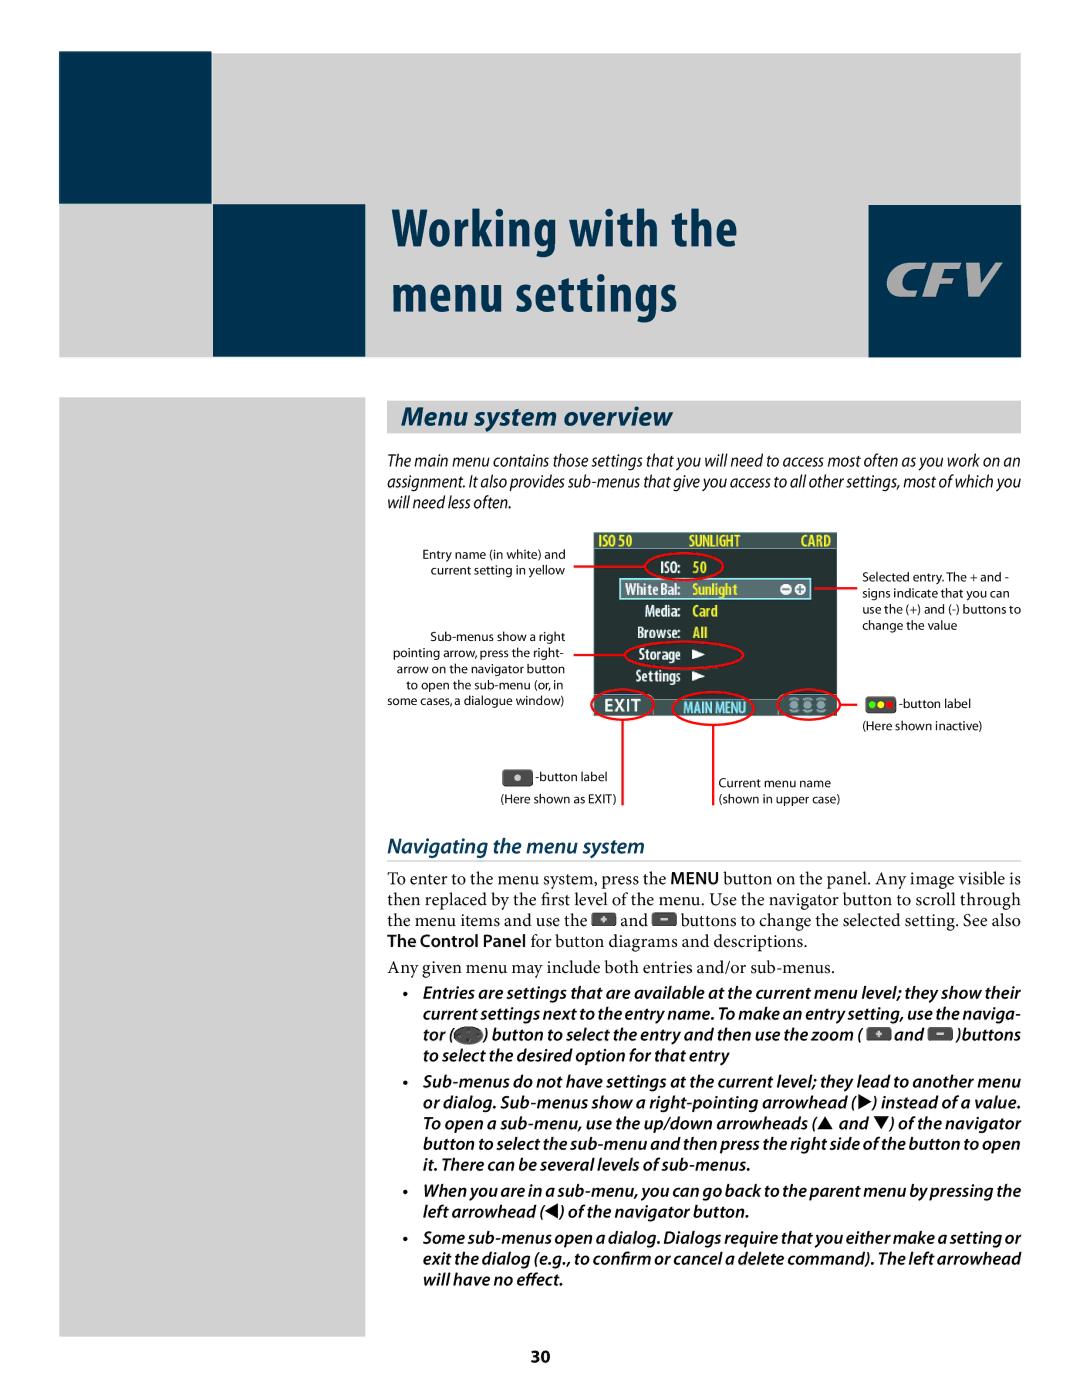
Entry name (in white) and current setting in yellow
![]()
Selected entry. The + and - signs indicate that you can use the (+) and
![]()
Current menu name (shown in upper case)
Navigating the menu system
To enter to the menu system, press the MENU button on the panel. Any image visible is then replaced by the first level of the menu. Use the navigator button to scroll through the menu items and use the ![]() and
and ![]() buttons to change the selected setting. See also The Control Panel for button diagrams and descriptions.
buttons to change the selected setting. See also The Control Panel for button diagrams and descriptions.
Any given menu may include both entries and/or sub-menus.
•Entries are settings that are available at the current menu level; they show their current settings next to the entry name. To make an entry setting, use the naviga-
tor (![]() ) button to select the entry and then use the zoom (
) button to select the entry and then use the zoom ( ![]() and
and ![]() )buttons to select the desired option for that entry
)buttons to select the desired option for that entry
•
•When you are in a
•Some
30