Language
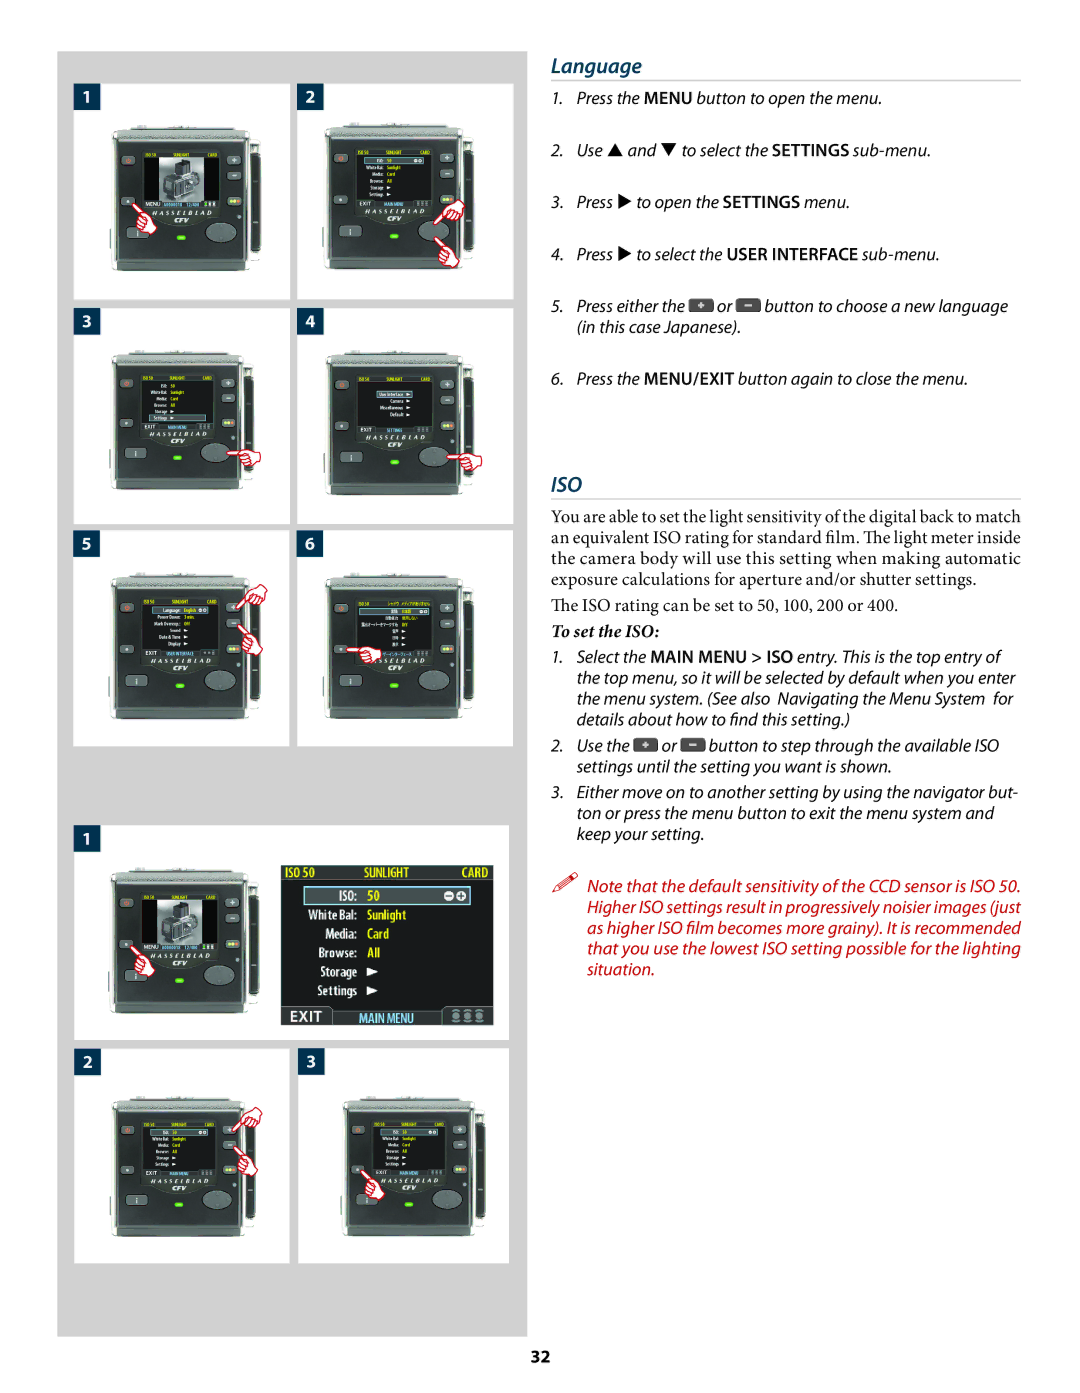
1 | 2 | 1. | Press the MENU button to open the menu. | ||
|
| 2. | Use and to select the SETTINGS | ||
|
| 3. | Press to open the SETTINGS menu. | ||
|
| 4. | Press to select the USER INTERFACE | ||
3 | 4 | 5. | Press either the | or | button to choose a new language |
| (in this case Japanese). |
| |||
|
|
|
| ||
|
| 6. | Press the MENU/EXIT button again to close the menu. | ||
ISO
You are able to set the light sensitivity of the digital back to match
56an equivalent ISO rating for standard film. The light meter inside the camera body will use this setting when making automatic exposure calculations for aperture and/or shutter settings.
The ISO rating can be set to 50, 100, 200 or 400.
To set the ISO:
1. Select the MAIN MENU > ISO entry. This is the top entry of the top menu, so it will be selected by default when you enter the menu system. (See also Navigating the Menu System for details about how to find this setting.)
2. | Use the | or | button to step through the available ISO |
| settings until the setting you want is shown. | ||
3. | Either move on to another setting by using the navigator but- | ||
| ton or press the menu button to exit the menu system and | ||
1 | keep your setting. |
| |
Note that the default sensitivity of the CCD sensor is ISO 50. Higher ISO settings result in progressively noisier images (just as higher ISO film becomes more grainy). It is recommended that you use the lowest ISO setting possible for the lighting situation.
23
32