1

23
Browse shortcut !
There is also a
To use it, press and hold (do not click!) the Instant Approval but- ton until the approval status colour appears. Browsing will then only display the images with that classification.
Browse
The browse filter complements the
•All: browses all of the images in the current batch, regardless of their approval status. This is the default.
•Red: browses only
•Green: browses only
•Green & Yellow: browses green and
For more information about using the
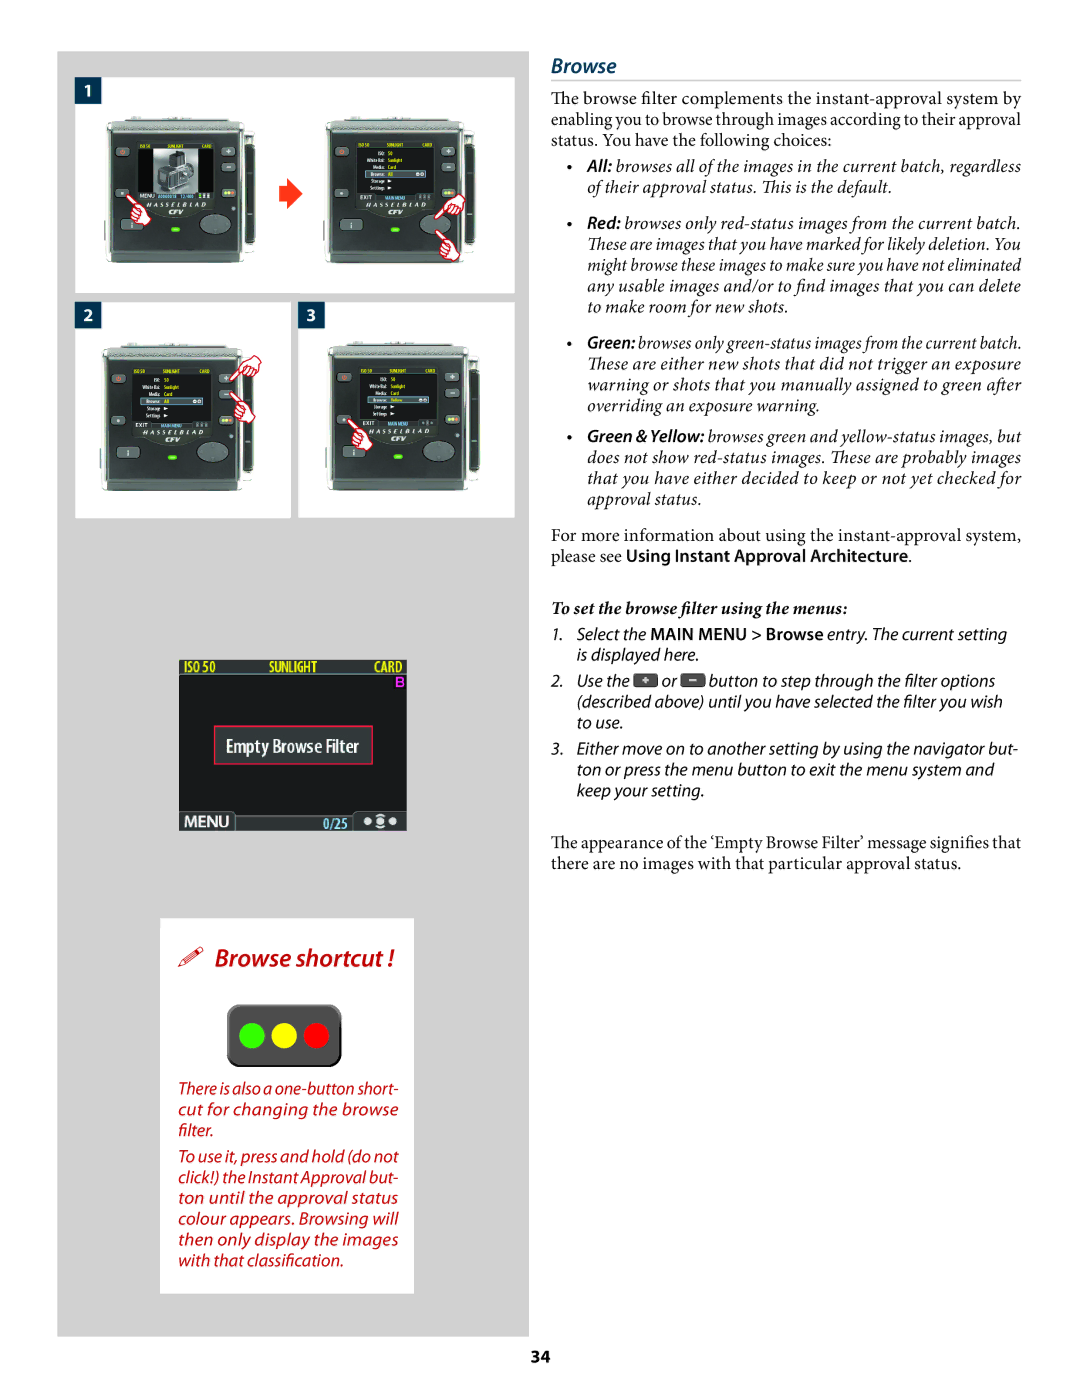
To set the browse filter using the menus:
1.Select the MAIN MENU > Browse entry. The current setting is displayed here.
2.Use the ![]() or
or ![]() button to step through the filter options (described above) until you have selected the filter you wish to use.
button to step through the filter options (described above) until you have selected the filter you wish to use.
3.Either move on to another setting by using the navigator but- ton or press the menu button to exit the menu system and keep your setting.
The appearance of the ‘Empty Browse Filter’ message signifies that there are no images with that particular approval status.
34