12
34
56
78
910
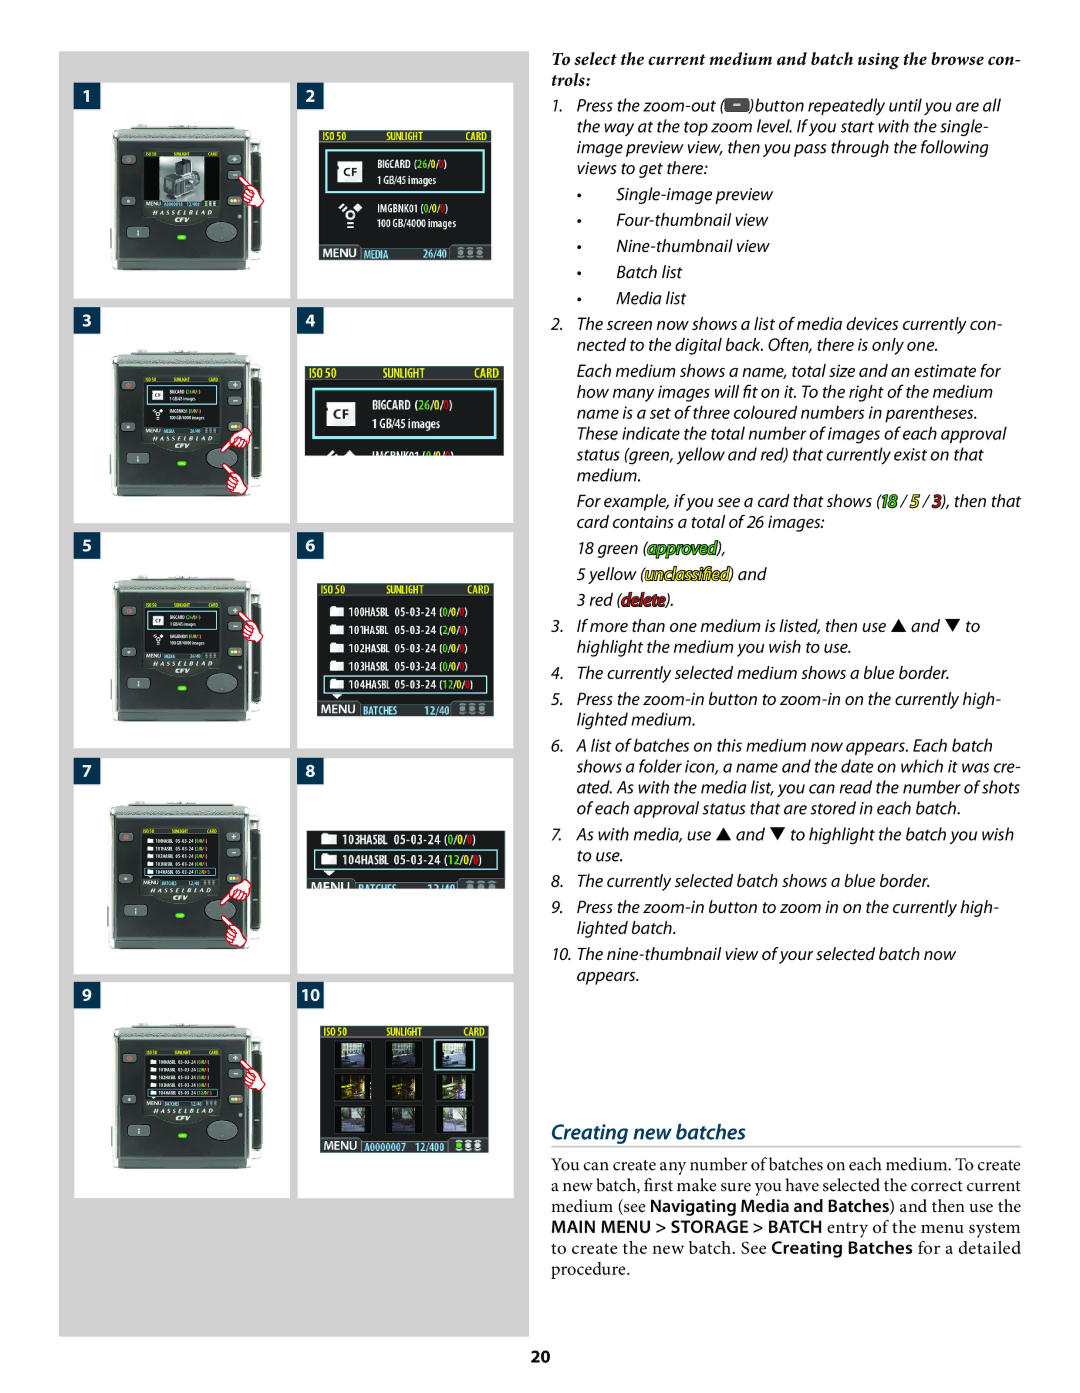
To select the current medium and batch using the browse con- trols:
1.Press the ![]() )button repeatedly until you are all the way at the top zoom level. If you start with the single- image preview view, then you pass through the following views to get there:
)button repeatedly until you are all the way at the top zoom level. If you start with the single- image preview view, then you pass through the following views to get there:
•
•
•
•Batch list
•Media list
2.The screen now shows a list of media devices currently con- nected to the digital back. Often, there is only one.
Each medium shows a name, total size and an estimate for how many images will fit on it. To the right of the medium name is a set of three coloured numbers in parentheses.
These indicate the total number of images of each approval status (green, yellow and red) that currently exist on that medium.
For example, if you see a card that shows (18 / 5 / 3), then that card contains a total of 26 images:
18 green (approved),
5 yellow (unclassified) and
3 red (delete).
3.If more than one medium is listed, then use and to highlight the medium you wish to use.
4.The currently selected medium shows a blue border.
5.Press the
6.A list of batches on this medium now appears. Each batch shows a folder icon, a name and the date on which it was cre- ated. As with the media list, you can read the number of shots of each approval status that are stored in each batch.
7.As with media, use and to highlight the batch you wish to use.
8.The currently selected batch shows a blue border.
9.Press the
10.The
Creating new batches
You can create any number of batches on each medium. To create a new batch, first make sure you have selected the correct current medium (see Navigating Media and Batches) and then use the MAIN MENU > STORAGE > BATCH entry of the menu system to create the new batch. See Creating Batches for a detailed procedure.
20