E.Positioning the Logs Model: Cerona-36

Log Assembly: LOGS-Cerona36

If the gas logs have been factory installed they should not need to be positioned. If the logs have been packaged separately, refer to the following instructions.
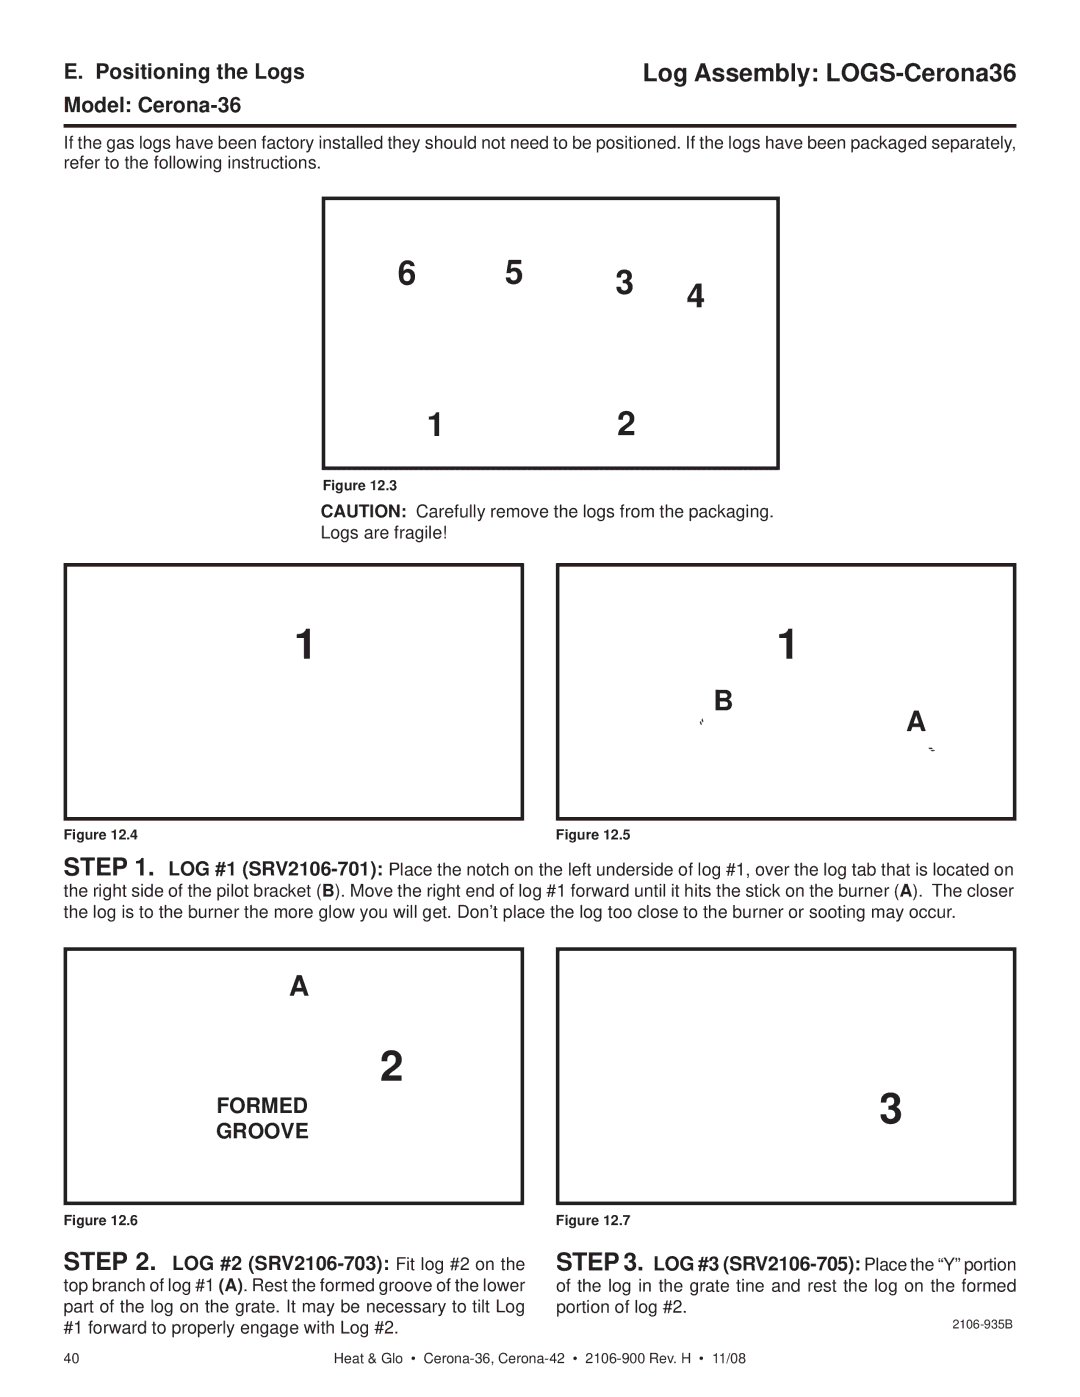
6 5 3 4

1 2

Figure 12.3

CAUTION: Carefully remove the logs from the packaging.

Logs are fragile!

1

1

Figure 12.4

B

Figure 12.5

A

STEP 1. LOG #1 (SRV2106-701):Place the notch on the left underside of log #1, over the log tab that is located on the right side of the pilot bracket (B). Move the right end of log #1 forward until it hits the stick on the burner (A). The closer the log is to the burner the more glow you will get. Don’t place the log too close to the burner or sooting may occur.

A

2

FORMED

GROOVE

Figure 12.6

STEP 2. LOG #2 (SRV2106-703):Fit log #2 on the top branch of log #1 (A). Rest the formed groove of the lower part of the log on the grate. It may be necessary to tilt Log #1 forward to properly engage with Log #2.

3

Figure 12.7

STEP 3. LOG #3 (SRV2106-705):Place the “Y” portion of the log in the grate tine and rest the log on the formed portion of log #2.

2106-935B

40

Heat & Glo • Cerona-36, Cerona-422106-900 Rev. H • 11/08

Page 40
Image 40
Hearth and Home Technologies CERONA-42 owner manual Log Assembly LOGS-Cerona36, Positioning the Logs Model Cerona-36