hp psc 2100 series
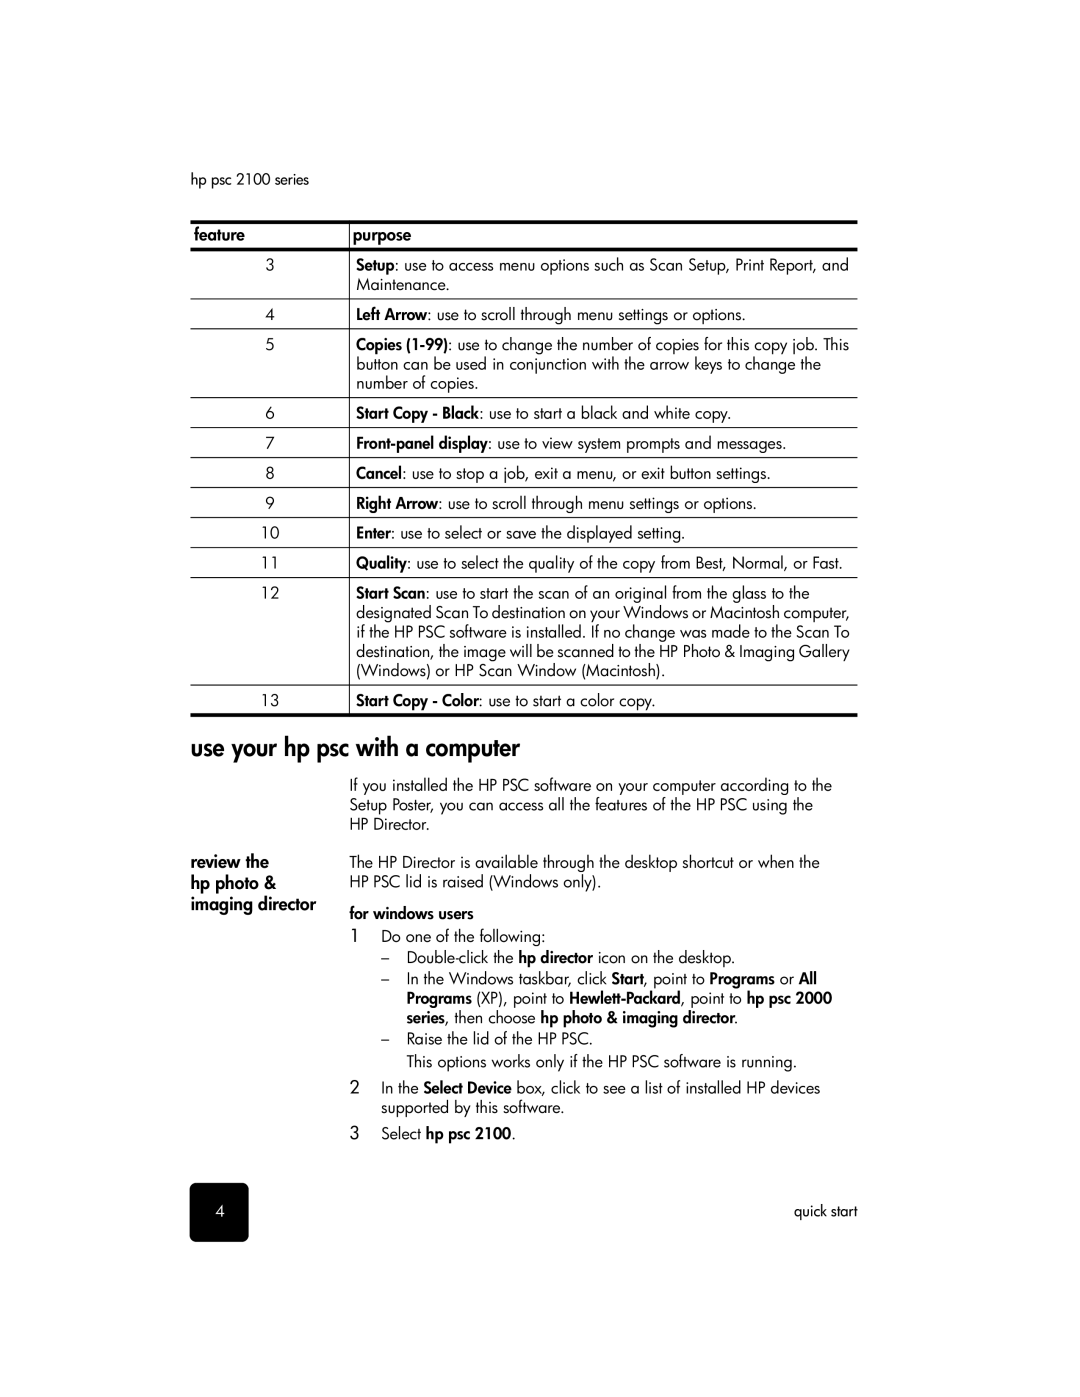
feature | purpose |
3Setup: use to access menu options such as Scan Setup, Print Report, and Maintenance.
4Left Arrow: use to scroll through menu settings or options.
5Copies
6 | Start Copy - Black: use to start a black and white copy. |
7 | |
|
|
8 | Cancel: use to stop a job, exit a menu, or exit button settings. |
|
|
9 | Right Arrow: use to scroll through menu settings or options. |
|
|
10 | Enter: use to select or save the displayed setting. |
|
|
11 | Quality: use to select the quality of the copy from Best, Normal, or Fast. |
12Start Scan: use to start the scan of an original from the glass to the designated Scan To destination on your Windows or Macintosh computer, if the HP PSC software is installed. If no change was made to the Scan To destination, the image will be scanned to the HP Photo & Imaging Gallery (Windows) or HP Scan Window (Macintosh).
13Start Copy - Color: use to start a color copy.
use your hp psc with a computer
review the hp photo & imaging director
If you installed the HP PSC software on your computer according to the Setup Poster, you can access all the features of the HP PSC using the HP Director.
The HP Director is available through the desktop shortcut or when the HP PSC lid is raised (Windows only).
for windows users
1Do one of the following:
–
–In the Windows taskbar, click Start, point to Programs or All Programs (XP), point to
–Raise the lid of the HP PSC.
This options works only if the HP PSC software is running.
2In the Select Device box, click to see a list of installed HP devices supported by this software.
3Select hp psc 2100.
4 | quick start |
