Chapter 8
Incorrectly Installed Cartridge(s)
Print Cartridge(s) Missing
Solve a problem
Print cartridges missing or not detected
Try the following solutions to resolve the issue. Solutions are listed in order, with the most likely solution first. If the first solution does not solve the problem, continue trying the remaining solutions until the issue is resolved.
•Solution 1: Remove and reinsert the print cartridges
•Solution 2: Clean the print cartridge contacts
•Solution 3: Replace the print cartridges
Solution 1: Remove and reinsert the print cartridges
Solution: Remove and reinsert the print cartridges and verify that they are fully inserted and locked in place.
Also, make sure the print cartridges are installed into the correct slots.
To make sure the print cartridges are installed correctly
1.Make sure the product is turned on.
2.Open the print cartridge door.
The print carriage moves to the center of the product.
3.Check to make sure you are using the correct print cartridges for your product. For more information about compatible print cartridges, see “Order ink supplies” on page 33
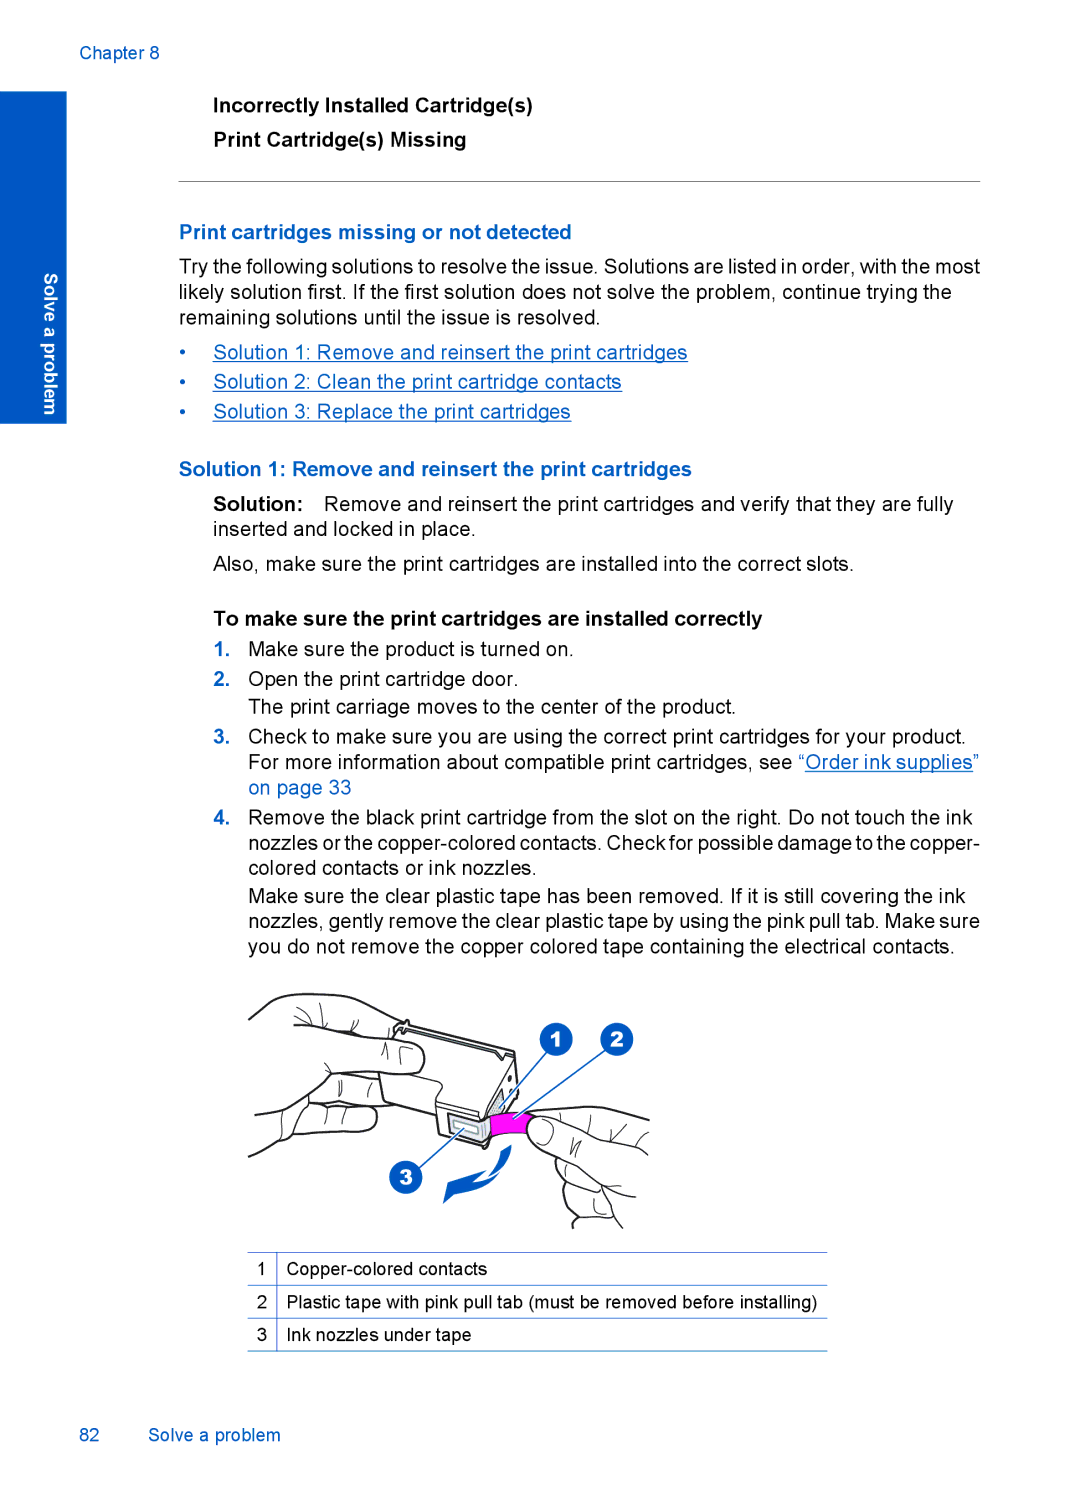
4.Remove the black print cartridge from the slot on the right. Do not touch the ink nozzles or the
Make sure the clear plastic tape has been removed. If it is still covering the ink nozzles, gently remove the clear plastic tape by using the pink pull tab. Make sure you do not remove the copper colored tape containing the electrical contacts.
1
2Plastic tape with pink pull tab (must be removed before installing)
3Ink nozzles under tape
82 Solve a problem
