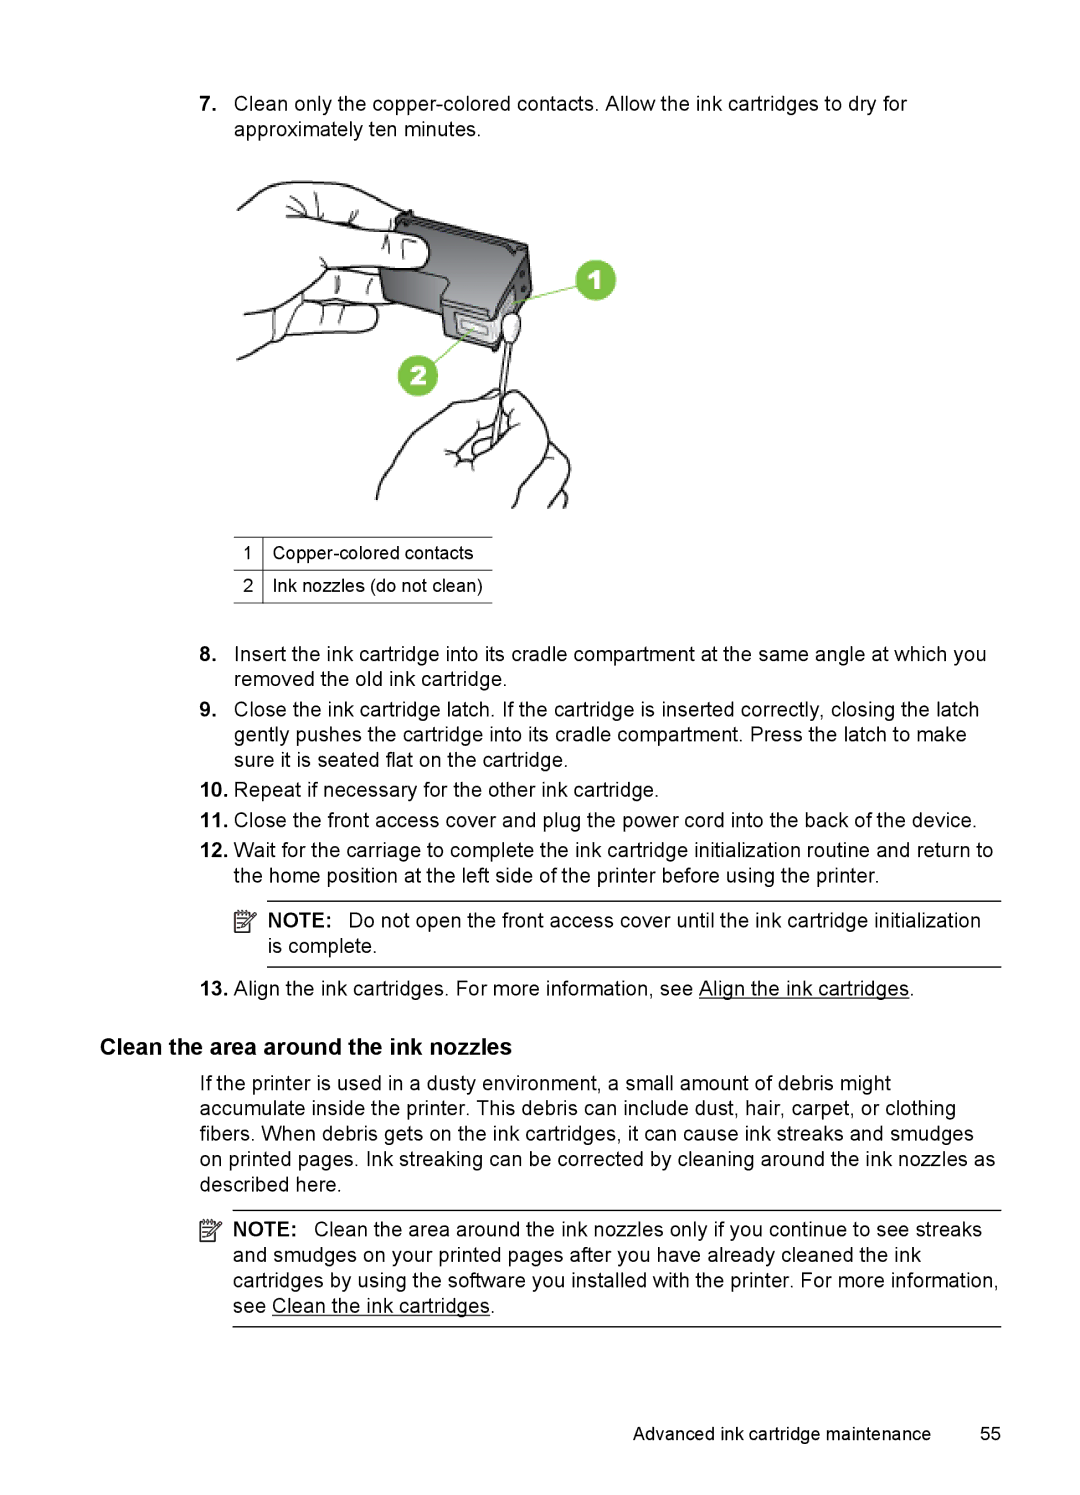
7.Clean only the
1
2Ink nozzles (do not clean)
8.Insert the ink cartridge into its cradle compartment at the same angle at which you removed the old ink cartridge.
9.Close the ink cartridge latch. If the cartridge is inserted correctly, closing the latch gently pushes the cartridge into its cradle compartment. Press the latch to make sure it is seated flat on the cartridge.
10.Repeat if necessary for the other ink cartridge.
11.Close the front access cover and plug the power cord into the back of the device.
12.Wait for the carriage to complete the ink cartridge initialization routine and return to the home position at the left side of the printer before using the printer.
![]() NOTE: Do not open the front access cover until the ink cartridge initialization is complete.
NOTE: Do not open the front access cover until the ink cartridge initialization is complete.
13.Align the ink cartridges. For more information, see Align the ink cartridges.
Clean the area around the ink nozzles
If the printer is used in a dusty environment, a small amount of debris might accumulate inside the printer. This debris can include dust, hair, carpet, or clothing fibers. When debris gets on the ink cartridges, it can cause ink streaks and smudges on printed pages. Ink streaking can be corrected by cleaning around the ink nozzles as described here.
![]() NOTE: Clean the area around the ink nozzles only if you continue to see streaks and smudges on your printed pages after you have already cleaned the ink cartridges by using the software you installed with the printer. For more information, see Clean the ink cartridges.
NOTE: Clean the area around the ink nozzles only if you continue to see streaks and smudges on your printed pages after you have already cleaned the ink cartridges by using the software you installed with the printer. For more information, see Clean the ink cartridges.
Advanced ink cartridge maintenance | 55 |