Printing Private Print Jobs
NOTE |
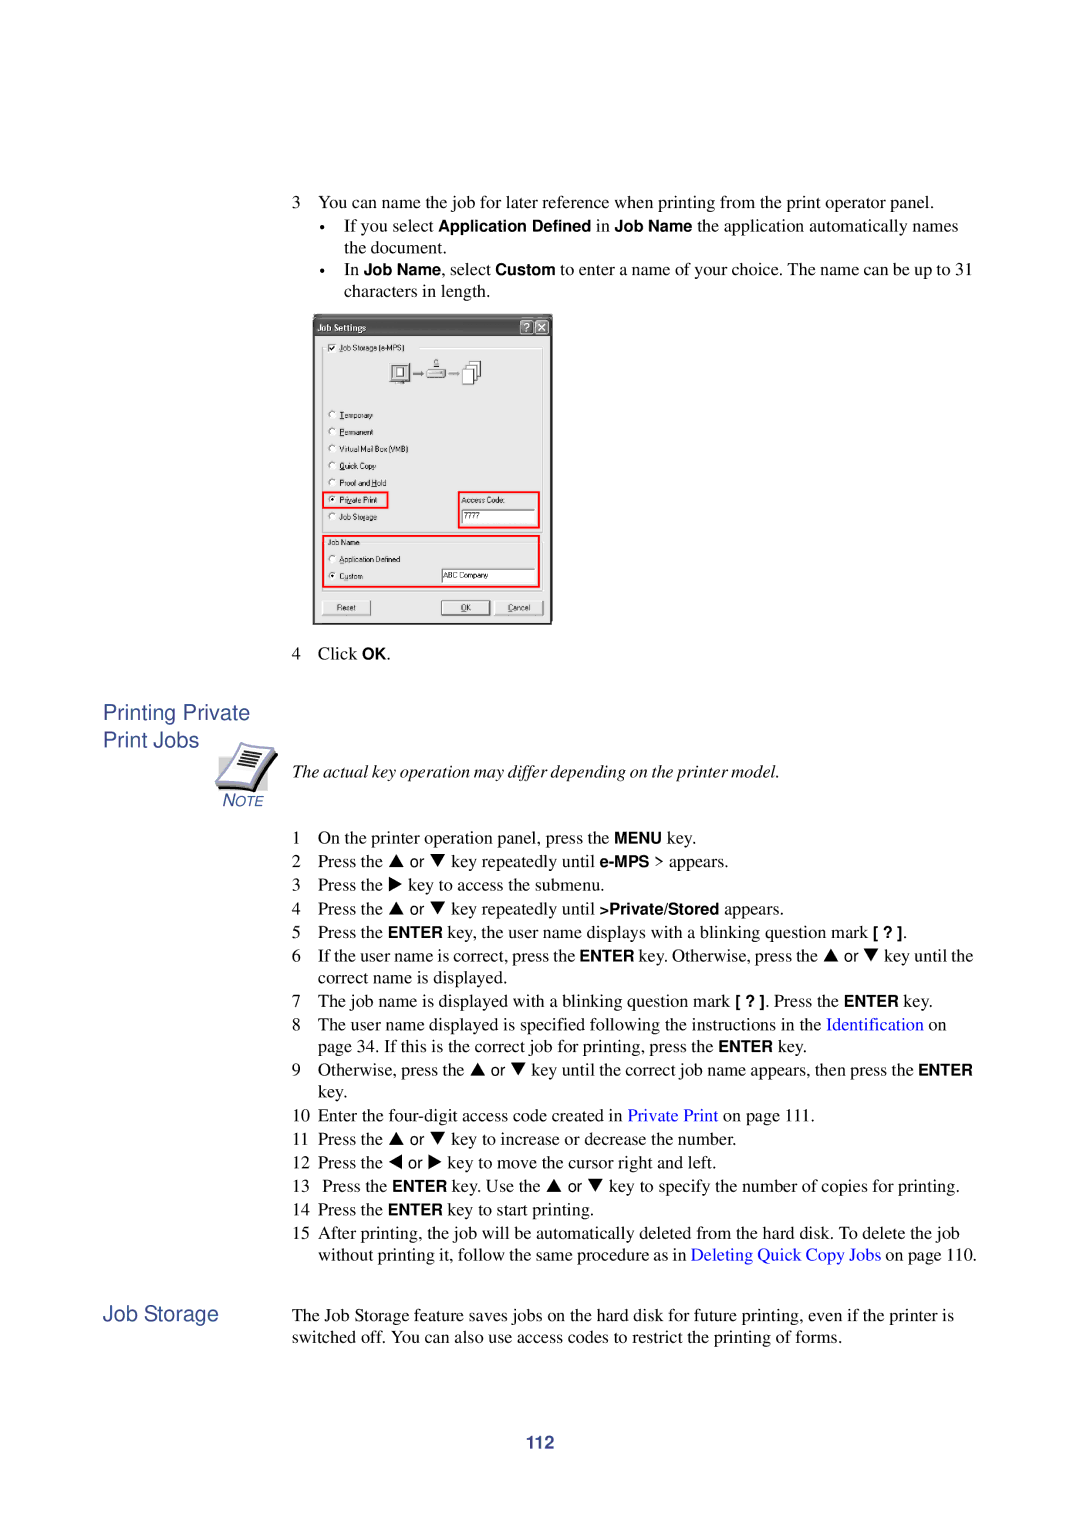
3You can name the job for later reference when printing from the print operator panel.
•If you select Application Defined in Job Name the application automatically names the document.
•In Job Name, select Custom to enter a name of your choice. The name can be up to 31 characters in length.
4 Click OK.
The actual key operation may differ depending on the printer model.
Job Storage
1On the printer operation panel, press the MENU key.
2Press the S or T key repeatedly until
3Press the X key to access the submenu.
4Press the S or T key repeatedly until >Private/Stored appears.
5Press the ENTER key, the user name displays with a blinking question mark [ ? ].
6If the user name is correct, press the ENTER key. Otherwise, press the S or T key until the correct name is displayed.
7The job name is displayed with a blinking question mark [ ? ]. Press the ENTER key.
8The user name displayed is specified following the instructions in the Identification on page 34. If this is the correct job for printing, press the ENTER key.
9Otherwise, press the S or T key until the correct job name appears, then press the ENTER key.
10Enter the
11Press the S or T key to increase or decrease the number.
12Press the W or X key to move the cursor right and left.
13Press the ENTER key. Use the S or T key to specify the number of copies for printing.
14Press the ENTER key to start printing.
15After printing, the job will be automatically deleted from the hard disk. To delete the job without printing it, follow the same procedure as in Deleting Quick Copy Jobs on page 110.
The Job Storage feature saves jobs on the hard disk for future printing, even if the printer is switched off. You can also use access codes to restrict the printing of forms.