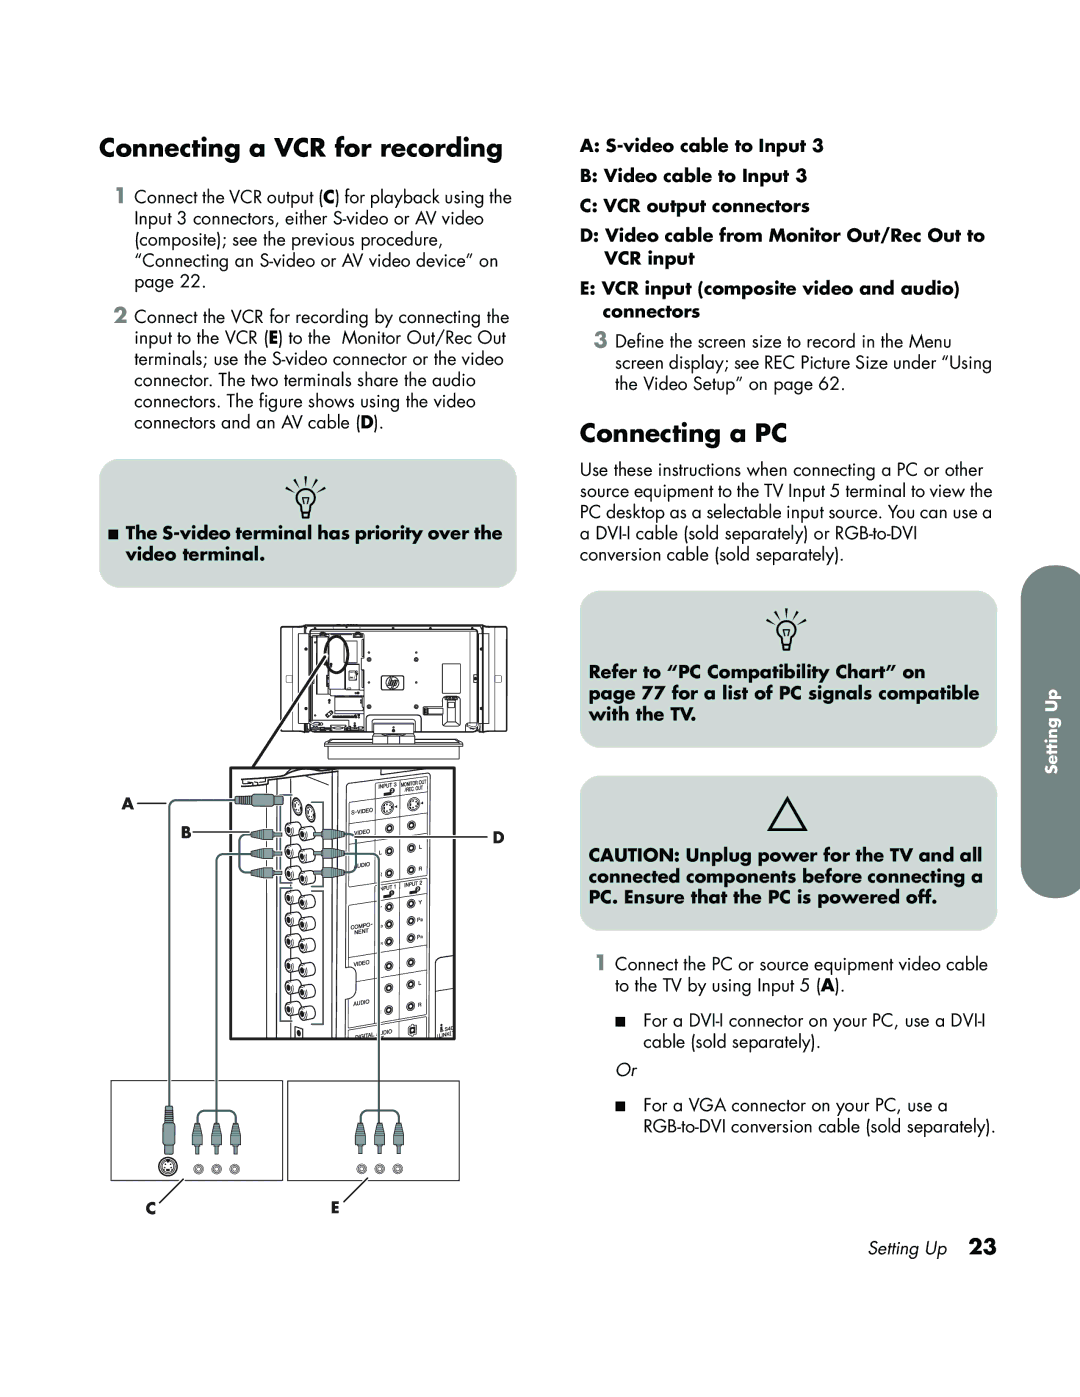
Connecting a VCR for recording
1Connect the VCR output (C) for playback using the Input 3 connectors, either
2Connect the VCR for recording by connecting the input to the VCR (E) to the Monitor Out/Rec Out terminals; use the
n
■The
A |
|
B | D |
CE
A:
B:Video cable to Input 3
C:VCR output connectors
D:Video cable from Monitor Out/Rec Out to VCR input
E:VCR input (composite video and audio) connectors
3Define the screen size to record in the Menu screen display; see REC Picture Size under “Using the Video Setup” on page 62.
Connecting a PC
Use these instructions when connecting a PC or other source equipment to the TV Input 5 terminal to view the PC desktop as a selectable input source. You can use a
a
n
Refer to “PC Compatibility Chart” on page 77 for a list of PC signals compatible with the TV.
c
CAUTION: Unplug power for the TV and all connected components before connecting a PC. Ensure that the PC is powered off.
1Connect the PC or source equipment video cable to the TV by using Input 5 (A).
■For a
Or
■For a VGA connector on your PC, use a
Setting Up