1Printer overview
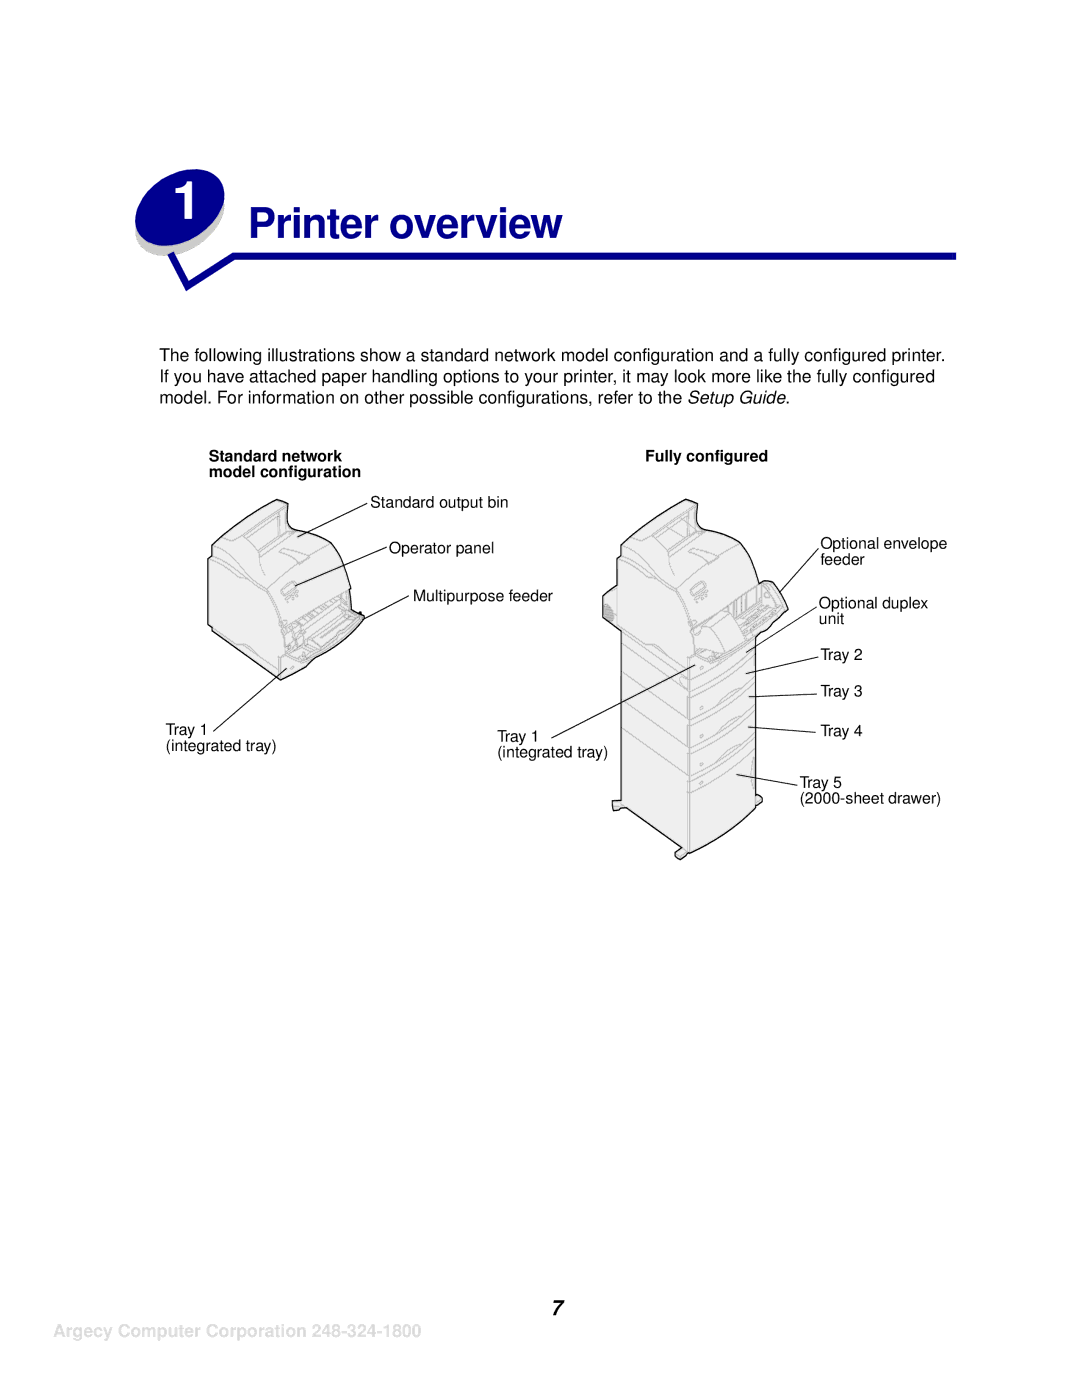
The following illustrations show a standard network model configuration and a fully configured printer. If you have attached paper handling options to your printer, it may look more like the fully configured model. For information on other possible configurations, refer to the Setup Guide.
Standard network model configuration
Standard output bin
Operator panel
Multipurpose feeder
Tray 1 | Tray 1 | |
(integrated tray) | ||
(integrated tray) | ||
|
Fully configured
Optional envelope feeder
Optional duplex unit
Tray 2
![]()
![]() Tray 3
Tray 3
![]()
![]() Tray 4
Tray 4
![]() Tray 5
Tray 5 ![]()
7