16.Install the server system cover. For instructions, see “Installing the System Cover”.
17.Plug all peripheral devices and the AC power cable(s) into the server.
Installing and Removing a PCI Add-in Card
The instructions below describe how to install and remove a PCI
Installing a PCI Add-in Card
1.Observe the safety and ESD precautions at the beginning of this book. See “Safety Information”.
2.Power down the server and unplug all peripheral devices and the AC power cable(s).
3.Remove the server system cover. For instructions, see “Removing the System Cover”.
4.Remove the processor air duct. For instructions, see “Removing the Processor Air Duct”.
5.Remove the PCI riser assembly. For instructions, see “Removing the PCI Riser Assembly”.
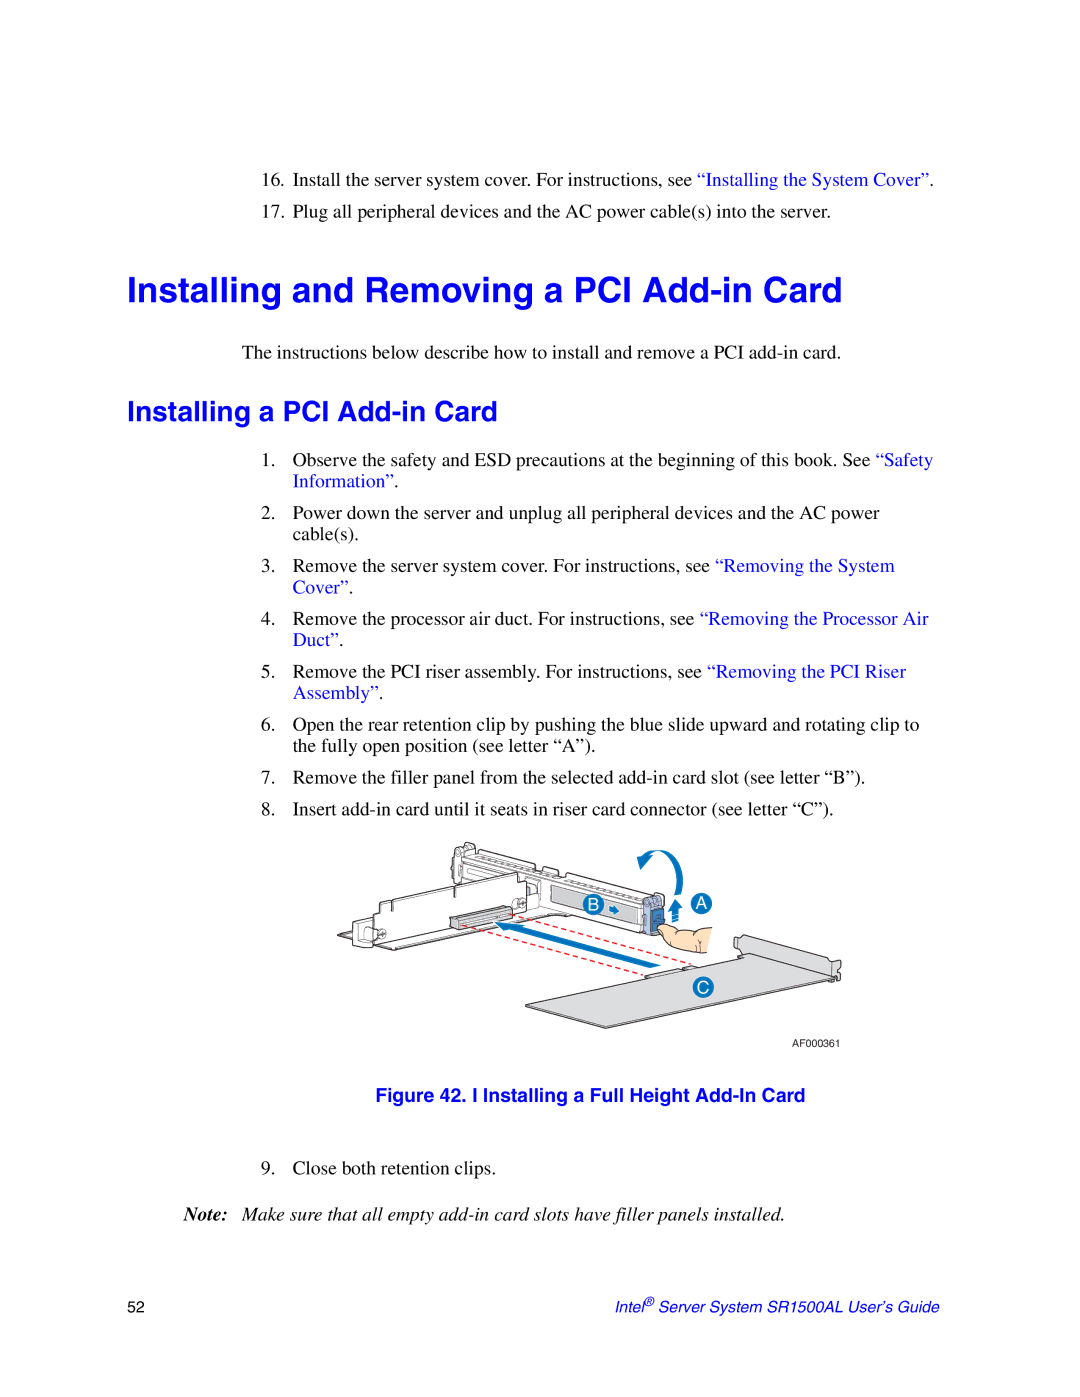
6.Open the rear retention clip by pushing the blue slide upward and rotating clip to the fully open position (see letter “A”).
7.Remove the filler panel from the selected
8.Insert
B ![]()
![]()
![]() A
A
C
AF000361
Figure 42. I Installing a Full Height Add-In Card
9. Close both retention clips.
Note: Make sure that all empty
52 | Intel® Server System SR1500AL User’s Guide |